‘Tis the perfect moment for a revamp, no?
As many of us are reinventing how we share yoga in the world, it’s an excellent time to give our Yoga Alliance profile a tender loving upgrade and share all the ways we’re growing as teachers!
Read on to learn about how to create a stand-out profile and a step-by-step guide on how to update it.
How to Make a Stand-Out Yoga Alliance Profile
As with most things, we get out what we put in! I suggest spending the bit of extra time and energy it takes to make your profile stand out among the crowd by doing the following:
Use a Quality Profile Photo
This is not the place to be artsy or mysterious. Make sure your profile pic shows your face so people can see you clearly! As a bonus, add a few extra pics to your photo album that include non-asana photos.
Write a Killer Bio
Use your bio to shine and showcase your unique qualities, training, and experience. Your bio is so important that I made a whole post on it here to help you with it. In general, rework this snapshot of you and your offerings so it reflects you NOW! Keep it short, but do include a bit about your training and continuing education.
- Pro tip #1: Use the bullet point, bold, and indent features to keep your bio brief, organized, and clear.
- Pro tip #2: Describe your continuing education in one sentence by mentioning the general topics you enjoy studying like, “Loves to do continuing education in the areas of yoga history and philosophy,” for example.
Include Your Teaching Experience
Update your teaching experience and make sure to include a link to studio websites. This gives people a chance to see you in other contexts with different pics or bios and to otherwise know that you’re teaching and real and not a bot LOL.
Give People More!
Include links to your website and socials so people know you are active and accessible online and so they can continue to learn more about you.
Make Your Profile Feel Alive—aka UPDATE IT!
Don’t be that profile where someone excitedly clicks and then … [CRICKETS] … they feel like they’ve landed in no-man’s land—a deserted profile that hasn’t been updated in years. Having a profile that seems actively maintained shows that you take teaching seriously and people thereby stand to receive some serious benefits from your teachings! Make sure your teaching experience is updated through the present, that all of your links work, that your bio still represents you and includes recent trainings, and that your photos are current and not 10 years old. This is why it’s great to do a regular profile update…more on that next!
How to Update Your Yoga Alliance Teacher Profile Step-by-Step
Now that you’re ready and excited to up-level your profile, I’ll walk you through the steps to update it.
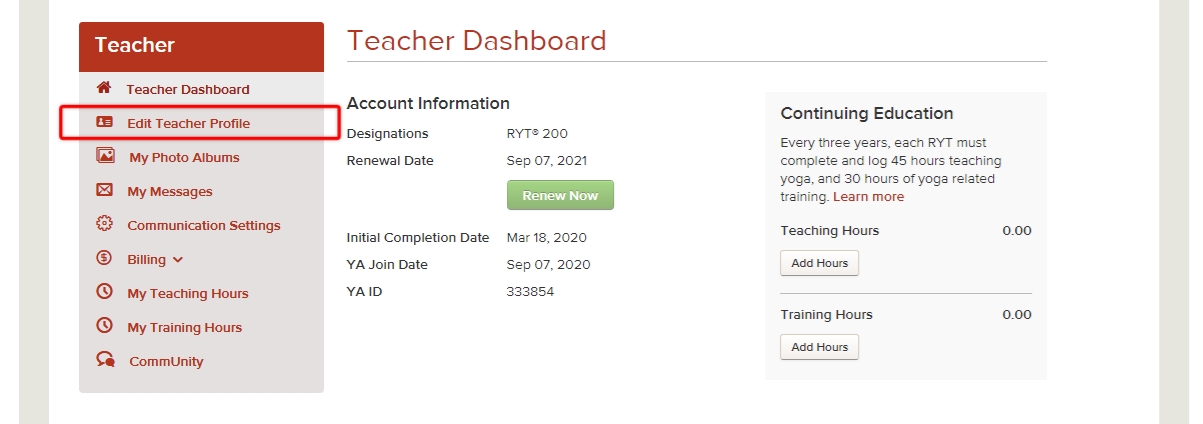
- Log into your Yoga Alliance account
- From your teacher dashboard, click “Edit Teacher Profile”
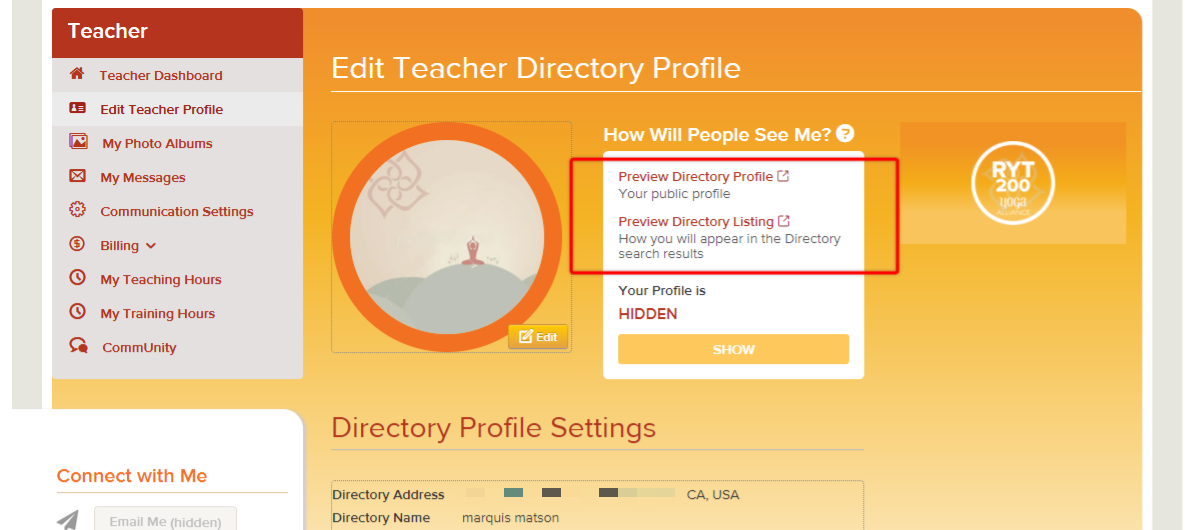
- Click “View Directory Profile” and “View Directory Listing” to see how your profile and listing look currently and note what you want to change
- Hover over your profile photo and click “Edit”
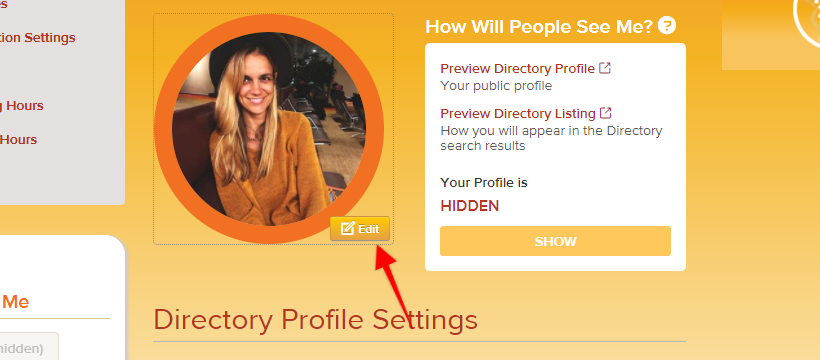
- Click “Upload Image” to select your new photo (ensure it’s cropped to a square shape and in a JPG, PNG, or GIF format) then click “Open”
- Hover over “My Bio”, click “Edit”, and add your updates
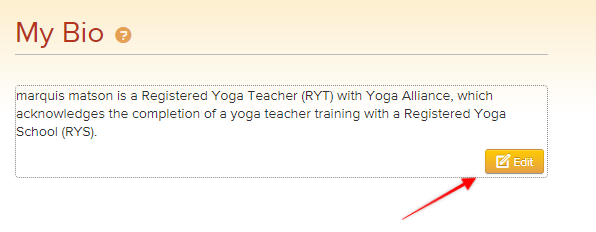
- Add your yoga teacher bio and attach a link to our online yoga teacher training course where it says “yoga teacher training.”
- Scroll down to “Your Bio is:” and make sure it says “VISIBLE”, then click “Save”
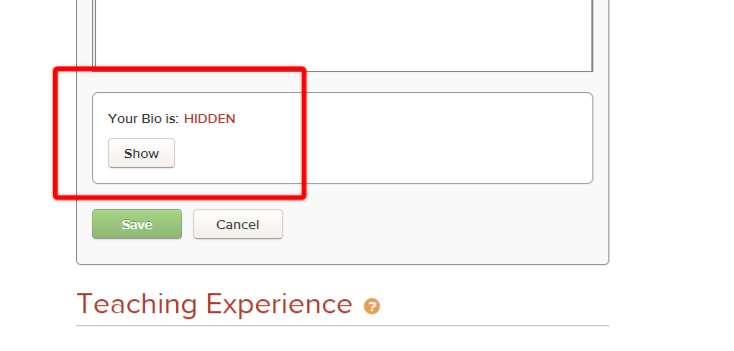
- Under “Teaching Experience”, click “Add Experience”. Include the studio name, start date, and link when possible
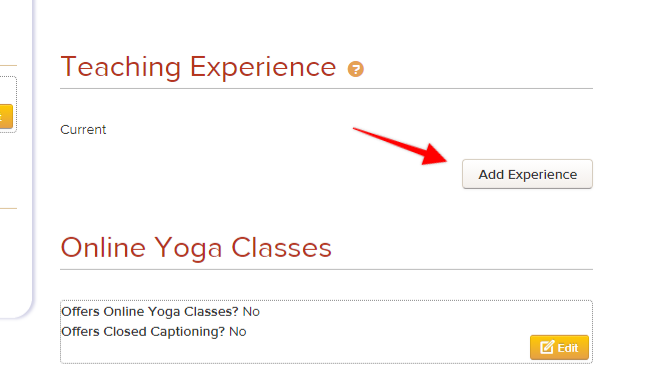
- Under “This Teaching Location is” make sure it’s set to “VISIBLE” so the job shows on your profile, then click “Save” and repeat as needed to bring your teaching experience up-to-date
- Under the “Online Yoga Classes” heading, click “Edit” to update whether you’re teaching online
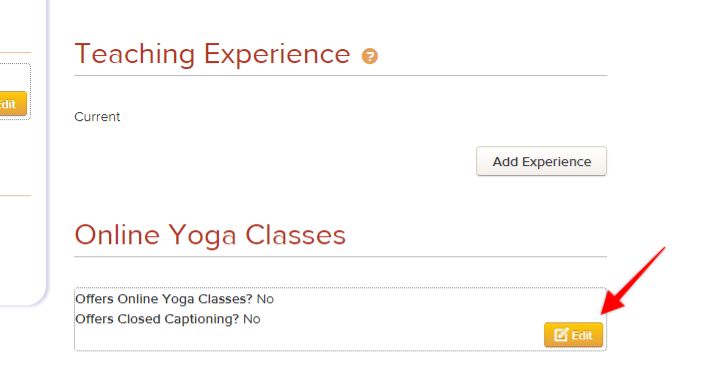
- If you select “Yes”, include the website, how classes can be accessed, and whether you offer closed captioning, then click “Save”
- Under Billing Address (it’s private and never shared), update your address by clicking “Edit”, inputting your address, and clicking “Save”
- On the left side menu, under “Connect With Me”, click “Edit”

- Update your “Email Me” email address or check the box to hide the “Email Me” button if you’d prefer not to be contacted this way
- Update your website address, your phone number if desired, and your professional social links (Twitter, Instagram, Facebook, LinkedIn, Pinterest, Google+), then click “Save”
- Go to “I Teach” on the left side menu and click “Edit”
- Check or uncheck boxes to update the styles of yoga that you currently teach, then click “Save”
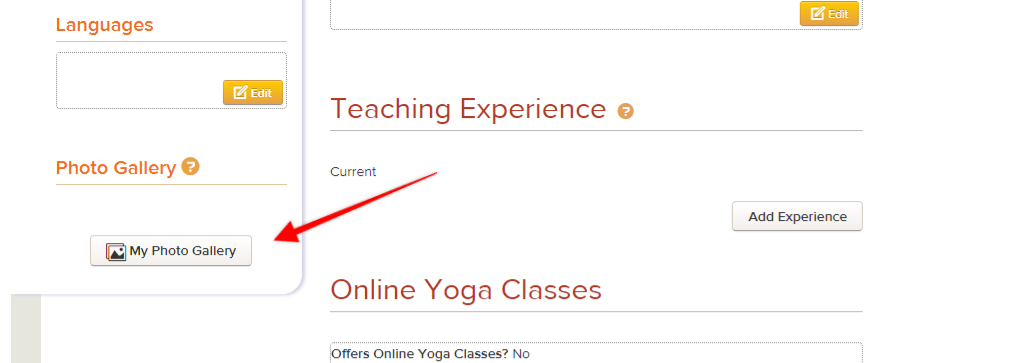
- Under the “Languages” heading, click “Edit” to update your teaching languages as needed
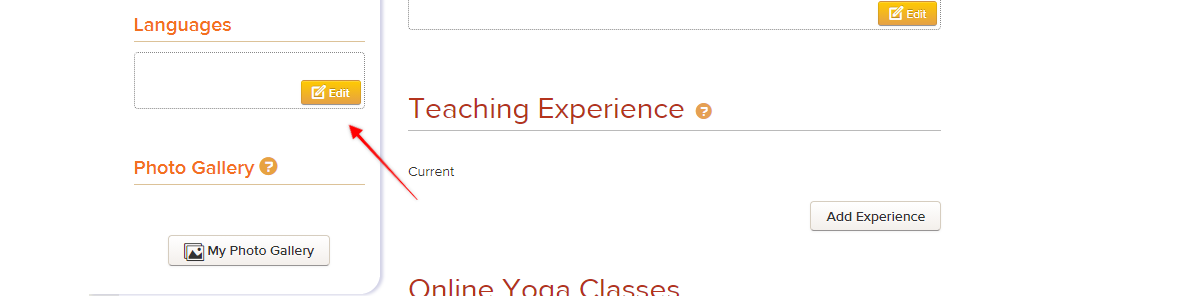
- On the left side menu, click on “My Photo Albums” or “My Photo Gallery” under the “Photo Gallery” heading and click “Edit” or “Add Photos” to edit your albums or add photos
Next Steps:
- Explore my Yoga Teacher Resource knowledge hub for more tips about how to grow your yoga business.
- Download my sequences for a jumpstart on your upcoming yoga classes!
- For more detailed tips, processes, and worksheets to supercharge your yoga business, download my yoga business launchpad course!
YOU MIGHT ALSO LIKE
- How Long Does Yoga Alliance Certification Last? 5 Steps to Maintain It
- What Topics Does a Yoga Alliance-Certified Training Cover?
- How Many Hours Do You Need to be Certified by the Yoga Alliance?
- Am I Qualified to Teach After Taking a 200 Hour YTT?
- How to Upgrade Your Yoga Alliance Certification Designation to 300 / 500 RYT
- How to Register Your YTT Certificate With Yoga Alliance (With Photos)
- How to Update Your Yoga Alliance Teacher Profile Step-by-Step
- Yoga Nidra Training Certification: Immersion, Online, Or In Studio
- How To Log Yoga Alliance Continuing Education Hours
- The Only 7 Yoga Alliance Membership Benefits (Some Are Free)
- 115 Shocking Yoga Statistics That Nobody Talks About
- Are Online YTT Courses Now Approved By Yoga Alliance? It’s Complicated.
- Can I Teach Without a Yoga Alliance Certification? (Yup)
- What is Yoga Alliance? Do You Need RYT Certification? (2026 Guide)
Sneak Peak into My 300-Hour YTT - FREE Videos, Info Session, Bonuses!