I am woman, hear me ROAR!!
As a woman, you are a beautiful, powerful, divine being. I mean, think about it….what creature is more powerful than the one that has the ability to create life?
You find ways to balance domestic duties (which is a full time job alone), probably have a day job, potentially caring for kids and aging parents, and are practicing yoga or going to yoga classes where you can.
That is a lot. You are AMAZING!!
Yoga is wonderful for everyone, regardless of gender identification. But if you resonate with what I wrote above, and are specifically seeking yoga classes and courses that support you wearing ALL the hats — you may be wondering? What yoga poses or practices can best support me as a woman navigating modern life’s challenges? Luckily, I have a lot to say about this topic 🙂
Jump ahead:
- Best Types of Yoga for Women
- Top Yoga Poses for Women
- Meditation (Dhyana)
- Child’s Pose (Balasana)
- Pigeon Pose (Eka Pada Rajakapotasana)
- Downward Facing Dog (Adho Mukha Svanasana)
- Tree Pose (Vrkasana)
- Goddess Pose (Utkata Konasana)
- Wide Legged Forward Fold(Prasarita Padottanasana)
- Garland Pose (Malasana)
- Boat Pose (Navasana)
- Reclined Bound Angle (Supta Baddha Konasana)
Best Types of Yoga for Women
Whether you are a yoga teacher or you just practice yoga at home you can find classes that are catered specifically for the divine feminine. Ranging from courses to help with menstrual syndrome, to prenatal/postnatal yoga, and yoga for menopausal women. Here are three styles of yoga that I recommend for women:
Vinyasa
Yoga for women must be variable because we as women are always changing throughout the month through the process menstruation. Vinyasa yoga offers a wide variety of postures and the opportunity to stay active. Generally the more we move, the greater our pain threshold will be. Practice Vinyasa yoga for your physical health and pain management before your menstrual cycle, in preparation for its arrival.
The Uplifted Perspective: Vinyasa is all about flow and connecting breath and movement. You perform seated postures, standing postures, balancing work and core work. This variety mirrors the way, as a woman, you have to navigate life: you have to be bold, nurturing, confident, and receptive, all in one day. You must get the kids up, then to school, start work, manage the house, you are up and down and around, and “all of the things.” It is a delicate balancing act that requires ALL of you. Practicing vinyasa flow trains you to stay connected to your breath as you are move and balance through a wide range of postures.
Learn more about Vinyasa Yoga:
- #414 – How I Get TV Segments & Talk on Camera (Without Stressing Out)
- #413 – Yoga Doesn’t Have a Devil. So What’s the Enemy? (Part 1)
- #412 – How the Chakras Relate to Polyvagal Theory + Your FAQ
- #411 – How to Get Inspired and Be Inspired (Even When You Feel Burned Out)
- #410 – The Adi Shakti Mantra for Overwhelmed Women with Polly Standeven
Prenatal
Prenatal yoga is designed for that unique time when you are creating life within. It conforms to the limitations that might occur as your body expands with baby and helps prep your body for the marathon that is birth. Studies have shown that yoga and meditation during pregnancy improve birth outcomes. If you are pregnant and want to get started with the incredible benefits of prenatal yoga, I created an entire course called Pregnant & Powerful just for you! Don’t forget about postnatal phase too. The fourth trimester is just as important as the first three!
The Uplifted Perspective: During pregnancy, you are more powerful and intuitive than you have ever been before. Yoga nurtures mindfulness, allowing you to connect with your body as it changes and evolves. This helps you identify what you truly want and need. This is especially important postpartum.
Learn more about Prenatal Yoga:
- The Best Kundalini Yoga for Pregnancy: How to Practice Safely
- Yoga For Third Trimester: My Favorite Poses
- 10 Yoga Poses That Will Strengthen The Pelvic Floor
- Yoga For Nausea: 7 Yoga Poses For A Sore Stomach
- Home Birth vs Hospital Birth: Which is More Yogic?
Restorative
Restorative yoga is proven to decrease tension in the body and the mind. It’s a wonderful option for pain relief and hormone balancing. Hormonal fluctuations can lead to a lot of uncomfortable physical and emotional symptoms. Therefore, having a practice that helps regulate yoga hormones makes it a perfect for “yoga for women” option.
The Uplifted Perspective: You are so busy being the caretaker for everyone else in you life. But who is taking care of you? This is where your restorative yoga practice comes in. It allows you to stop and just be. If you aren’t sure how to do self care or find this type of practice challenging my Yoga for Self Mastery was designed just for you!
Learn more about Restorative Yoga:
- 10 Restorative Yoga Poses For Total Relaxation
- Beyond Corpse Pose: 13 Questions About Restorative Yoga, Answered
Specific types of movement I love to sequence in for women (do these of use these too if you are a yoga teacher):
- Spiral movements
- Poses close to the ground
- Anything for the lymphatic system
- Movements that draw energy into the thyroid (shoulder stand, bridge)
- Punching and chopping (like Kundalini Bear Claws or Woodchopper)
- Balancing poses
- Shaking limbs, shaking the whole body to release tension
- Pairing movements with strong exhales out the mouth
Looking for more specific poses? I got you covered:
Top Yoga Poses for Women
1. Meditation (Dhyana)
- Step 1: Come to an easy pose. Sit up tall. Prop yourself up on a cushion or sit against a wall to maintain a tall spine.
- Step 2: Place the hands on the knees or gently in the lap.. Slight dip in the chin and close your eyes.
- Step 3: Begin to focus on your breath. Any thoughts that arise acknowledge and then bring your focus back inward. This is a great point to incorporate a visualization or special breathing technique.
- Step 4: When ready, bring the tongue to the roof of your mouth and blink the eyes open.
Variations: There are so many different types of meditations to choose from, especially those designed specifically for women. I have plenty designed for busy women on the go, to pregnant mamas, or those with fertility issues. I’m honored to share these with you free, here.
Benefits: Meditation has enormous benefits. It increases self awareness, reduces negative emotions and brings focus to the present moment. In fact, studies have shown that meditation and yoga can help regulate blood sugar similar to some medications. This means adding meditation techniques to your spiritual practice or regular yoga practice is beneficial not only to your general health, but especially if you have been diagnosed with diabetes or gestational diabetes.
When you are so busy with the kids or family and taking care of all aspects of life, your fuse can get a little short. Meditation teaches you to look at all the things with compassion, and without reactivity. So often as women we are in “doing” mode. Meditation lets you take a “time out” and just be you.
Pro Tips for Yoga Teachers:
- Start with a pranayama technique like Sitali or Left Nostril Breathing to bring your students into their bodies before asking them to meditate.
- A visualization going down the chakras is a great way to balance women’s energy centers and give your students something to focus on during meditation.
2. Child’s Pose (Balasana)
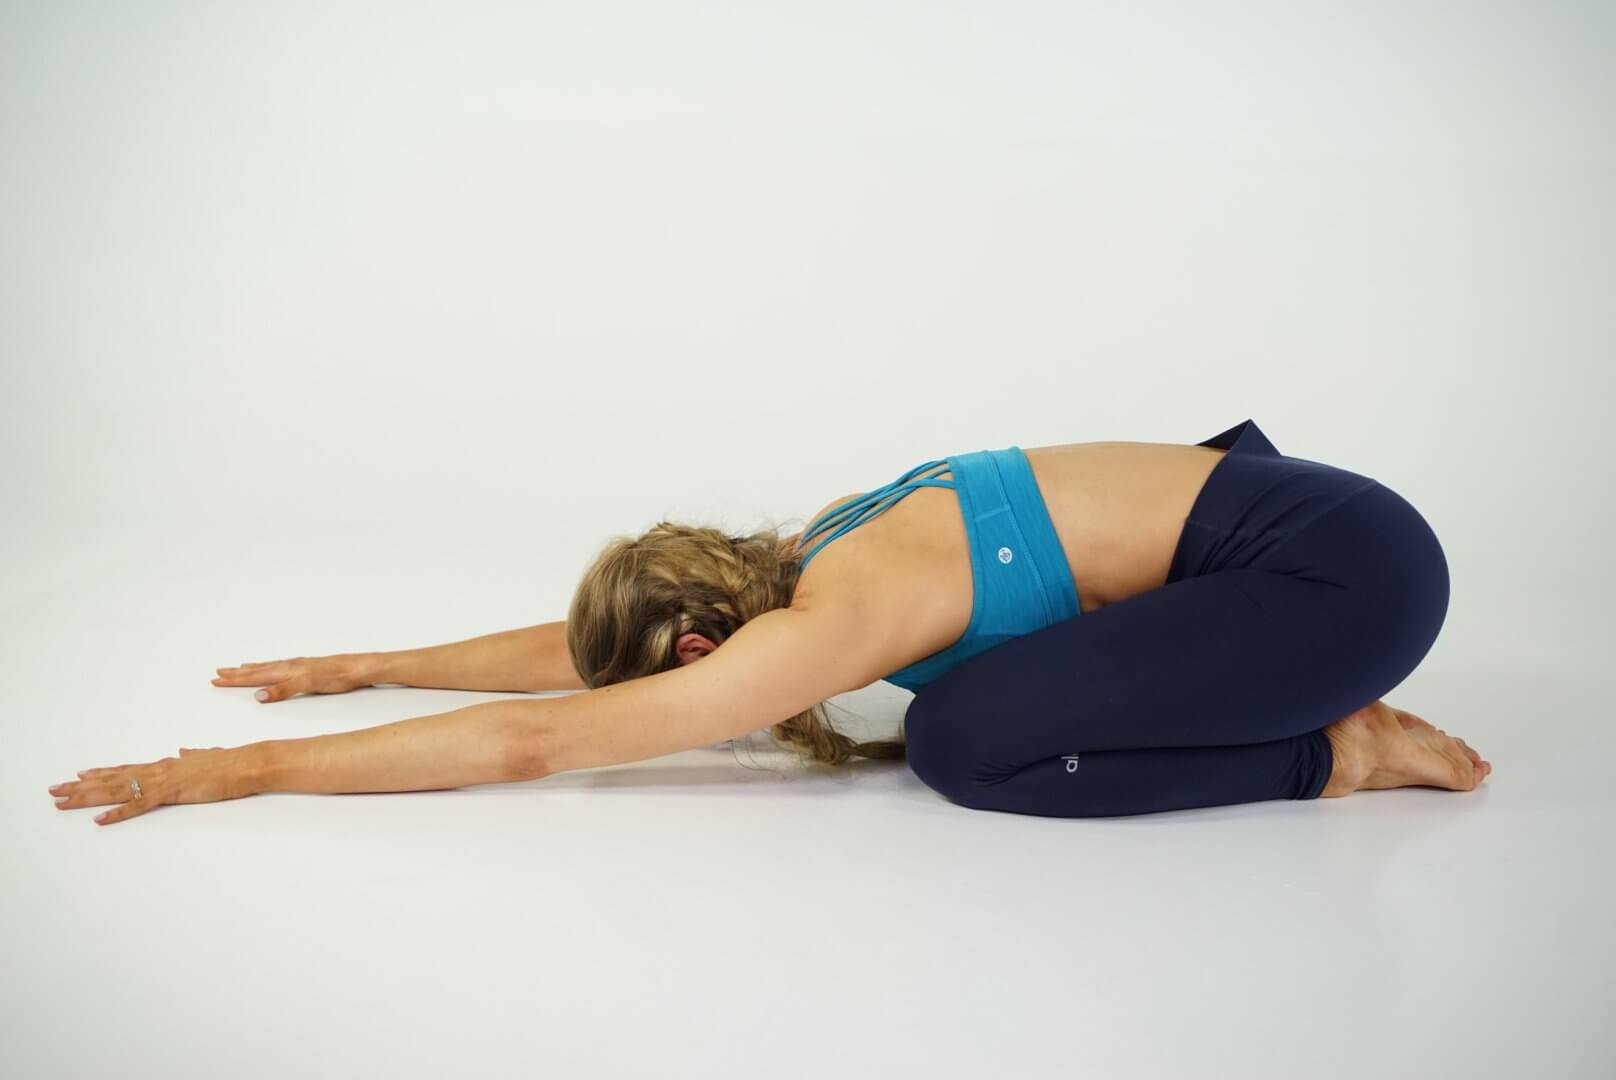
- Step 1: Beginning on hands and knees, take your hips back to your heels. Knees can be touching or as wide as the mat.
- Step 2: Let the head come to your mat resting the forehead down to the ground, closing the eyes.
- Step 3: Soften the upper body and experiment with where you want your hands/arms: index fingers touching, elbows wide in a diamond shape, or arms down with hands next to the feet.
- Step 4: Simply inhale rising back to all fours to come out of the pose.
Variations: To make this pose more restorative, you can hug a bolster to your chest. Another great variation is to place a block under the seat between the heels or under the forehead.
Benefits: Child’s pose has numerous benefits. It opens up the back body and releases the glutes and hips. It’s a nice option to offer relief for premenstrual syndrome in a “yoga for women” yoga practice. This pose also takes your attention inward, cooling the body and soothing the nervous system reducing stress and improving overall well being.
This is a position of surrender and letting go. Sometimes if I’m feeling a little extra stress or overwhelm, I just come into a child’s pose. Everything else can wait for a few breaths.
Pro Tips for Yoga Teachers:
- Give students options of what to do with their arms (hold heels, hand by sides, at prayer etc). You want them to be as comfortable as they can in this position. Make sure your students know they always have the option to come into child’s pose if they aren’t feeling good during one of the poses in your flow. No judgment.
- This posture is about surrender. Invite your students to “let go” of a specific thought or worry in this posture. Let them decide what they are choosing to surrender in this moment.
3. Pigeon Pose (Eka Pada Rajakapotasana)
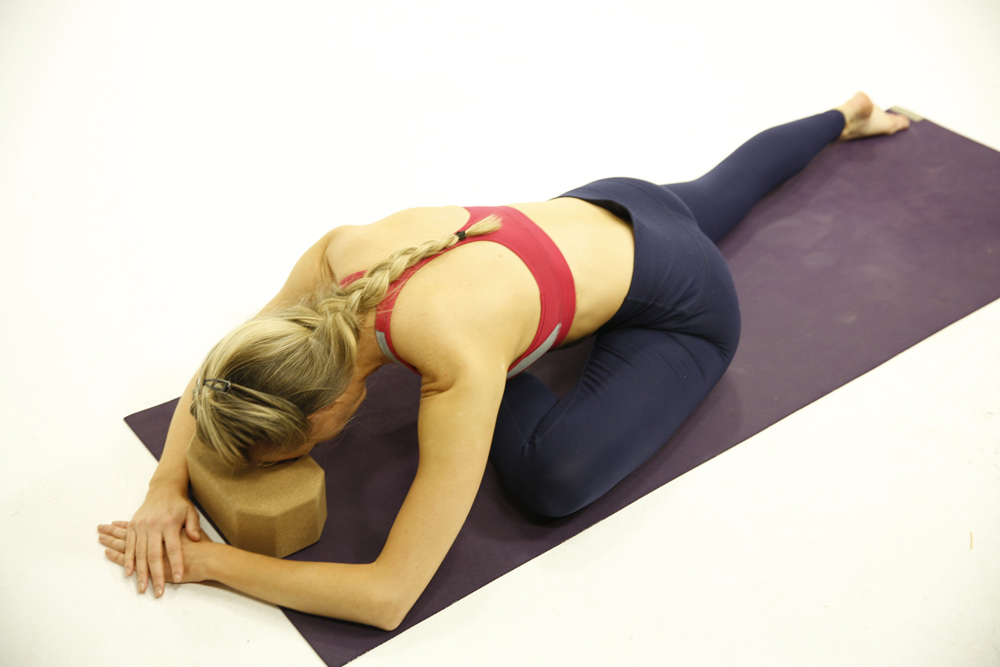
- Step 1: From an all fours position(hands and knees), carry your right leg to the front of the mat placing the shin to the mat across the front of your body. Note: The shin does not need to be a perfect right angle or parallel to the mat. Play with the placement, bringing it closer or further away from your body, flexing and relaxing the foot, to see what feels best in YOUR OWN body.
- Step 2: Send the back leg out in a straight line behind you making sure it stays in line with the hip.
- Step 3: Square the hips to make sure your weight is evenly distributed. Inhale lengthen through the spine and exhale as you fold over the front leg. Great opportunity for a few moments of deep breathing here.
- Step 4: Inhale as you press through the hands to rise and gently roll onto the right hip bringing the left leg back around to meet the right ending in an easy seat.
- Step 5: Repeat on the other side.
Variations: Use a block or bolster under the front side of your body if going to the floor feels uncomfortable. You can also place a blanket under the front thigh if there is a lot of space between the hip and the floor. If this version doesn’t work for you at all then try the ankle to knee version on your back.
Benefits: Pigeon pose provides a deep physical stretch through the lower half of your body. When you do pigeon you stretch through all the major muscles of the hips and upper legs. As women we carry so much tension in our lower halves.. I mean, you literally carry your child on your hip right?
Pigeon is also nice for balancing that second chakra. When the second chakra is balanced it can embrace change more readily and accept the fluidity of life. As the ultimate juggler of life you already know things change at the drop of a hat and don’t you want to be able to flow through those changes with ease?
Pro Tips for Yoga Teachers:
- Be mindful with your transitions in and out of this position. Give your students plenty of time to move slowly in or out to prevent injury.
- Hold space for your students here. Remind them that emotional release is normal in this position and why.
4. Downward Facing Dog (Adho Mukha Svanasana)
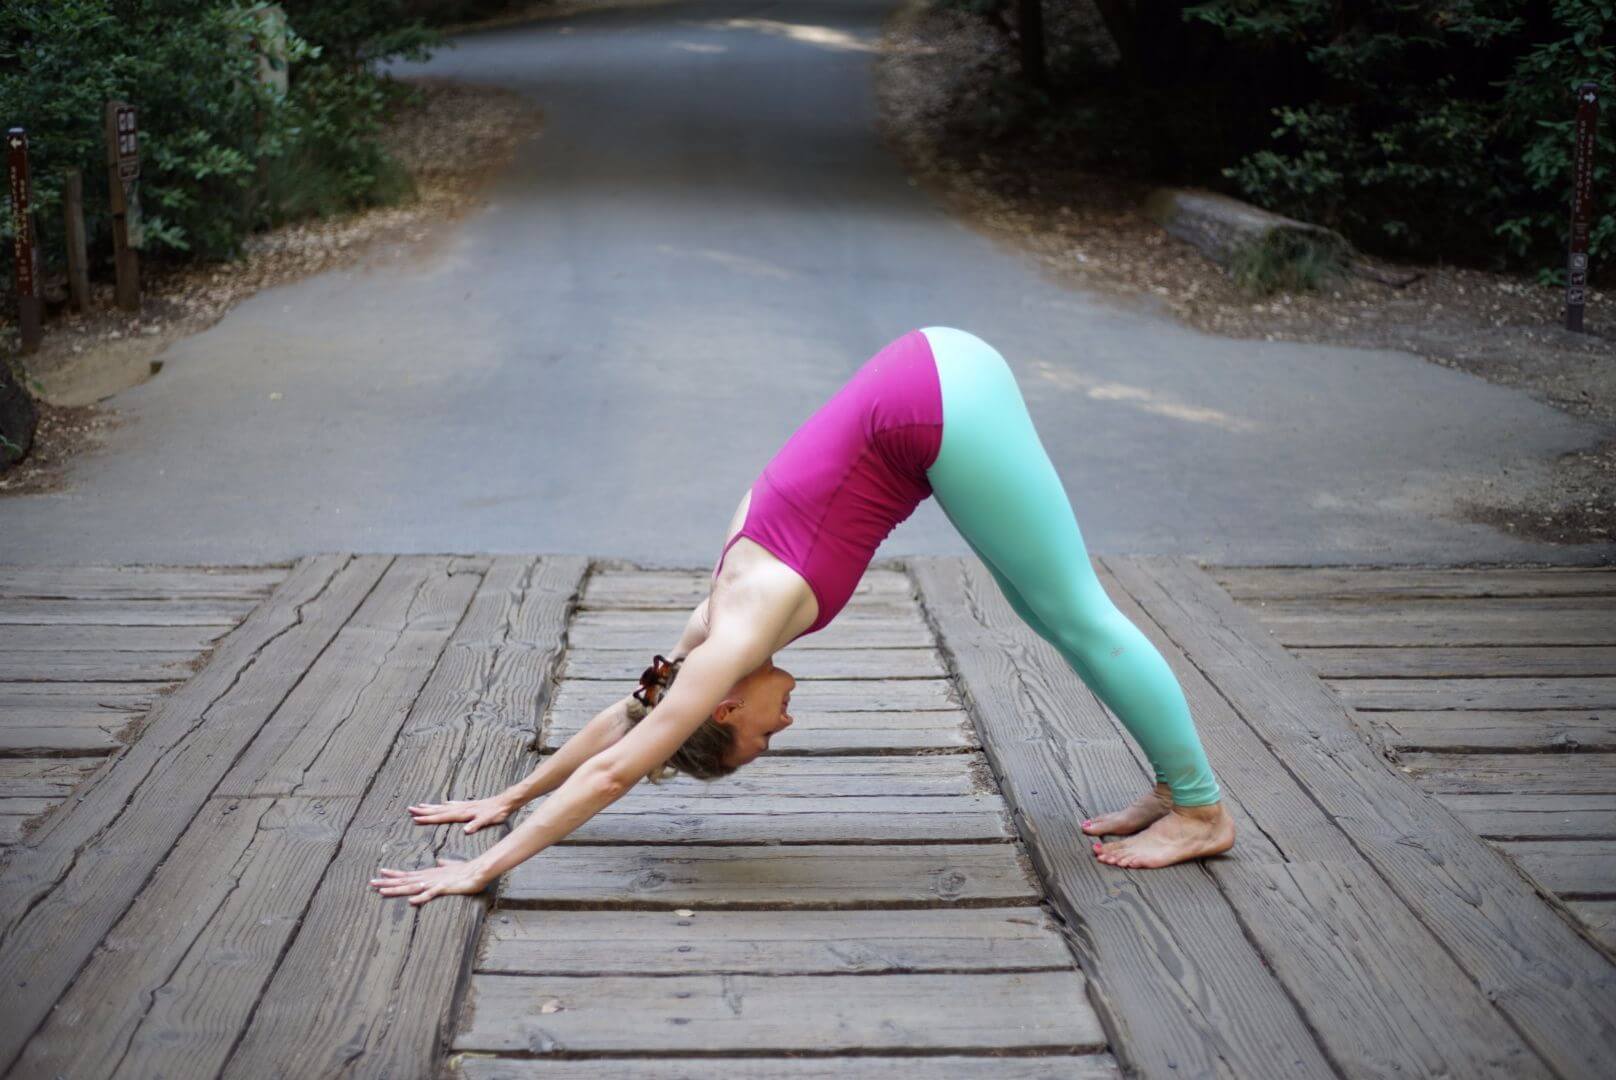
- Step 1: Starting on all fours, curl the toes under, pressing the hands into the mat send the hips up and back .
- Step 2: Feet hip width apart or wider, toes spread forward and heels yearn towards the mat (bend the knees generously if you need in order to keep a long straight spine)
- Step 3: Pushing through the hands, arches of palms lift, upper arms externally rotate, the head falls in line between the arms. Press the chest towards the thighs.
- Step 4: To come out of the pose simply look forward, walk the feet to the hands, sweeping the arms up as you inhale and letting the arms come to your sides on the exhale.
Variations: You can always bend the knees deeply or take feet as wide as mat to make this more comfortable like a resting pose. Place wedges under hands to elevate wrists or place hands on blocks to modify for any wrist issues. A great alternative yoga pose to this is puppy pose(Uttana Shishosana).
Benefits: Downdog works both the upper and lower halves of the body by asking for muscular engagement through both. It stretches the backside of the body and creates space between vertebrae. It is a mild inversion, increasing blood flow and lowering blood pressure. It triggers the parasympathetic (rest and digest) nervous system leading to calm in the body and mind.
BONUS TIP: If you are practicing at home with kids, this is a great pose to get them involved. Let them pretend you are a bridge they can crawl under.
Pro Tips for Yoga Teachers:
- Make students aware that their heels do not need to touch the mat. Give people permission to make the pose comfortable for their body.
- Downdog is great to add to a morning class, not only to do a physical “check in,” but a mental one as well. Let students be here for a moment and check in with their mental state at the start of class, and then again toward end of class. Ask them if they notice that they feel different.
5. Tree Pose (Vrkasana)
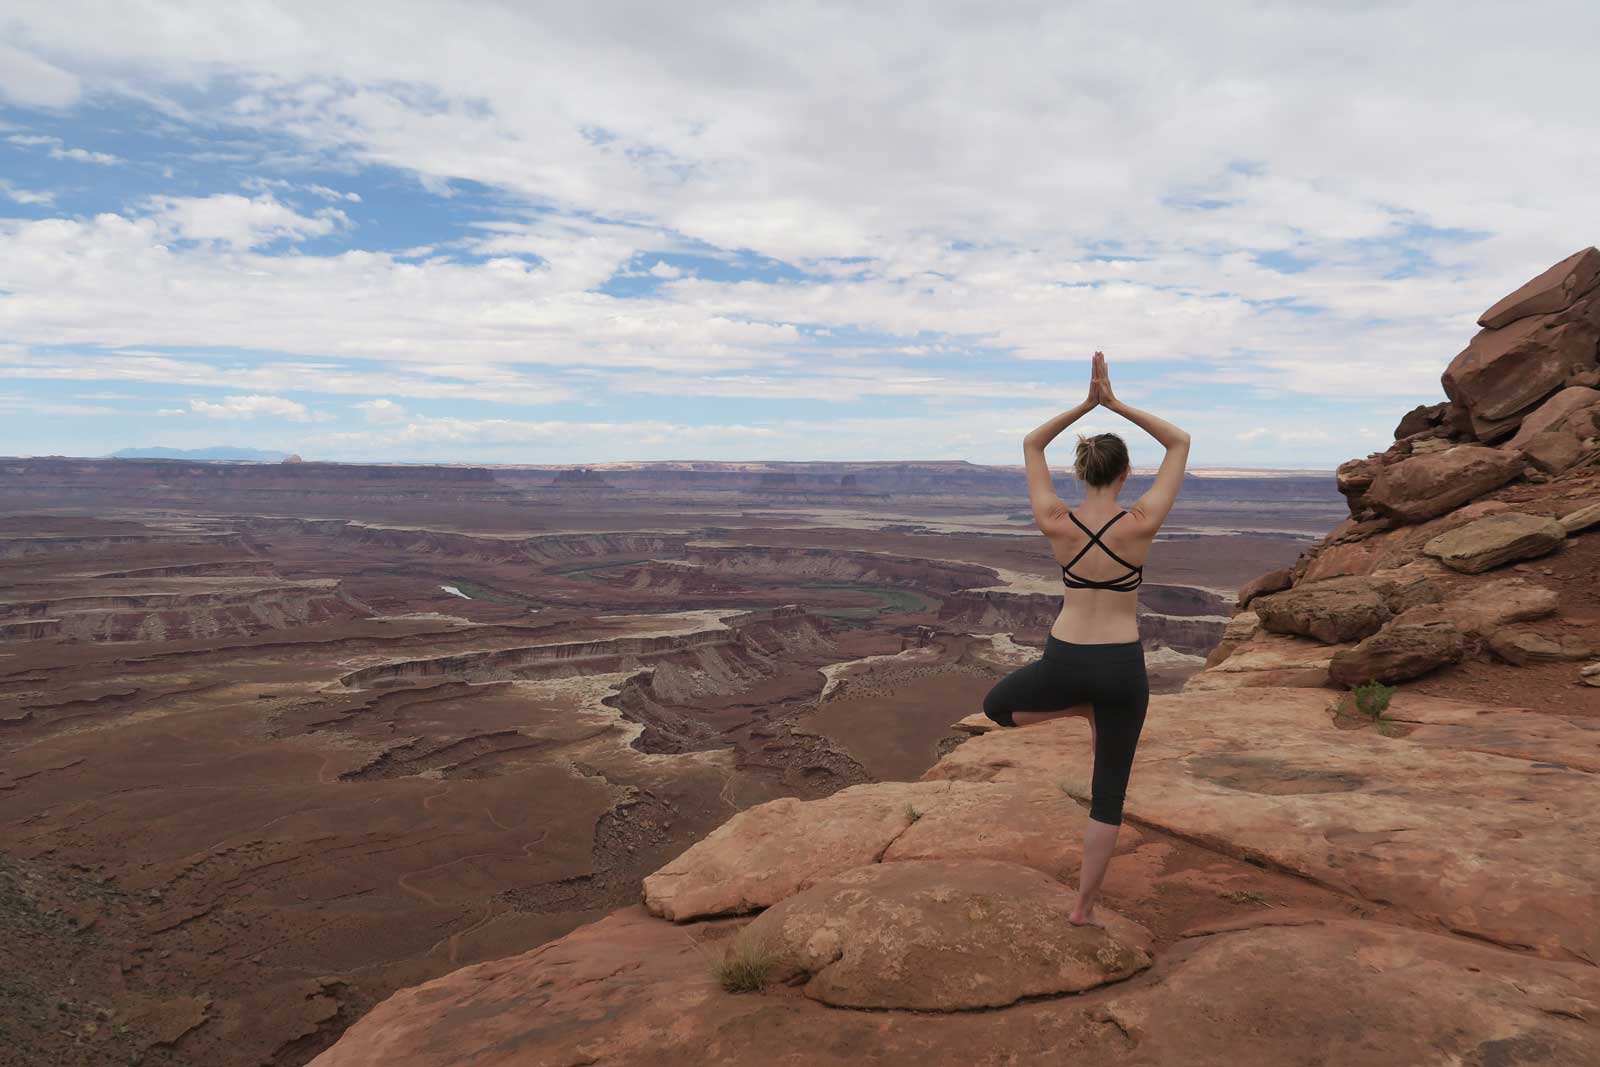
- Step 1: From a standing position, shift your weight into one foot.
- Step 2: Find a focal point as you pull your core up and in and bring the opposite foot off of the ground either taking the sole to the shin or inside of the thigh (never the knee, ouch!).
- Step 3: Inhale as you bring the hands to prayer at the heart’s center.
- Step 4: Bring the foot of the bent leg back down and take a deep breath as you align your body back to standing.
Variations: Keep the toes of the bent leg on the ground for balance or use the support of a chair or wall to keep you steady. To make it more challenging take the hands overhead.
Benefits: Tree pose is a yoga pose that really requires concentration and keeps you in the present moment. This is also known as mindfulness which reduces stress and increases happiness and resilience. Not only this but as a balancing posture it teaches you that you don’t have to be still to create balance. Your body still is making micromovements to stay stable. It is imbalance in motion. And isn’t that basically what life is?
When we incorporate tree pose into our regular yoga classes it improves self esteem and self confidence and tones the lower body. Plus, it looks gorgeous!
Pro Tips for Yoga Teachers:
- Add tree into your classes for a few weeks in a row so students can monitor their progress. This consistency increases their confidence and empowers them to truly sense their physical improvements.
- Remind your students that balance is not about stillness, but being able to “surf” all the micro-movements they will feel in their foot and ankle joint.
6. Goddess Pose (Utkata Konasana)
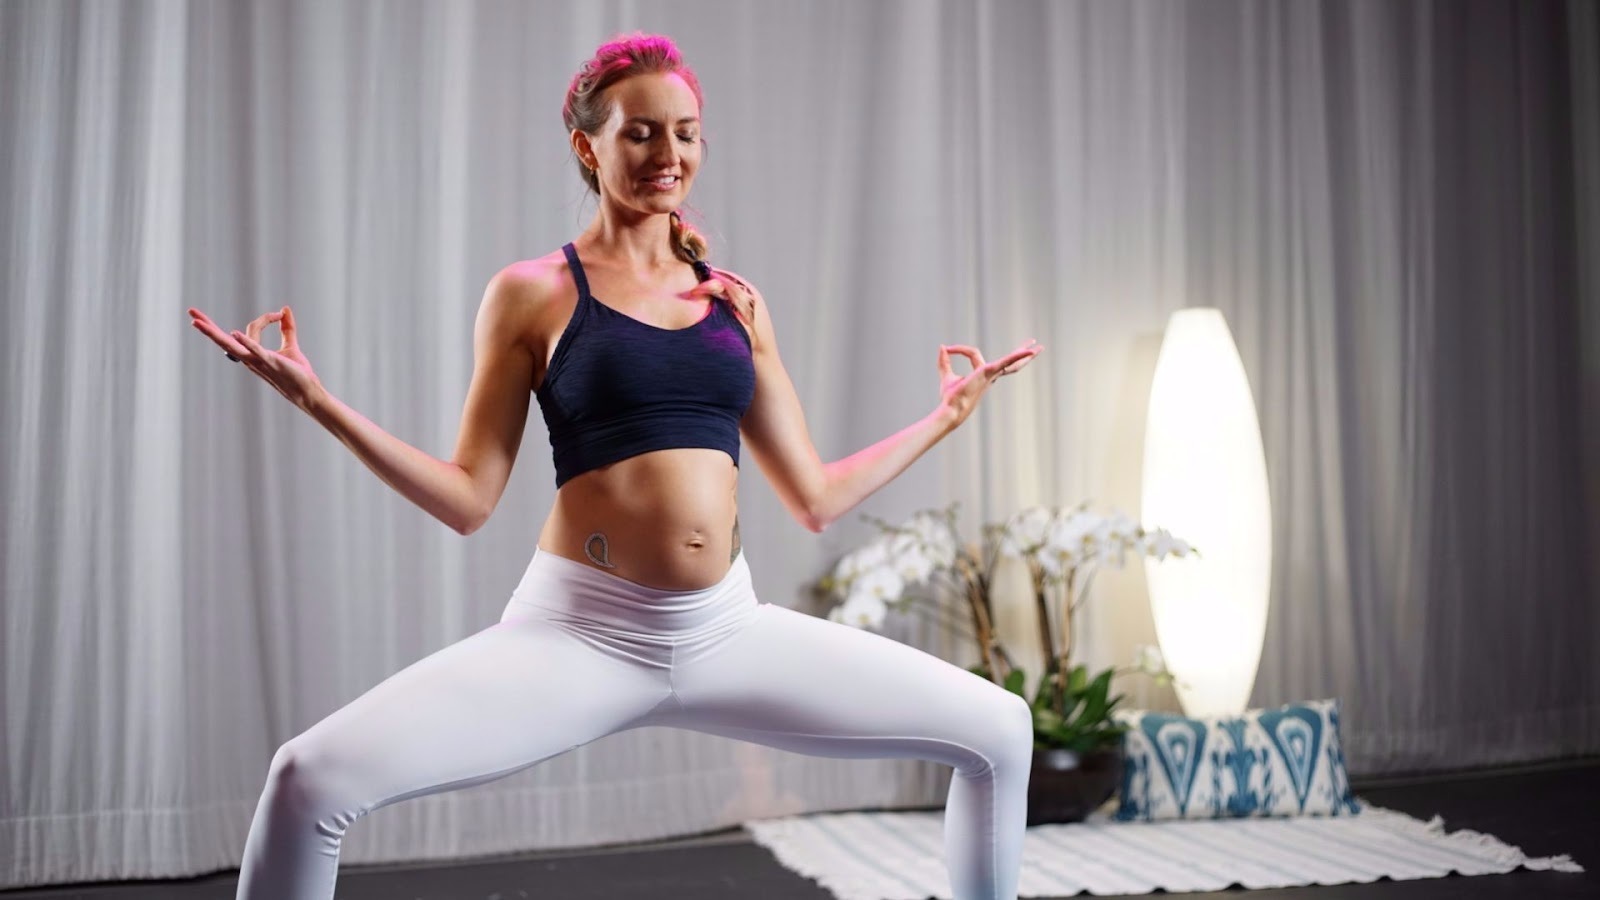
- Step 1: From standing, heel toe your feet out wide. Toes turn out to a 45 degree angle.
- Step 2: Inhale taking your arms overhead and as you exhale drop your hips bending the knees to 90 degrees. Make sure the knees are stacked over the ankles.
- Step 3: Pull the navel up and in as you broaden the chest and you cactus the arms.
- Step 4: To come out simply push through feet to stand, heel toeing your feet back to your neutral letting the arms come to your sides.
Variations: Bring your hands to the heart’s center or your hips if having the arms up aggravates the shoulders. You can always hold onto the back of a chair for support as well. If you want to make it harder, lift your heels to test your balance.
Benefits: Goddess brings you into your divine feminine energy, boosting self esteem and making you feel powerful. It is grounding and works your stabilizing muscles which can help improve your posture and releases tension in the hips; all of which make it not only a great pose to add to a yoga for women class, but especially for pregnant women.
Make sure you’ve got this one in your prenatal yoga routine. If you are pregnant and want to try this pose out with me, I’d love to walk you through it here.
Pro Tips for Yoga Teachers:
- Got beginners in class? Take them to the wall to try this out before having them do it on their mats.
- Remind your students how powerful they are in this posture. You can add in some really nice simple affirmations (“I am strong/I am powerful”) while in this position.
7. Wide Legged Forward Fold(Prasarita Padottanasana)
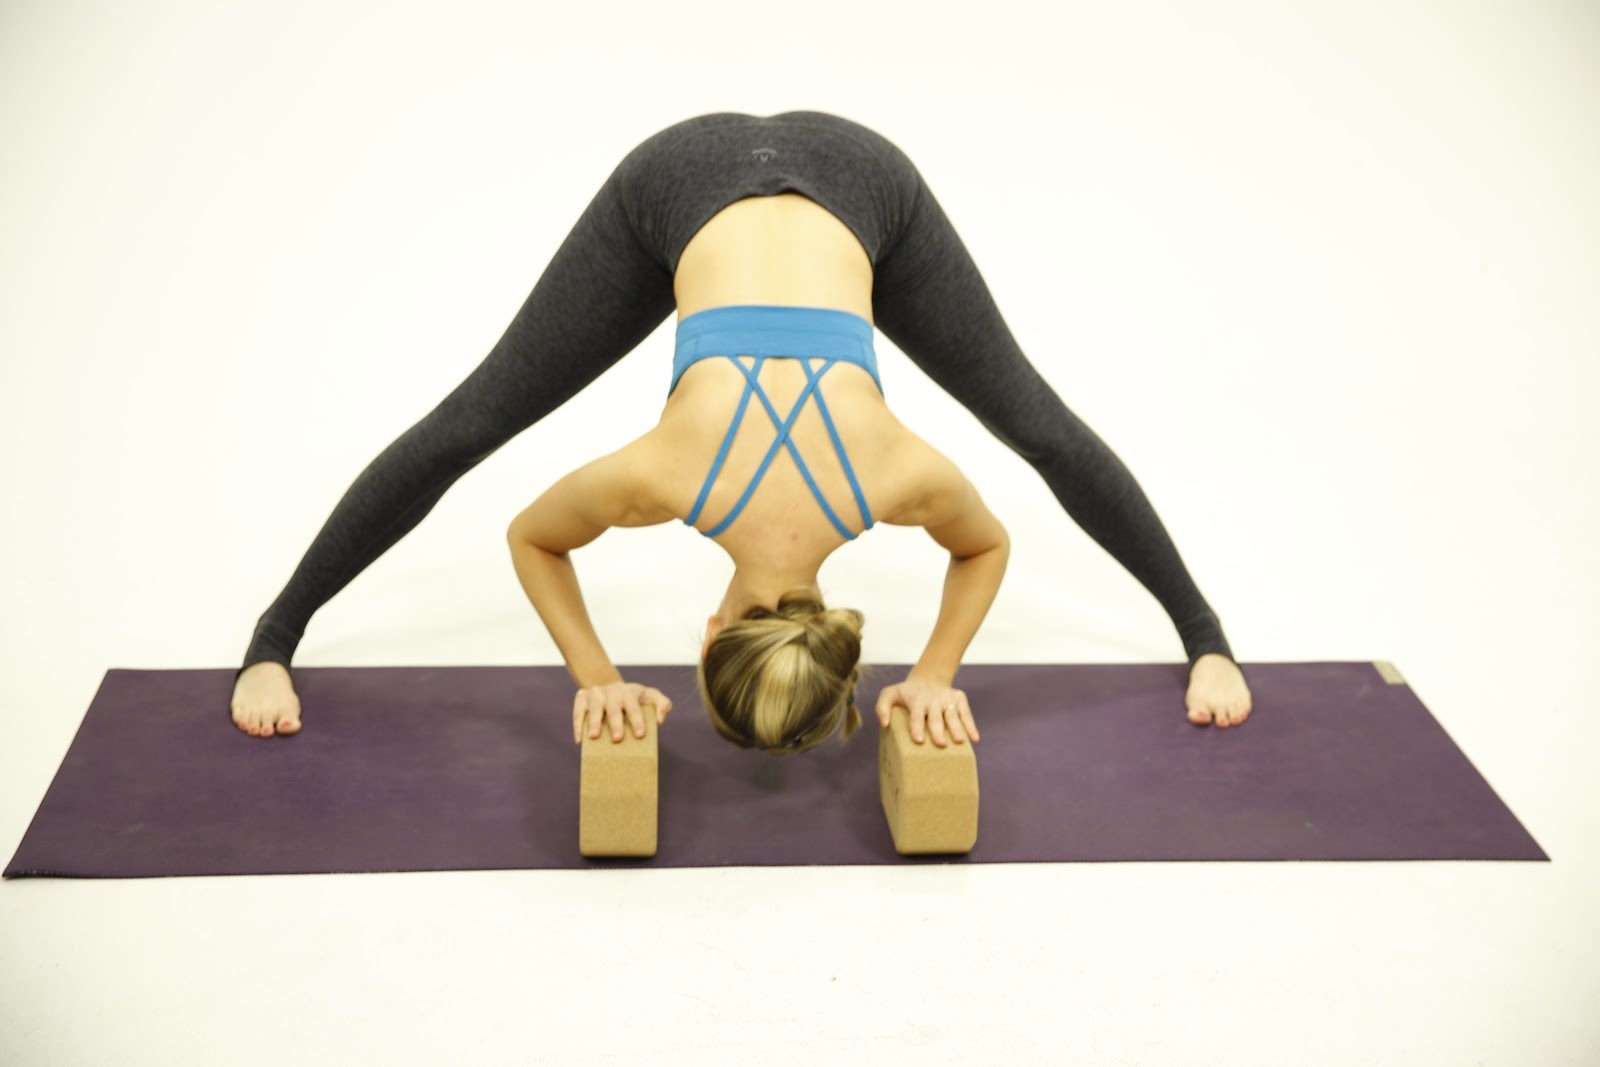
- Step 1: From goddess , straighten the legs. Turn the toes in slightly. hands on the hips as you inhale get tall.
- Step 2: Exhale bend forward, hinging at the hips placing the hands to the mat once you come halfway down.
- Step 3: Stay here or take another breath and as you exhale fold over completely keeping integrity in the spine.
- Step 4: When ready, inhale, come halfway up and pause for a breath. Then breath in as you continue your journey back to standing.
Variations: If the stretch in the back body is too intense you can create a more gentle stretch by bending the knees. Place the hands on blocks if you can’t come all the way down. To make this more challenging, interlace the hands behind you.
Benefits: This yoga pose increases blood circulation, lowering blood pressure, helps to ease headaches and pain in the backside of the body. It also works to tone the abdominal muscles. It is also a release for the upper back which can get tight from carrying children around all day.
I literally do this stretch everyday, three times a day. You don’t need to warm up before you do this. You can literally fold into it while you wait for your morning coffee or tea to brew.
Pro Tips for Yoga Teachers:
- Make sure you are guiding students out of the posture slowly, pausing in the middle, to prevent dizziness.
- During this posture is the perfect moment in class to prompt some introspection for your students. Ask a question, and allow them time in this position to go inward.
8. Garland Pose (Malasana)

- Step 1: From standing, heel toe the feet slightly wider than hip distance.
- Step2: Inhale sweep the arms up overhead bringing the palms to touch. Exhale the palms to the heart’s center as you drop the hips down between the shins.
- Step 3: Broaden across the chest, press the elbows into the thighs, and keep length in the back of the neck as you breathe.
- Step 4: To come out, inhale as you press through the soles of your feet to rise. Or you can place your hands behind you and bring your seat to the mat coming into an easy seat.
Variations: Place a block under your seat if it’s uncomfortable to drop the hips so low. You can also use a cushion or come to the edge of a small chair to assist you in this pose.
Benefits: Garland pose is great to stretch and strengthen your pelvic floor. Helping to reduce pelvic pain. It is a great release for the lower back and aids the digestive organs. Malasana is always a part of my regular practice, it just feels so good! In fact, I don’t even need to be practicing yoga to drop into this pose. If my lower half is feeling tense I’ll just drop into it, no yoga class needed!
Another great reward of this posture is you can get the kids involved with it too. You can squat into this position and play with them on the floor.
Pro Tips for Yoga Teachers:
- Add some juicy twists to this posture for extra mobility work.
- Garland is super grounding and calming, making it great to begin to bring energy and awareness down the spine before transitioning to the floor or savasana.
9. Boat Pose (Navasana)
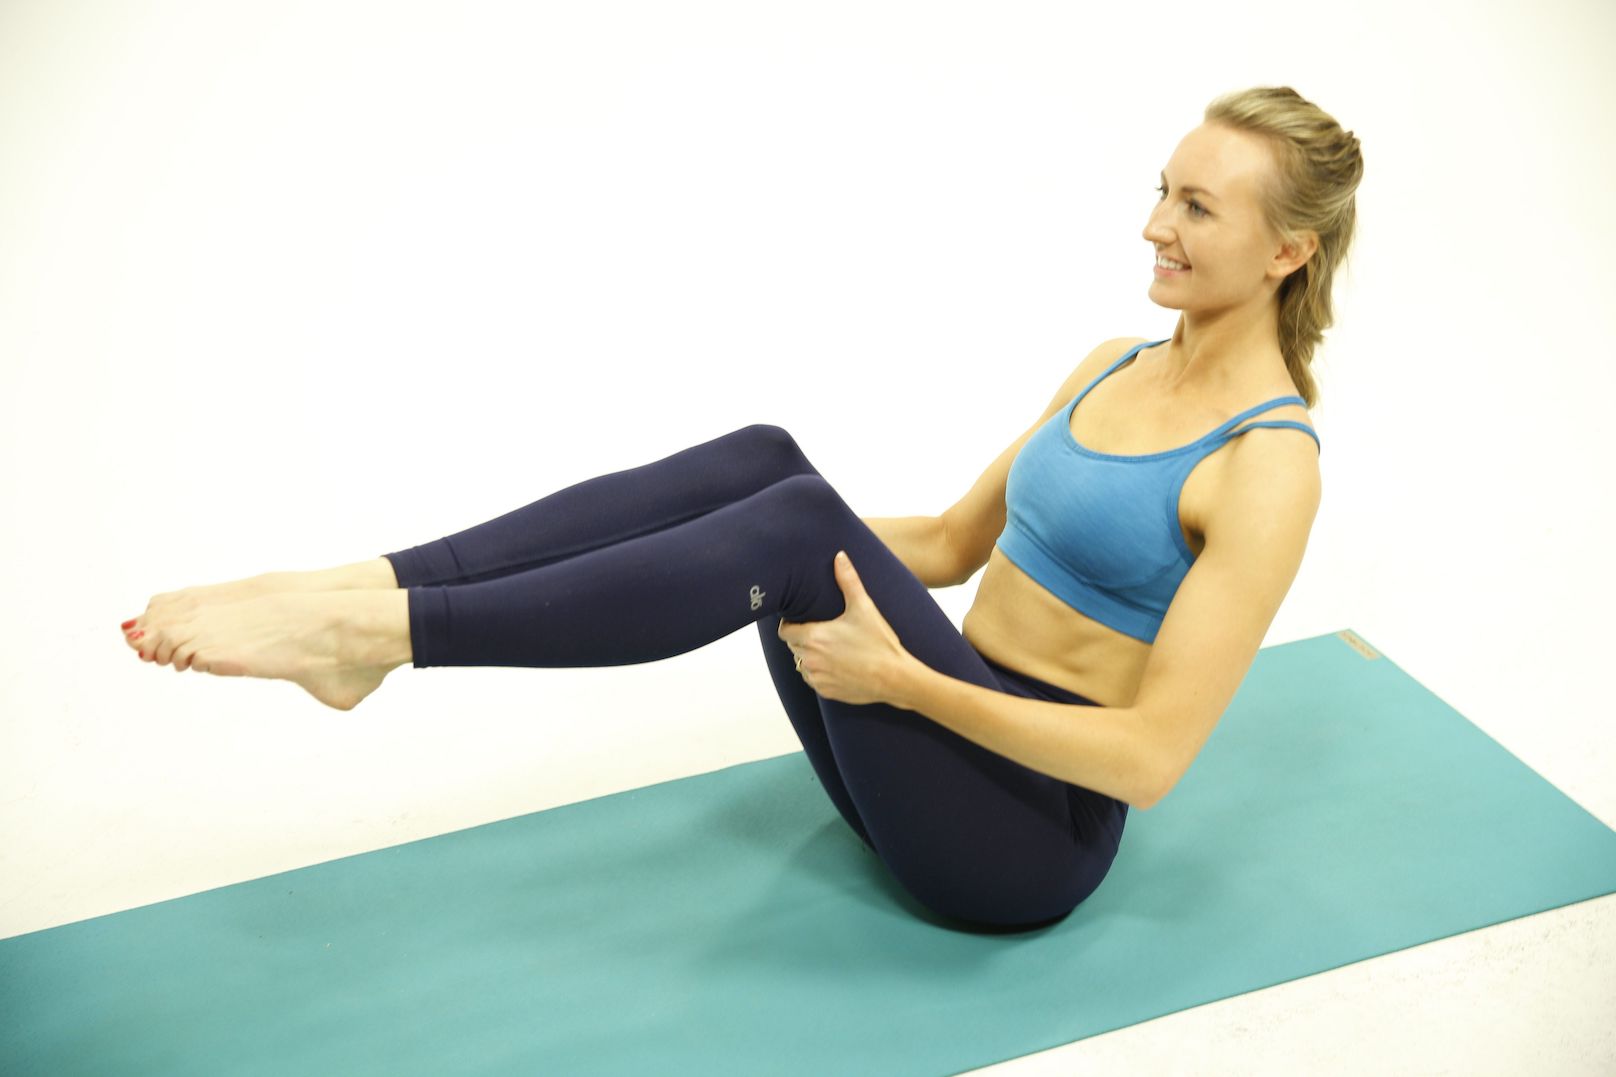
- Step 1: From seated bring the soles of your feet to your yoga mat and grip the backs of the thighs.
- Step 2: Inhale as you lengthen through the crown of head creating a long spine.
- Step 3: Exhale, pull the belly up and in and you lean back on the sits bones.
- Step 4: When ready, engage your quadriceps and lift the feet off the mat as a single package. Hold here or option to take the arms out straight. Keep the spine long.
- Step 5: Bring the soles of the feet back to the mat and come back to seated.
Variations: Keep the feet on the mat and play with the distance they are from your seat to make this more or less challenging, make sure to press down through the big toe. You can keep the hands on the back of the thighs for support or keep one foot down and only lift one at a time. For more advanced movement take the legs out straight creating a “V” shape.
Benefits: Boat pose will warm up the abdominal wall and strengthen the entire core. It requires focus on our movement and breath which increases mindfulness and reduces stress. Weak pelvic floor muscles can lead to pelvic pain, making this another great option in reducing pelvic pain for women.
Pro Tips for Yoga Teachers:
- Add to your yoga routine for women, explaining that it activates the pelvic floor muscles and works on strengthening them.
- Boat activates the solar plexus chakra, encouraging creativity and balancing emotions. I love sequencing it in chakra themed classes.
10. Reclined Bound Angle (Supta Baddha Konasana)
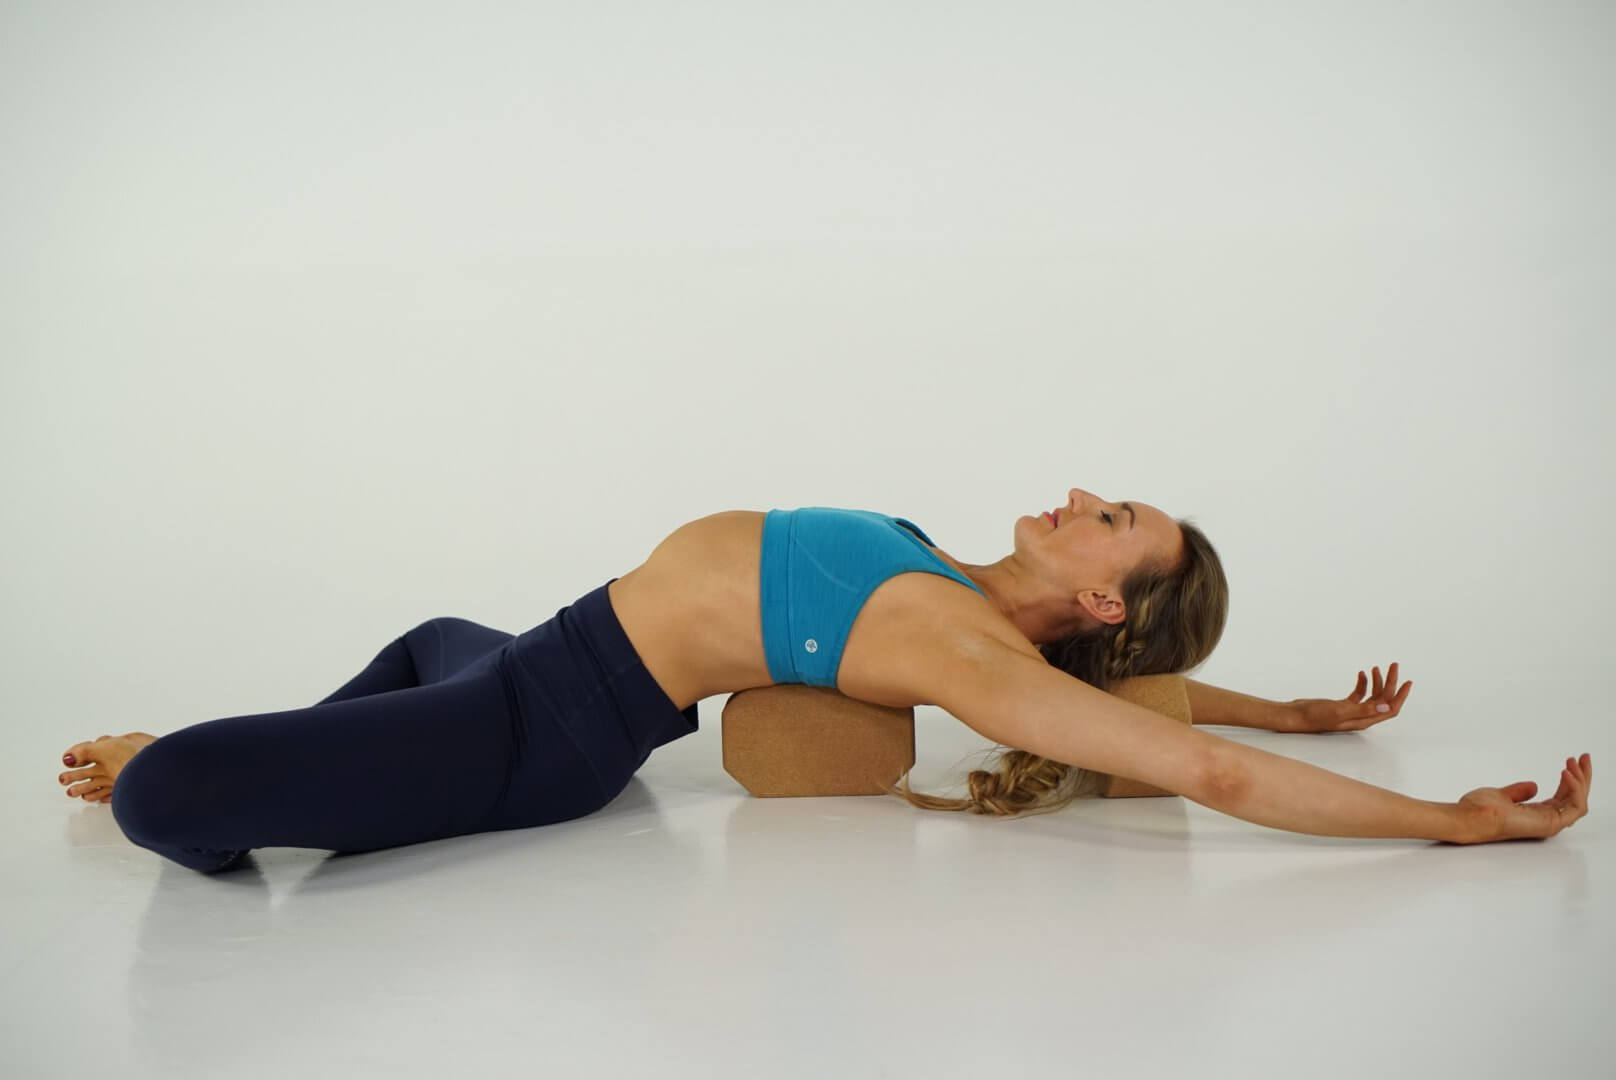
- Step 1: From Dandasana: place a bolster at the base of your spine, bring the soles of your feet to touch creating a diamond shape. Place blocks or blankets under the knees for extra support.
- Step 2: When your props are positioned comfortably, lay back over your cushion(s). Cover yourself with a blanket and maybe you have an eye mask you can place over the face.
- Step 3: Breathe deeply as you let all your body parts get heavy coming to complete relaxation.
- Step 4: Stay as long as you like, but when you are ready begin with small movements and slowly lift yourself out of the posture.
Variations: Props! Props! Props! Use as much special equipment as you want/can to make this the yummiest part of your yoga routine.
Benefits: Your pituitary gland, your major hormone regulating gland, works best at night when you are resting. Reclined bound angle pose is a restorative pose that mimics those conditions making it the perfect pose when you practice yoga for hormone regulation. This is also great for when you start menopause. Regulating hormones will help with things like hot flashes which is one of the most talked-about menopause symptoms.
As women, the number one thing our family wants is for us to be centered in our heart for them. This pose brings energy into your heart so you can be the very best version of yourself for your family.
Pro Tips for Yoga Teachers:
- This yoga pose is one of the best yoga poses for women or anyone suffering a hormone imbalance.
- Add this posture to a class for bringing harmony into the heart space. If you don’t have blocks, have your students roll a blanket under their shoulder blades.
If you are an Uplifted member I have so many yoga for women resources compiled in one simple spot for you here.
Not an Uplifted member and want to dive deeper? Join us! I’d love to welcome you to our community.
Next Steps
- Check out my YouTube channel and find some yoga classes that you can try out for yourself!
- Explore my knowledge hub for How to Become a Yoga Teacher
- Attend a 200 YTT info session to see what else you’ll learn in my online teacher training.
Find more yoga sequences by benefit.
YOU MIGHT ALSO LIKE
- How to Teach Somatic Yoga: A Practical Guide for Instructors
- The Best Somatic Exercises for Grief: Find Healing Through Movement
- The Best Somatic Exercises for Anger Management and Emotional Release
- Yoga to Reconnect with Yourself: 5 Essential Practices for Inner Peace
- Yoga for Connection: 10 Poses to Deepen Relationships and Bonding
- Yoga To Connect With Your Body For Mind-Body Harmony
- Yoga to Connect with Feminine Energy: 5 Transformative Practices
- Yoga to Connect with Your Heart: 3 Poses for Emotional Balance
- Myofascial Release Yoga: Unlock Tension and Improve Flexibility
- 6 Hip Openers For Emotional Release
- Office Yoga: 10 Poses You Can Do Right Now
- Ayurveda Food Combining: The Key to Balanced Digestion
- Yoga For Grief: 8 Yoga Poses For Support
- Yoga for Vata Dosha: Practice Poses and Tips
- Yoga for Pitta Dosha: Practice Poses and Tips


