How often do you feel sick to your stomach? For me, it can be pretty often…which is no fun. So many things can cause nausea! Anxiety, excitement, anger, intense pain, morning sickness, motion sickness, food poisoning, the list could go on and on!

With nausea being so easily triggered it’s a good idea to have ways to alleviate it. One of the best ways….? Your yoga practice OF COURSE!!
Yoga for Nausea
Practicing yoga reduces stress, tension, fatigue, and anxiety in the body. When you experience nausea, your body may be responding to physical, emotional, or environmental stressors. Yoga poses, breathing techniques, and meditation alleviate these stressors and promote relaxation and a sense of calm, certain yoga poses even provide instant relief when nausea strikes!
Does Yoga For Nausea Really Make a Difference?
What the science says: Science tells us that the brain and gut are directly connected and that exercise helps the digestive system move. Basically exercise gets those internal functions going and calming the mind calms the gut. Isn’t it great that yoga achieves both of those things?! If you’re looking for more specific evidence, one study found: “Yoga helps normalize gastric motility and enhances cardiac and gastric parasympathetic activity in subjects undergoing chemotherapy.”
Meaning yoga reduced nausea in cancer patients. Another study also found that breast cancer patients suffering from chemotherapy induced nausea found relief after adding yoga to their treatment plans.
The Uplifted Perspective: Nausea is often a side effect letting us know something in the body is out of balance. If it’s constant and for no reason, explore if maybe something is energetically out of balance. A good first step might be discovering your ayurvedic constitution and how to balance it.
Nausea means something is not “sitting well” inside your system, whether it be physically or energetically. Do poses that stay close to the ground; you don’t want to raise energy, soothe and ground yourself to bring calming energy. I have an entire section dedicated to calming practices in my Uplifted Membership. Practice poses that stimulate the digestive system and help move food and waste through the body more efficiently. They will increase blood flow to the abdomen and stimulate the parasympathetic nervous system, which is responsible for digestion and relaxation.
Breathing techniques such as deep belly breathing or alternate nostril breathing to calm the mind will reduce feelings of nausea too.
Try to look at your nausea as part of the natural healing process… maybe it leads you to throw up, which could be a GOOD thing. Or maybe it’s warning you of certain foods you don’t want to eat while pregnant. Respect your body’s innate intelligence
As always, remember, yoga is a wonderful complementary therapy but, if you are experiencing persistent or severe nausea, or abdominal pain, it’s important to seek medical advice from a healthcare professional.
Below is a list of the best yoga poses for nausea I’ve compiled to help, but this class is a great place to start too: Yoga for Nausea Relief, Morning Sickness, & Fatigue (20-min)
Find more classes just like this in the Restorative Sick & Injured section of our Uplifted Members app.
Top Yoga Poses for Nausea
1. Breathwork (Pranayama)

- Step 1: Come to an easy pose. Sit up tall. Prop yourself up on a cushion or sit against a wall to maintain a tall spine.
- Step 2: Place one hand on the belly, one hand on the chest. Slight dip in the chin and close your eyes.
- Step 3: Inhale into your belly, ribs and chest as much as possible, slight pause.
- Step 4: Exhale, let all these areas release completely. Repeat.
Variations: This is a simple full complete breath exercise but there are so many breathing techniques you can do. Check out some different breathing practices in this blog post: Calming Pranayama for Clarity, Focus, and Peace.
Benefits: Deep breathing is soothing and draws attention inward. Slows down and clears your head to calm your system, focus attention, and slow or stop stress response. If you start feeling nauseous from something like a bumpy ride or a horrible feeling of panic proper breathing is your best bet at nausea relief.
Uplifted Pro Tips:
- Explore mudras with breathwork to enhance your practice.
- Pranayama can be accessed from anywhere, no matter where your regular practice happens. Use pranayama while driving in the car or standing in line for a coffee to get help for fatigue or nausea relief.
2. Child’s Pose (Balasana)
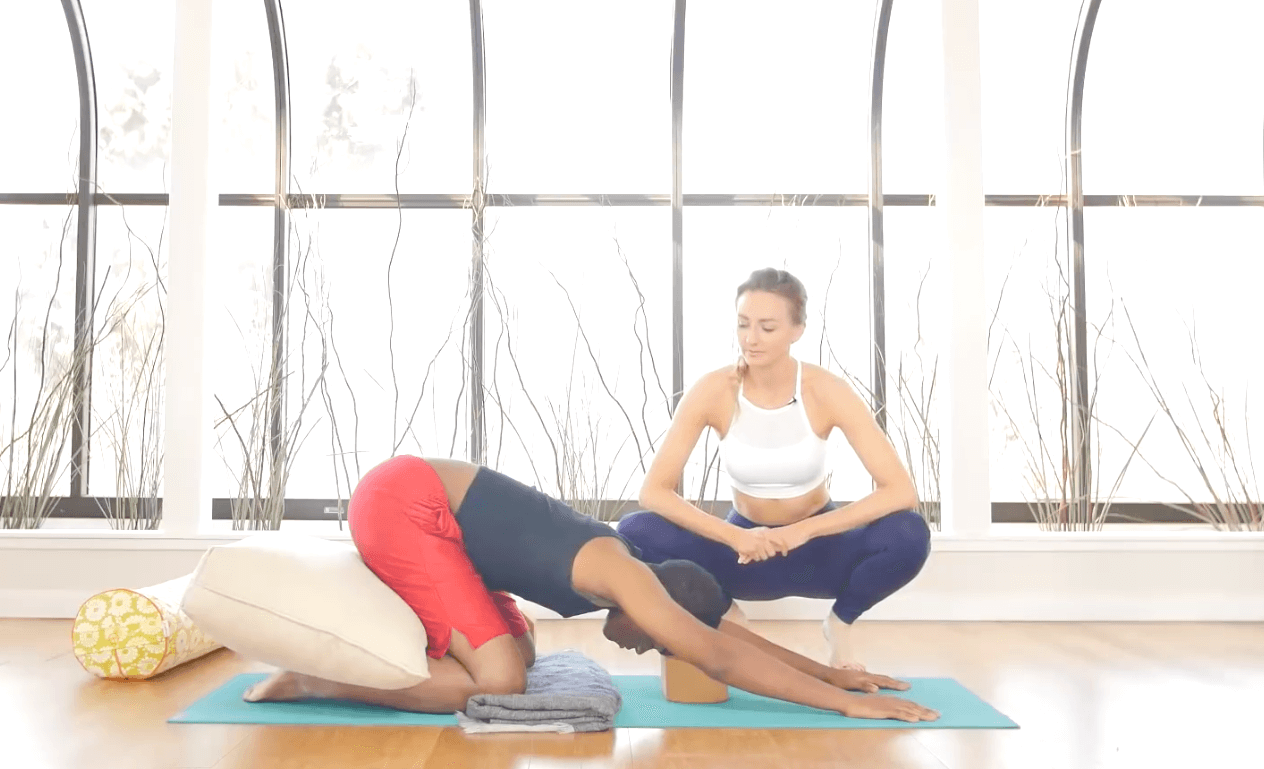
- Step 1: Beginning on hands and knees, take your hips back to your heels. Knees can be touching or as wide as the mat.
- Step 2: Let the head come to your mat resting the forehead down to the ground, closing the eyes.
- Step 3: Soften the upper body and experiment with where you want your hands/arms: index fingers touching, elbows wide in a diamond shape, or arms down with hands next to the feet.
- Step 4: Simply inhale rise back to all fours to come out of the pose.
Variations: To make this pose more restorative, you can hug a bolster to your chest. Another great variation is to place a block under the seat between the heels or under the forehead.
Benefits: Child’s pose increases body awareness, opens the back body and releases the glutes and hips. It brings you close to the ground and in a comfortable position to relieve nausea and stomach pain. This pose also takes your attention inward, cooling the body and soothing the nervous system reducing stress and improving overall wellness.
This is a position of surrender and letting go. Sometimes if I’m feeling a little extra stress or overwhelm, I just take a deep breath and come into a child’s pose. Everything else can wait for a few breaths.
Uplifted Pro Tips:
- Roll a blanket or use your fists and place them in the crease between your hips while in this pose to add a little self massage to those abdominal organs.
- Add some side opening to this posture: extend the arms out long and then walk to hand to one side. Hold for several breaths then move to the other side.
3. Seated Forward Bend (Paschimottanasana)
- Step 1: Start seated, legs extended. Ensure a straight spine.
- Step 2: Heels touch or hip width, flex the feet as you inhale the arms up getting tall.
- Step 3: Breathe out, draw the belly in, hinge from the hips to bend forward keep the spine straight.
- Step 4: Place hands on shins or wherever you can comfortably keep the integrity of the low spine. Neck stays long. Deep breaths here.
- Step 5: Inhale and press the palms into the floor to gently lift yourself back to your starting position.
Variations: Place a folded blanket or pillow under the seat if the back needs a little extra love. Or make this a yin fold letting the whole body relax into the posture with some delicious deep breathing.
Benefits: Forward fold stretches the backline of the body. Opens up the hamstrings and low back easing discomfort in those areas, and stimulates the gut making it helpful to get rid of nausea.
Pro Tips for Yoga Teachers & Yogis:
- Place a block under the head to bring rest to this pose in addition to putting pressure on the forehead relieving headaches and nausea. Or place a chair between the legs and rest the head there.
- Encourage introspection here. Allow students to touch base with the different sensations in their body and mind while in this pose. Use this moment to be a “body detective”. (Learn how to be a body detective in my 200-hr training)
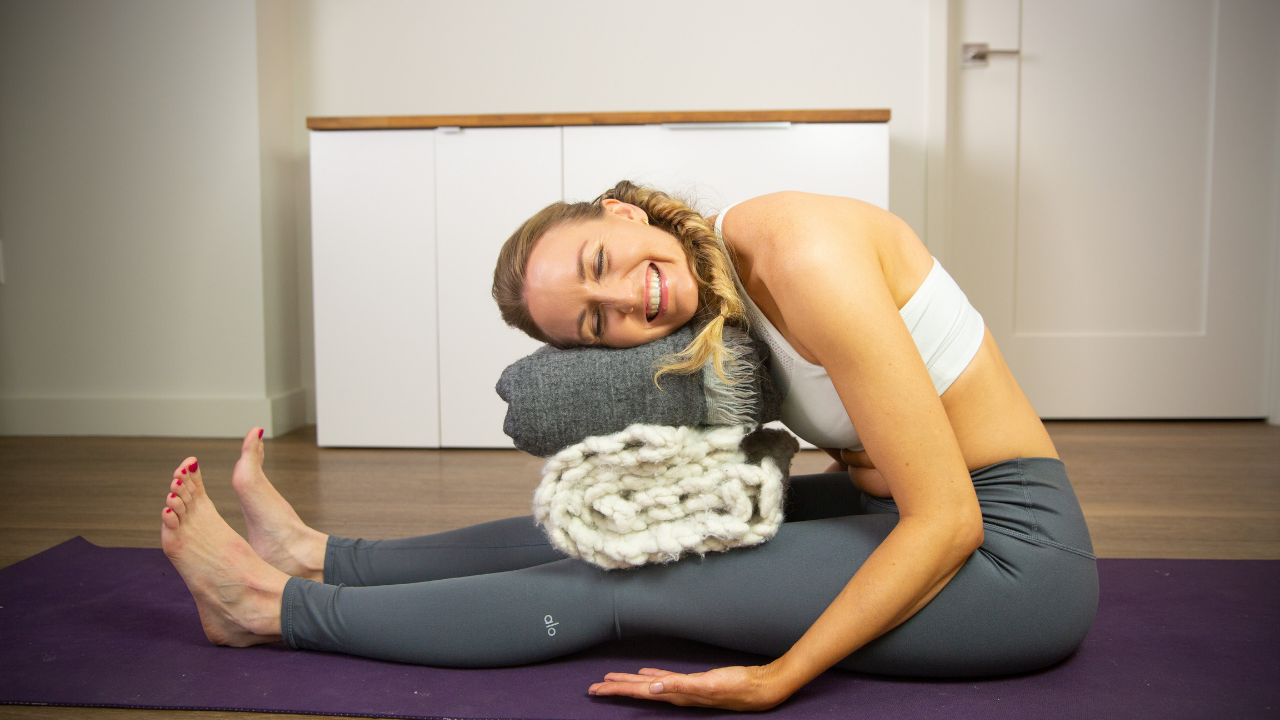
4. Bound Angle Pose (Baddha Konasana)
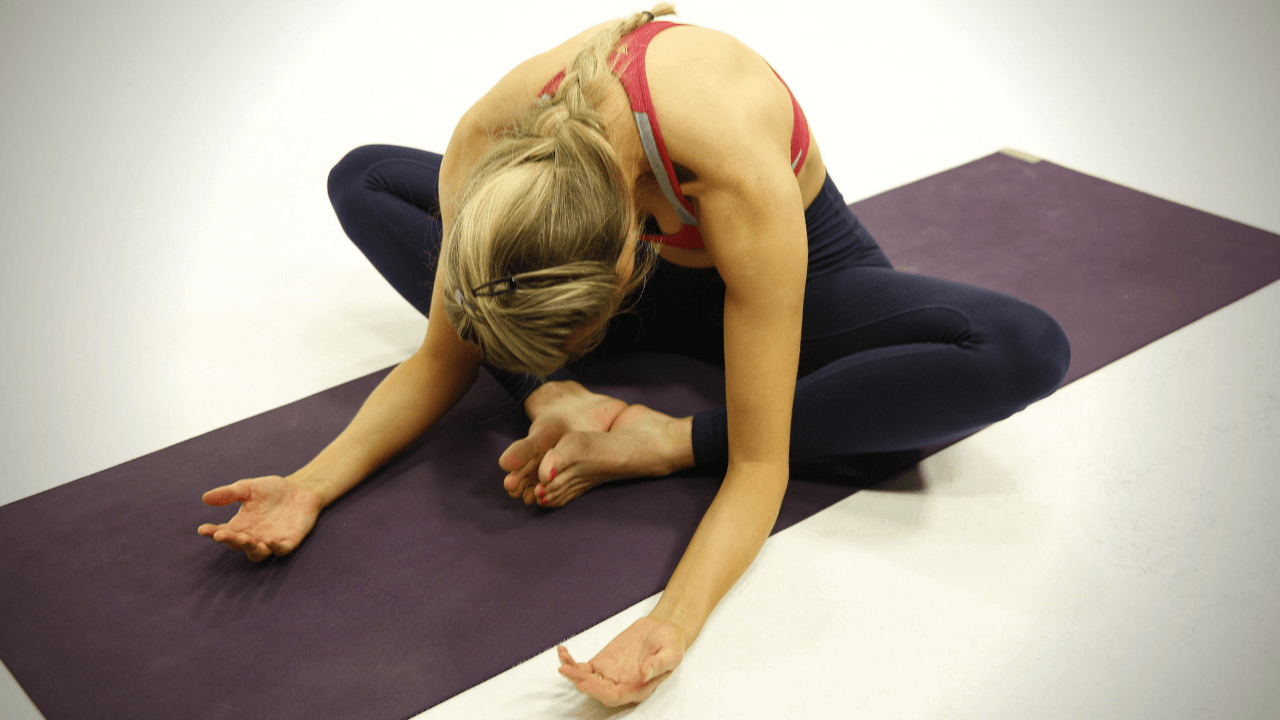
- Step 1: From Dandasana: bring the soles of your feet to touch creating a diamond shape.
- Step 2: Root the sits bones down, hold the soles of the feet as you inhale get tall.
- Step 3: Exhale fold over the legs keep the spine long. Hold for several breaths and round: rest.
- Step 4: Breathe in as you slowly rise up to sit tall. Take the legs back out in front of you.
Variations: Knees up high? Place blocks or blankets underneath them. You can also make this more restorative by reclining back on a bolster or some cushions.
Benefits: Baddha Konasana is a great hip opener and will relieve nausea, stomach cramps and low back pain. It brings you close to the ground to soothe the system.
Uplifted Pro Tips:
- The goal is to calm the body when feeling nauseous, take supta baddha konasana(reclined bound angle pose) instead to reset the nervous system and completely relax.
- Head does not need to touch your toes!! Fold until you feel sensation and then pause there. Use blankets and props to hold yourself where you feel the stretch best.
5. Hero Pose (Virasana)
- Step 1: Kneel with your knees together and feet hip-width apart. Toes should be pointed straight back behind you.
- Step 2: Lower your seat to your heels, keep knees together. You may want to place a cushion or folded blanket under the seat.
- Step 3: Hands rest on thighs, palms face down, or rest them in your lap with palms face up. Lengthen your spine and lift the crown of your head toward the ceiling. Imagine a string pulling the top of your head up toward the sky.
- Step 4: Breathe deeply and steadily, feel your chest expand on the inhale and release on the exhale. Draw the shoulders away from the ears.
- Step 5: To release, gently lift your seat off the heels and come back to kneel.
Variations: Place a folded blanket or yoga block between your calves and thighs for support. Place a folded blanket or towel under your knees for padding. Or you can use a bolster or cushion behind your back for support.
Benefits: Hero poses stretches and strengthens the hips and thighs and improves posture. It works to create balance in the body and activates the abdominal organs and removes toxins that may be causing you to feel nauseated.
Uplifted Pro Tips:
- Take a restorative and calming approach by laying back on a bolster for a reclining hero pose to open the entire abdomen and relax your internal organs.
- Make this a double whammy posture to reset your nervous system by doing pranayama while sitting in hero pose.
6. Supine Twist (Supta Matsyendrasana)
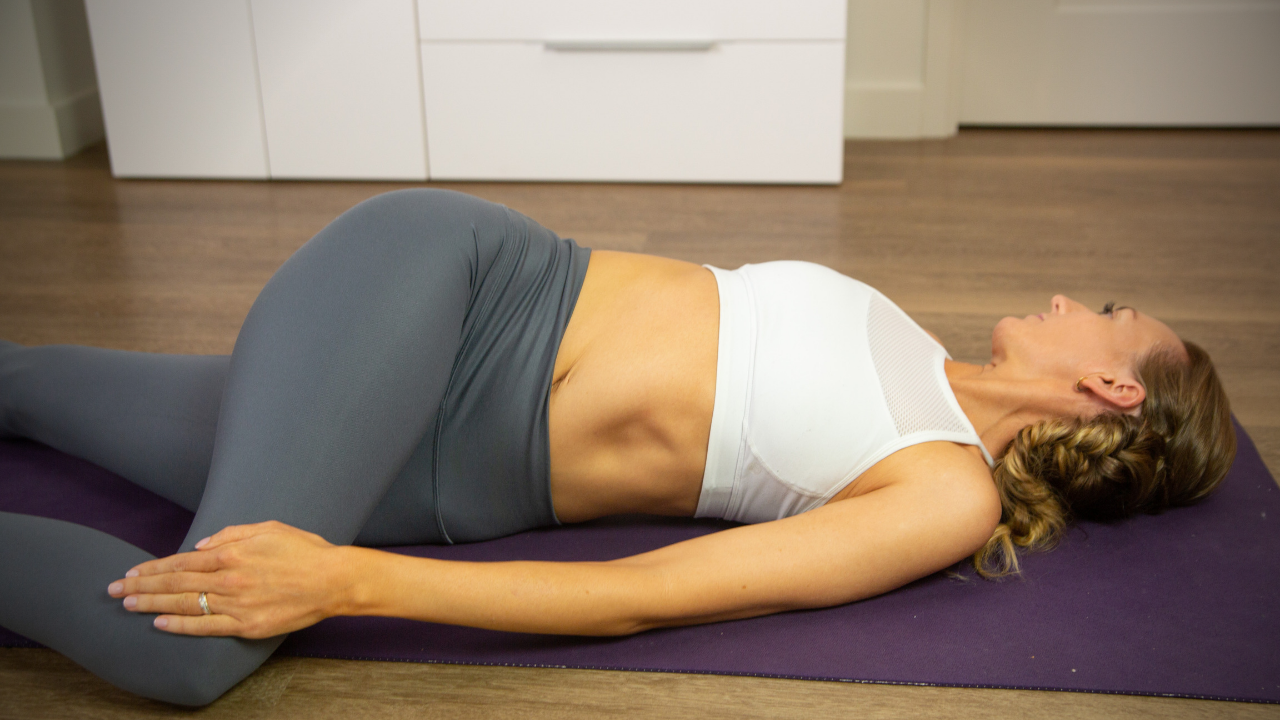
- Step 1: Lay flat on your back. Pull your right leg into your chest. Breathe in.
- Step 2: As you breathe out gently let the knee cross the body floating to the ground on the opposite side.
- Step 3: You can gently place the opposite hand of the leg onto the knee keeping the shoulders to the mat and the other arm extended to the side. Deep breaths.
- Step 4: Inhale as you untwist the body hugging that knee back to the chest.
- Step 5: Exhale release the leg long laying back completely flat.
- Step 6: Repeat on the left side.
Variations: Place a block or pillow under the knee if it doesn’t meet the ground. Play with the position of your arm to see what is most comfortable. Or if you don’t like having one leg extended you can always bring the knees together and twist them both to one side, then the other.
Benefits: Twisting yoga poses help with stagnant energy in the body. This yoga pose will increase blood circulation in addition to stretching the abdominal muscles, hip and spinal muscles. All of these great benefits will help relieve stress and provide nausea relief.
Pro Tips for Yoga Teachers & Yogis:
- Sync breath and movement by sliding the extended arm slowly up above the head, across the face, and back down again, as if you were making a snow angel. Have students send their breath through as their arms move.
- If with a private client or small group: place a support cushion between or under the bent knees and add an arm pull assist (I teach this and other myofascial hands-on assists in 300-Hour Yoga Teacher Training). It will make your student feel amazing and well-cared for.
7. Legs Up The Wall Pose (Viparita Karani)
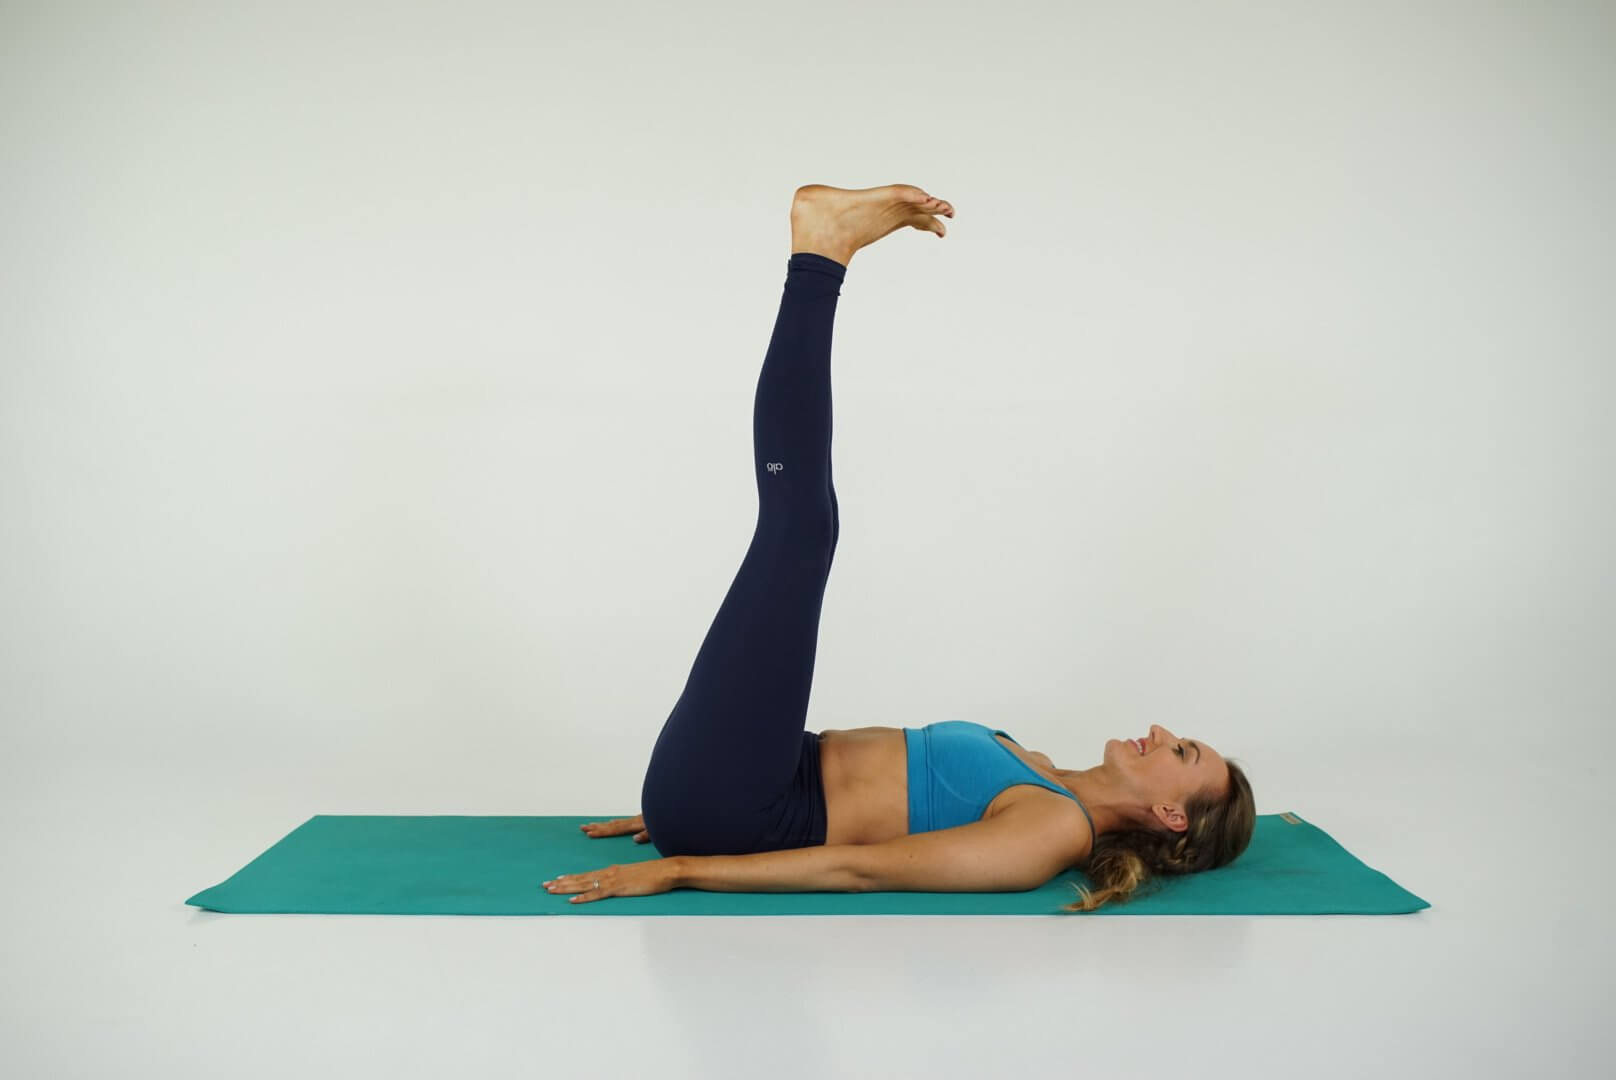
- Step 1: From the ground, bring the base of your seat to a wall.
- Step 2: Carefully lay the body back on your yoga mat and extend the legs up against the wall towards the ceiling. Breathe deeply.
- Step 3: Slowly bring your legs down from the wall, roll to the side and push yourself back to a seated position.
Variations: You can place a block or blanket under the hips to provide a gentler bend. You can do this pose in bed against your headboard or even against the back of your couch while watching TV!
Benefits: Legs up the wall pose affects the nervous system and can instantly calm you, reducing anxiety and improving mood. It improves blood circulation and is a perfect go to comforting asana when you are feeling sick to your stomach, whether it be from a stomach flu, gallbladder stones or intense anxiety.
Uplifted Pro Tips:
- This is a great moment to add a pranayama technique like karma breath to deepen relaxation and increase mindfulness.
- Not sure what to do with your hands? Try adding Apana Mudra to this pose to add balance and aid the digestive system.
Practicing yoga regularly improves overall physical and mental health, which leads to a better sense of well-being and decreased frequency and severity of symptoms of nausea. So don’t worry, nausea happens, but work on being a body detective to figure out what is triggering you and use your practice to counter it! You’ve got this!!
Next Steps
- Check out my YouTube channel and find some yoga classes that you can try out for yourself!
- Explore my knowledge hub for How to Become a Yoga Teacher
- Attend a 200 YTT info session to see what else you’ll learn in my online teacher training.
Find more yoga sequences by benefit.
YOU MIGHT ALSO LIKE
- How to Teach Somatic Yoga: A Practical Guide for Instructors
- The Best Somatic Exercises for Grief: Find Healing Through Movement
- The Best Somatic Exercises for Anger Management and Emotional Release
- Yoga to Reconnect with Yourself: 5 Essential Practices for Inner Peace
- Yoga for Connection: 10 Poses to Deepen Relationships and Bonding
- Yoga To Connect With Your Body For Mind-Body Harmony
- Yoga to Connect with Feminine Energy: 5 Transformative Practices
- Yoga to Connect with Your Heart: 3 Poses for Emotional Balance
- Myofascial Release Yoga: Unlock Tension and Improve Flexibility
- 6 Hip Openers For Emotional Release
- Office Yoga: 10 Poses You Can Do Right Now
- Ayurveda Food Combining: The Key to Balanced Digestion
- Yoga For Grief: 8 Yoga Poses For Support
- Yoga for Vata Dosha: Practice Poses and Tips
- Yoga for Pitta Dosha: Practice Poses and Tips
Learn how to do 11 of the most popular yoga poses correctly. Free video + PDF download.


