There is a huge misconception out there that yoga is all about fitness and sculpting. With so much western focus on “asana”, or the actual yoga postures and not yoga itself, it’s to make that mistake.
And hey, a strong yoga sequence that drenches you in sweat is definitely needed sometimes.
But my personal favorite way to practice yoga is for deep relaxation and a good old-fashioned stretch. (If you’ve never been to a restorative yoga class before, THEN GO NOW.)
If you’ve got aches and pains, then there are restorative yoga poses to help.
If you’re stressed, then a restorative yoga sequence will calm you down.
If you can’t touch your toes, then a restorative practice will help you get there.
Whether you’re doing it for relaxation or for a stretch, give these restorative yoga poses a try. (And then thank me later)
See you on the mat.
Try my 60 min restorative yoga class on YouTube.
What is Restorative Yoga?
Restorative yoga is a gentle yoga practice that’s all about slowing down and opening your body through passive stretching. It’s totally different from other styles of yoga because, in a restorative yoga class, you hold the poses for two to 10 minutes.
In a restorative class, yoga props are used for support, which helps the body and mind to consciously relax, allowing the poses to be held almost effortlessly.
Want a full introduction to everything restorative yoga? Check out our complete guide to restorative yoga.
10 Basic Restorative Yoga Poses
I invited yoga teacher extraordinaire Nicole Windle to share her favorite restorative yoga poses. These ten yoga postures are accessible to everyone, all body types and skill levels. They are restorative. Stay in each posture as long as you want to.
1. Reclined Butterfly – Supta Baddha Konasana
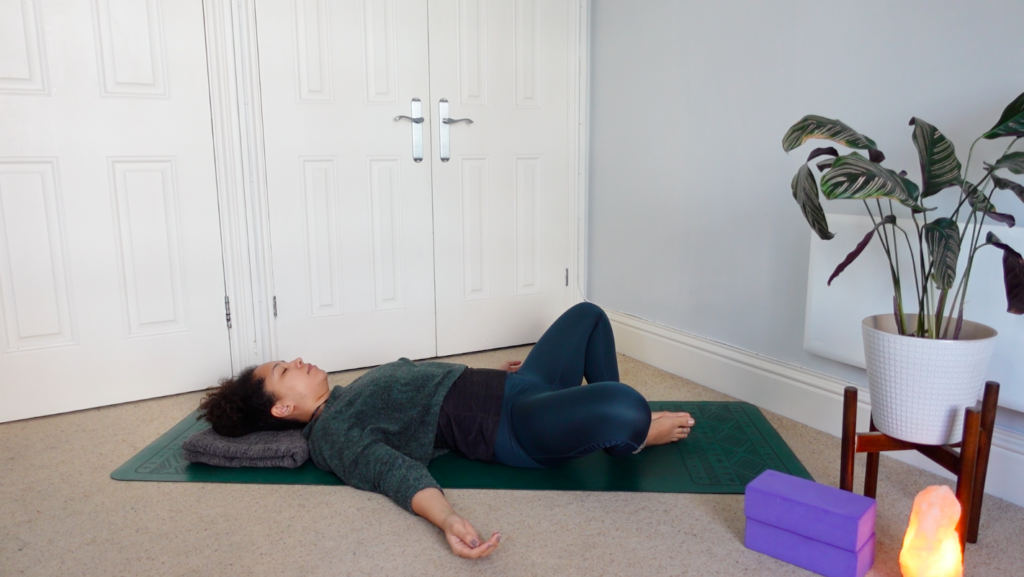
- Step 1: Lay down on your yoga mat with a cushion under your head.
- Step 2: Bring the soles of your feet together and let your knees bend out to the sides.
- Step 3: Add cushions under the thighs for added support.
Variations: You can do this posture while lying on a yoga bolster to open the chest. Add one block under each thigh if the hip opening feels challenging.
Benefits: This pose helps to improve circulation and stretches the inner thigh and groin area. It helps to relieve symptoms of stress, mild depression, and menstruation.
2. Reclined Twist – Supta Matsyendrasana
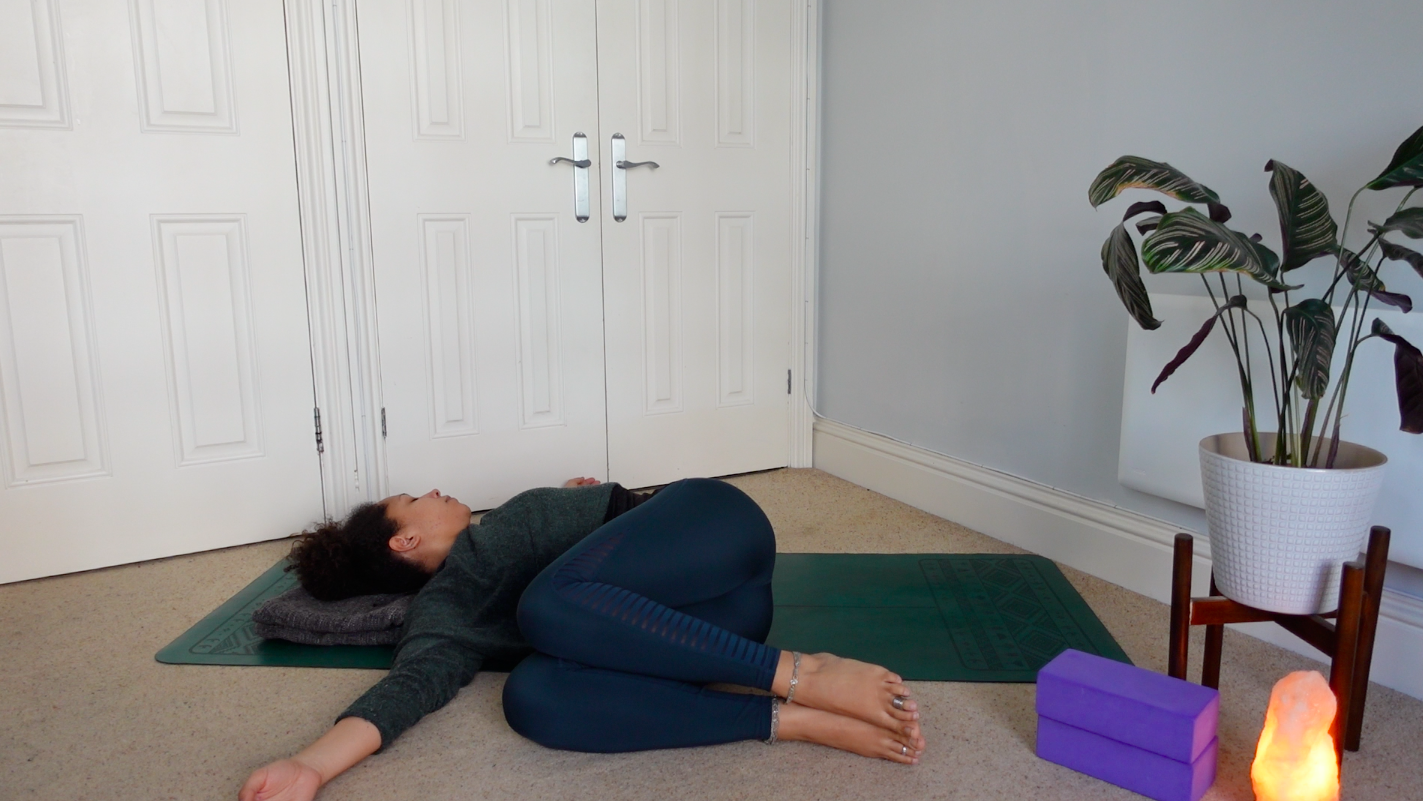
- Step 1: Lay down on your back and hug your knees into your torso.
- Step 2: Open your arms into a T shape on the floor, relaxing your shoulders to the ground.
- Step 3: Bring your knees down to rest on the floor on either side, stacked on top of one another.
- Step 4: Stay for a few breaths and repeat on the other side.
Variations: To deepen the twist, hug your legs closer to your torso, or cross one knee over the other.
Benefits: Twisting helps to massage the internal organs, easing the digestive system. It can also help to relieve sciatica. Twisting at the end of your practice helps to restore equilibrium in the nervous system and releases tension in the spine.
3. Child’s Pose – Balasana
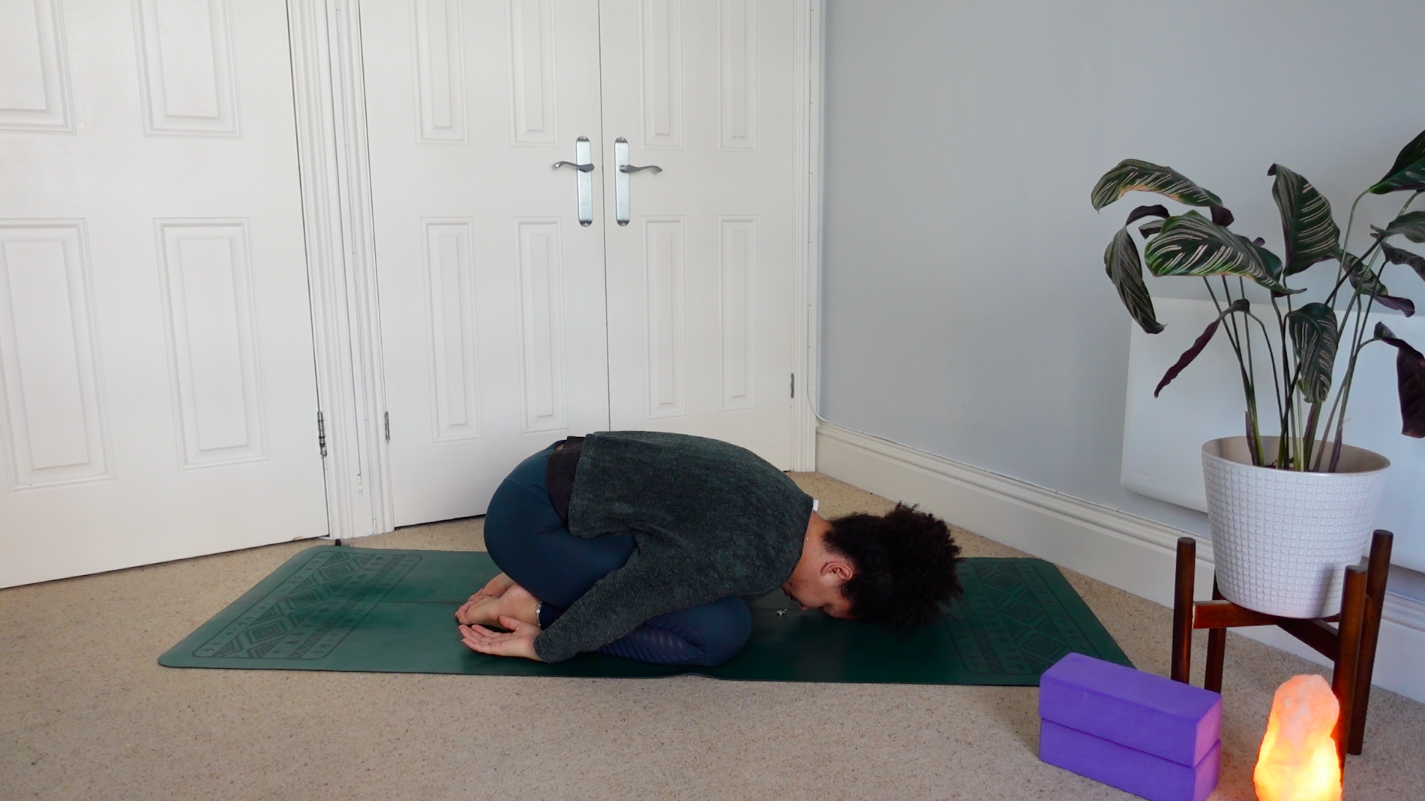
- Step 1: Begin on your hands and knees. Open your knees hip-distance or wider.
- Step 2: Bring your buttocks towards your heels and reach your arms forward, bringing your head to the floor.
- Step 3: Your hands can either rest down by your feet or stack them like a pillow under your forehead.
- Step 4: Rest here for up to 5 minutes.
Variations: Place a bolster in between your thighs and drape your torso and head onto the bolster. Turn your head to one side to relax the neck.
Benefits: This is a healing, restorative pose that gently stretches the spine and is a nice counterpose for backbends. It’s psychologically soothing when you’re feeling cold, anxious, or vulnerable, as it inclines the head so the heart can rest instead of trying to force blood upward to the brain.
4. Legs Up The Wall – Viparita Karani
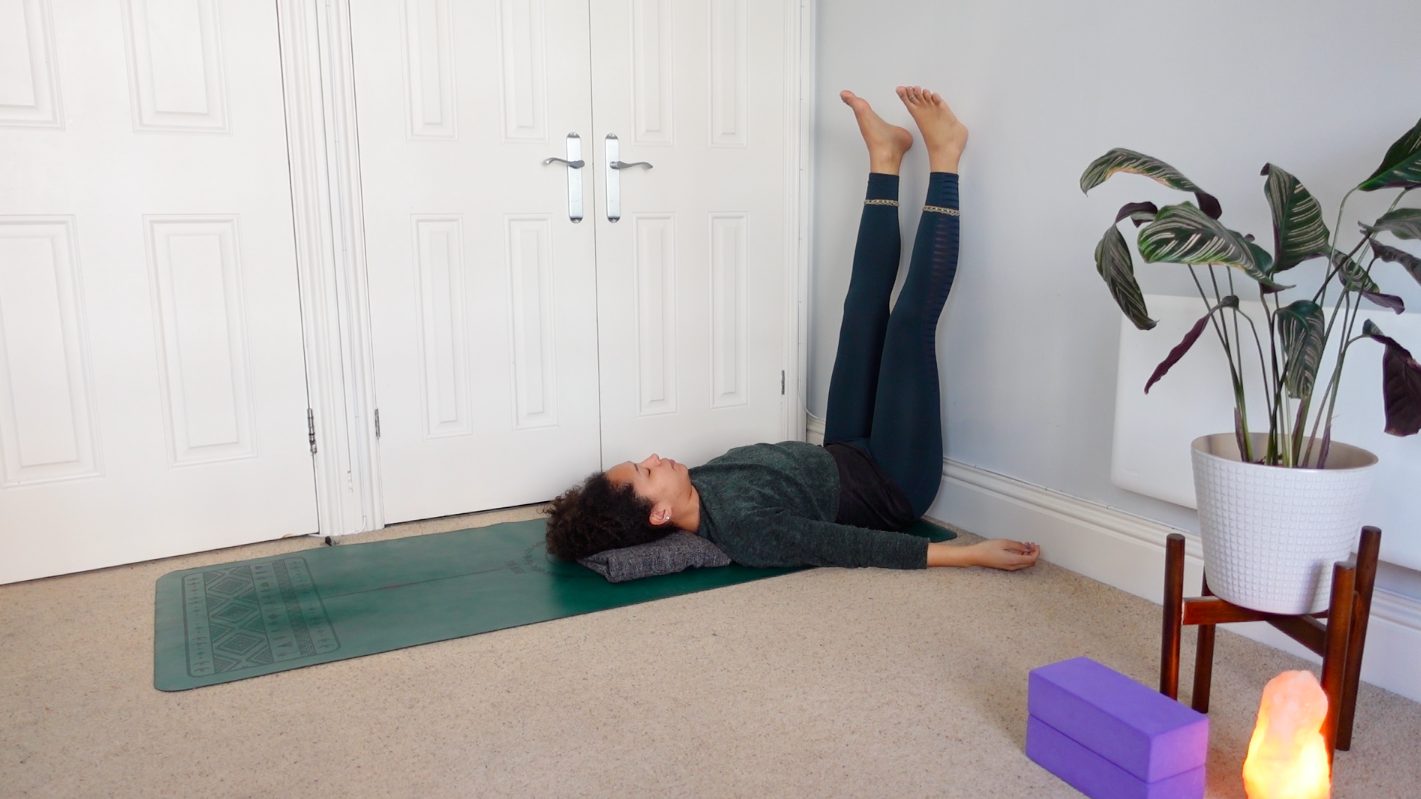
- Step 1: Sit straight with your right hip close to the wall and your legs straight out in front of you.
- Step 2: As you lay back, swivel around and slide your legs up the wall, bringing your buttocks against the wall.
- Step 3: Keep your sacrum weighted toward the floor, and rest your head on a blanket.
- Step 4: Stay in this pose for 3-5 minutes. To come out, bend the knees and either push with your feet away from the wall or twist to the side.
Variations: Place a blanket or a cushion under the hips. If your legs feel like they will bend easily wrap a strap around your thighs to keep it restorative.
Benefits: Having your legs higher than your head and your heart causes the downward pull of chi (energy) to be reversed, refreshing the circulation throughout your body. If you are stressed, fatigued, or jet-lagged this pose is especially refreshing and perfect for stress relief.
5. Reclined Pigeon – Supta Kapotasana
- Step 1: Lay down on your back with your knees bent and feet on the floor. Place your right ankle across your left knee.
- Step 2: Draw your left knee toward your chest and interlace your fingers around your leg. As you draw your knee towards you, keep your sacrum down and relax your head and shoulders on the floor.
- Step 3: Stay in this pose for 3-5 minutes and switch sides.
Variations: If it’s difficult to reach through and clasp your hands, press your left foot against the wall and cross your right ankle over your left knee, while your hands rest on the floor.
Benefits: This is a juicy hip opener that helps to improve circulation throughout the lower body and is a soothing counterpose for backbends and twists. It increases blood flow to the pelvis and surrounding organs which helps reduce digestive discomforts.
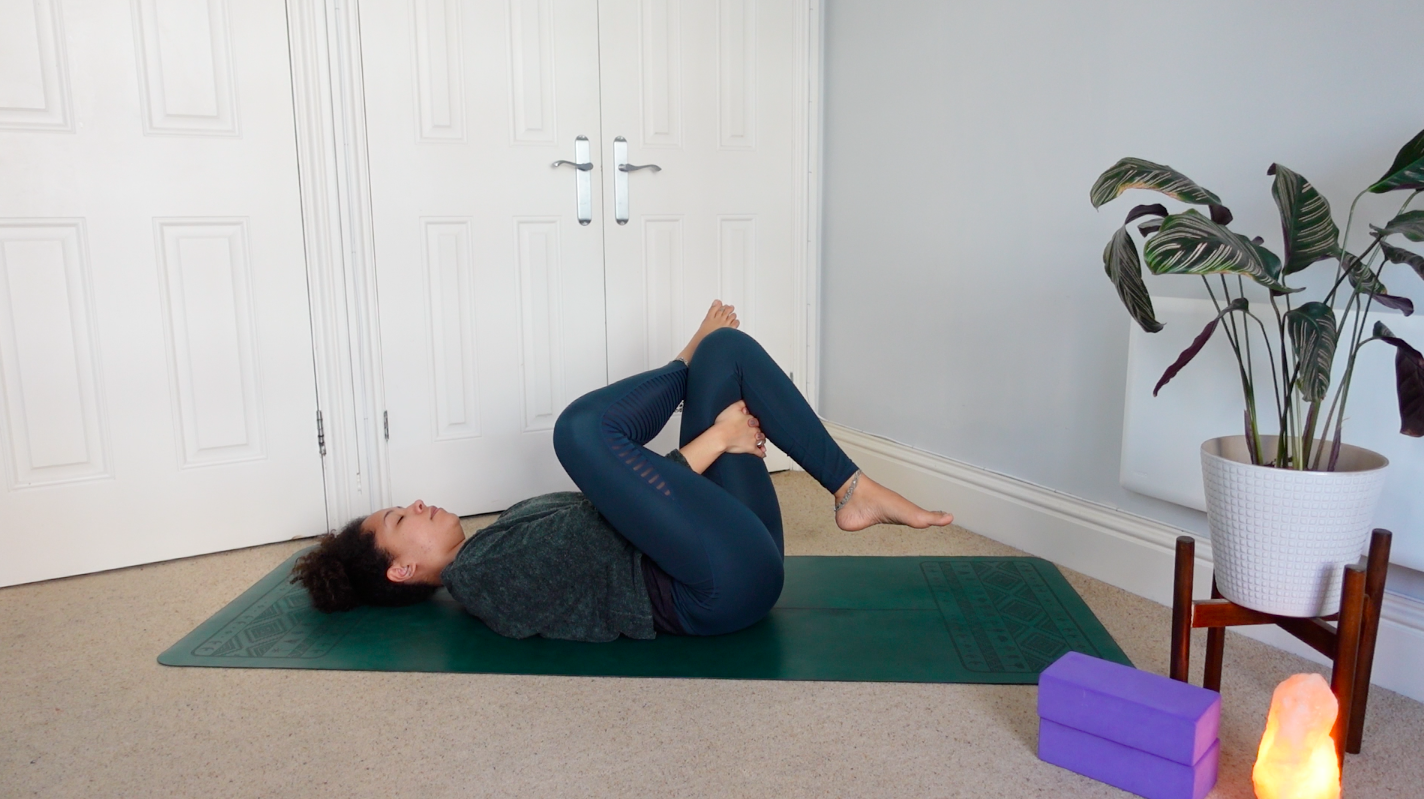
6. Happy Baby – Ananda Balasana
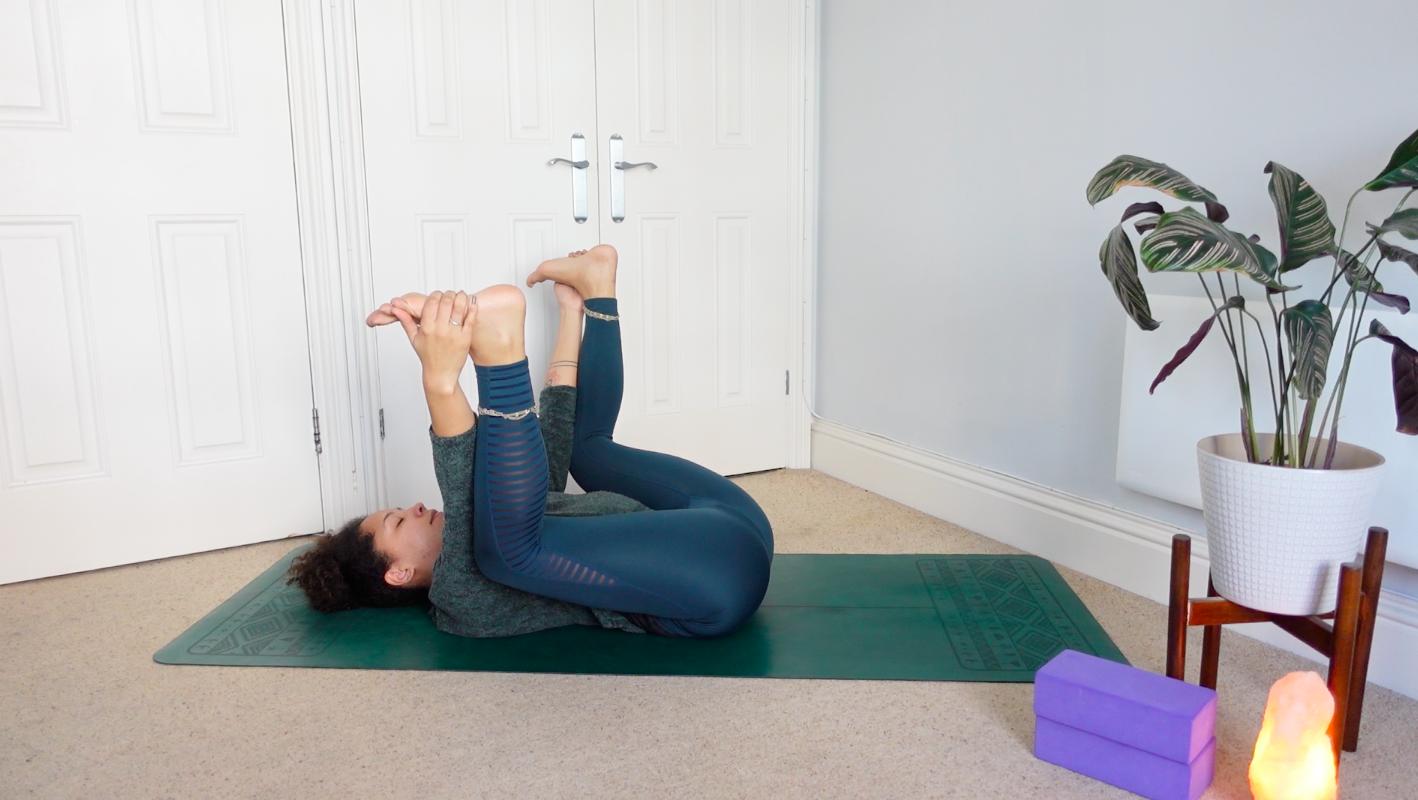
- Step 1: Lay on your back, bend your knees toward your armpits, and reach your hands to your feet.
- Step 2: Draw your feet out so they are positioned over your knees. Keep your chin in line with your forehead, shoulders heavy to the floor, and sacrum down.
Variations: Place a bolster or a cushion underneath the pelvis for extra, restorative support.
Benefits: This is a deep hip opener that can use arm strength, rather than letting gravity do the work. It releases and decompresses the sacroiliac joints (SI).
7. Supported Fish – Matsyasana
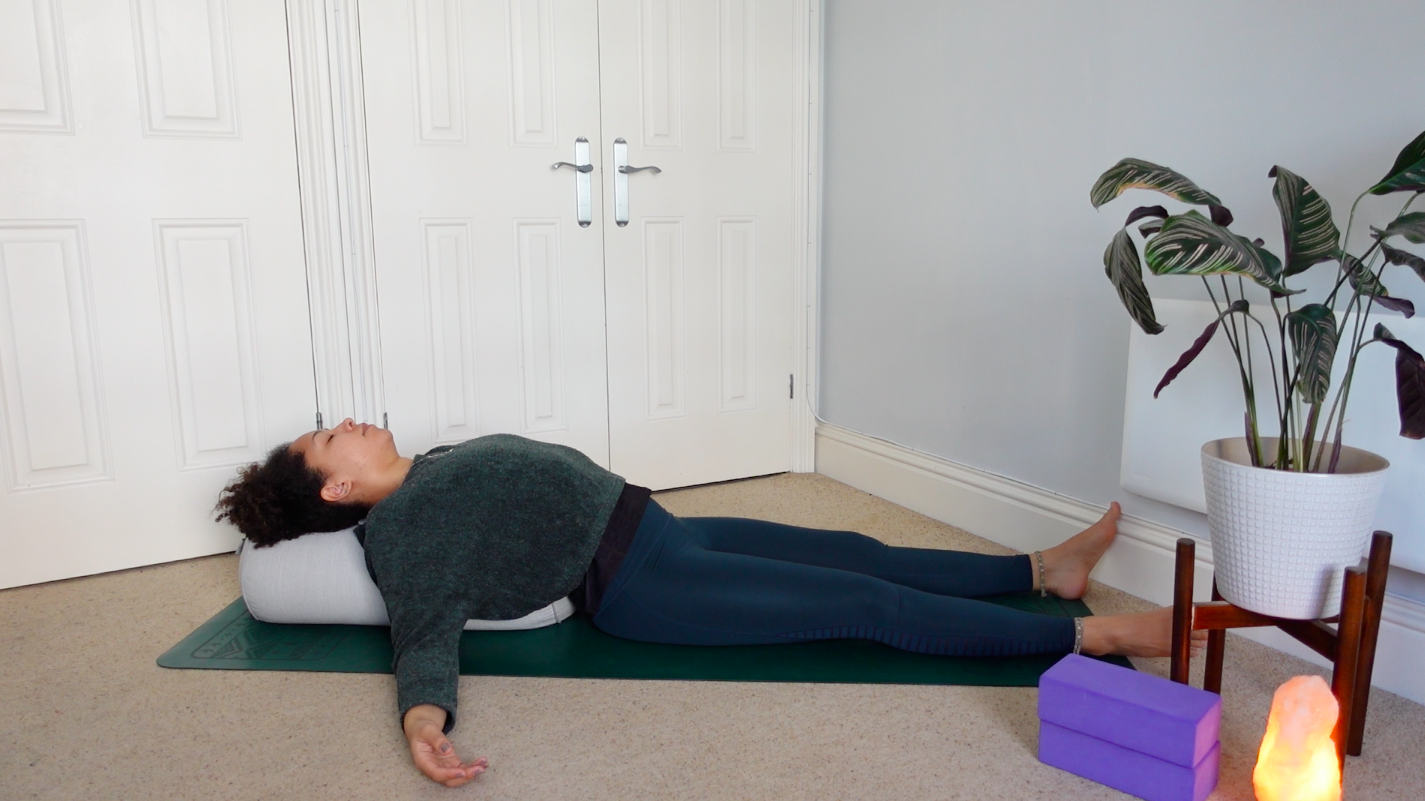
- Step 1: Grab two yoga blocks and put one vertically and one horizontally so that your mid back rests on the vertical block and you head rests on the horizontal block. You can place a folded blanket on top or use a bolster to make it softer.
- Step 2: Lay with your legs extended out straight, your upper body and head resting on your props. Let your arms fall out to the sides with your palms turned upwards.
- Step 3: Stay here for up to 10 minutes.
Variations: While laying on your back, place the soles of your feet together, knees bending out to the sides in a bound angle pose, allowing the hips and inner thighs to open up.
Benefits: This is a gentle restorative backbend. The goal is to relax and renew by opening the front body. Most of us spend so much time in the opposite position, bent over a keyboard, so allow yourself to relax and let go.
8. Reclined Cow Pose – Gomukhasana

- Step 1: Place one block in the highest position 6 inches from the bottom of your mat. Then place another block on the 2nd highest position 6 inches up the mat.
- Step 2: Place a bolster over the blocks to make a ramp for your legs. Place a blanket on the top half of your mat.
- Step 3: Lay down on the blanket with your buttocks close to the bottom of the bolster ramp.
- Step 4: Lengthen your left leg and cross it over to the right, placing your thigh on the bolster. Cross your right leg over your left thigh. Even out the weight in your hips.
- Step 5: Broaden your shoulders and rest your hands on your belly. Stay here for up to 5 minutes and switch sides.
Variations: You can do this seated and forward bend over your legs, helping to decompress the spine. Use blankets to support your hips and knees.
Benefits: Our hips are known as the storage depot for stress and anxiety. By sitting in this pose for several minutes while staying present on your breath and the release of deep hip muscles, your body will overcome negative effects.
9. Supported Bridge Pose – Setu Bandha Sarvangasana
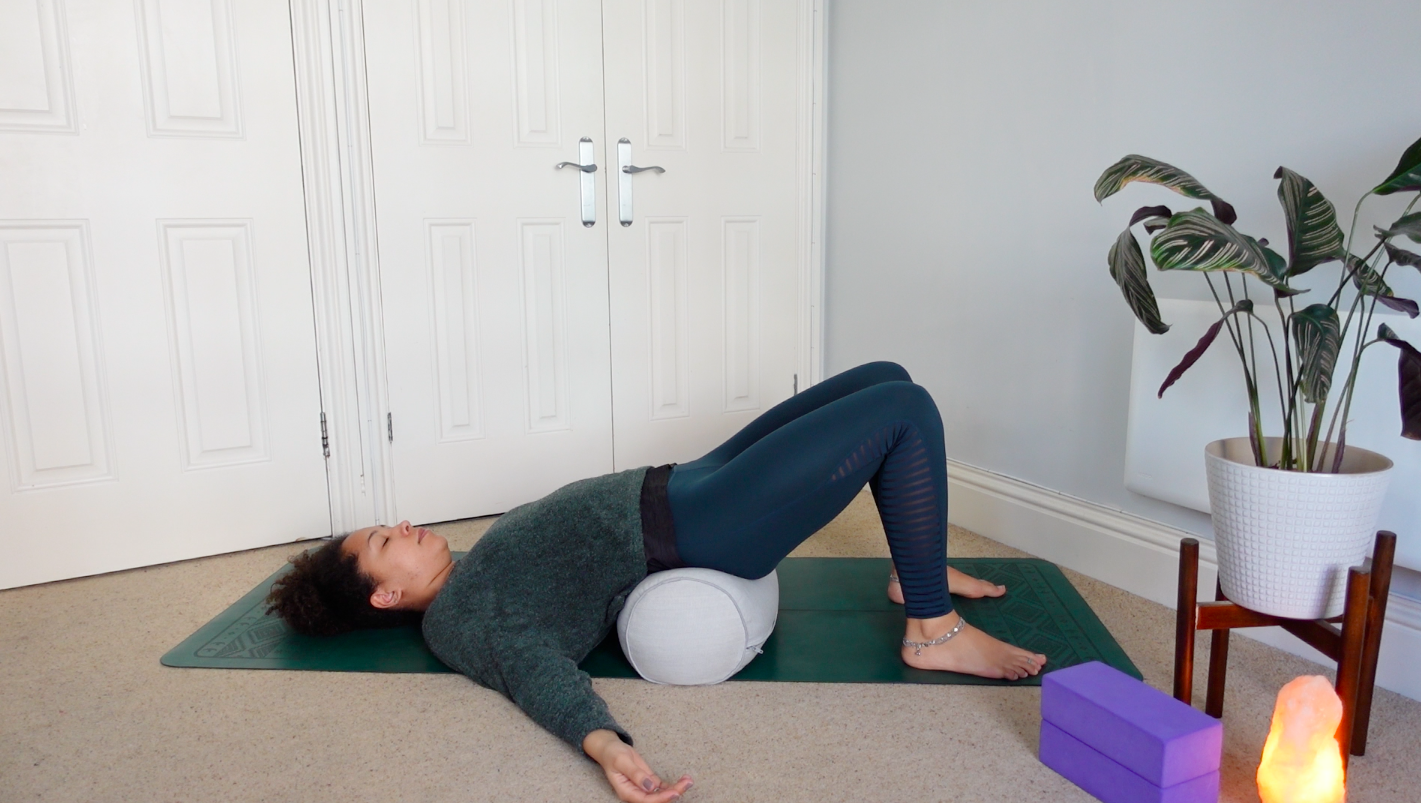
- Step 1: Lay down on your back and place rolled-up blankets or a bolster, across your mat, under your sacrum.
- Step 2: Keep your legs bent and feet grounded. Arms open alongside your body. Allow your hips and lower back to completely rest on the support.
- Step 3: Get cozy with a blanket and rest here for up to 10 minutes.
Variations: Place some rolled up blankets under your lower body with a bolster under your spine to fully release the weight of your body.
Benefits: As a backbend, it expands the front body which gently eases depression-like symptoms and stretches the hip flexors. It restores and replenishes your nervous system from the fight or flight response to rest and relax your entire body, switching on the parasympathetic nervous system.
10. Corpse Pose – Savasana
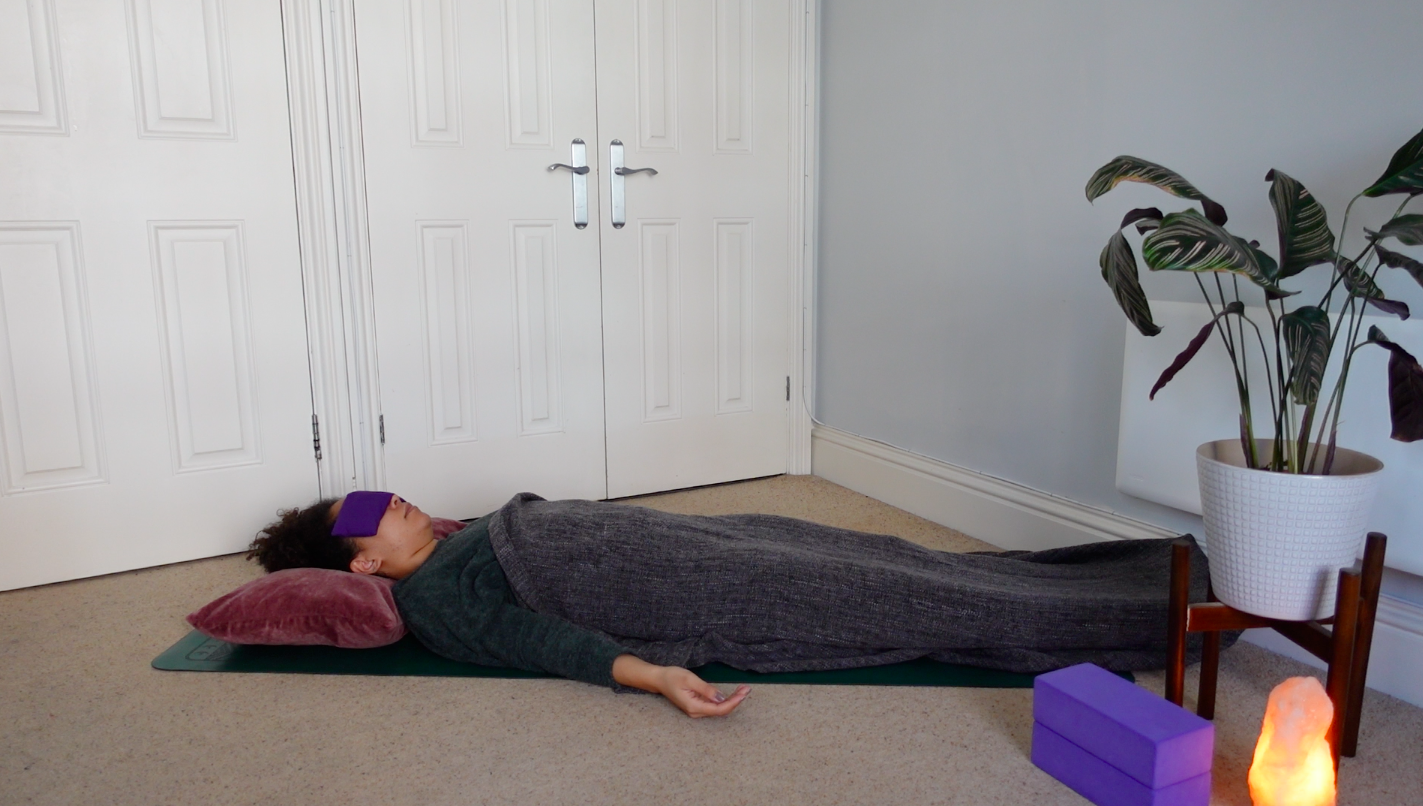
- Step 1: Lay down on your yoga mat with a cushion or a blanket under your head, a blanket on top of your body, and an eye pillow.
- Step 2: Place your legs long and feet hip-distance apart, to fully relax your muscles in your legs and feet.
- Step 3: Draw your shoulder blades together, so your shoulders can relax with palms facing upwards, relaxing your fingers.
- Step 4: Take a deep breath in and relax the entire body and mind as you exhale.
- Step 5: Stay here for up to 10 minutes in deep relaxation to let go and close your restorative practice.
Variations: Place a rolled blanket or bolster under your thighs, to ease any back pain.
Benefits: This position invites you to be still, calming the brain, relieving stress and mild depression. It also reduces headaches, while lowering blood pressure.
Next Steps
- Check out my YouTube channel and find some yoga classes that you can try out for yourself!
- Download my Yoga Calendars for an at-home practice, guided by me on YouTube!
- Join Uplifted for exclusive content that you can access right from the app. Take a deep dive into your practice with me this year!
YOU MIGHT ALSO LIKE
- What Is Somatic Yoga? Everything You Need To Know
- What is Kriya Yoga? The Philosophy and Practice
- Try This 30-Minute Yoga Nidra Script for Deep Sleep and Relaxation [+ Video]
- 9 Fierce Kundalini Yoga Poses to Light Your Inner Fire
- Tantra Yoga: The Most Misunderstood Path of Yoga
- Styles and Types of Yoga: The Complete Beginner’s Handbook
- What is Hatha Yoga? The Origins, Definition, Poses, & Practice
- What Is Trauma Informed Yoga And Should I Get Certified?
- How To Do High Lunge Pose
- 10 Yin Yoga Poses To Melt Away Stress (For Beginners)
- Amazing Benefits of Ashtanga Yoga That Your Studio Won’t Teach You
- Earthing Yoga 101: 6 Poses To Connect With The Earth (Root Chakra)
- Find A Gentle Yoga Sequence That Anyone Can Do
Learn how to do 11 of the most popular yoga poses correctly. Free video + PDF download.


