SLOW DOWN!!
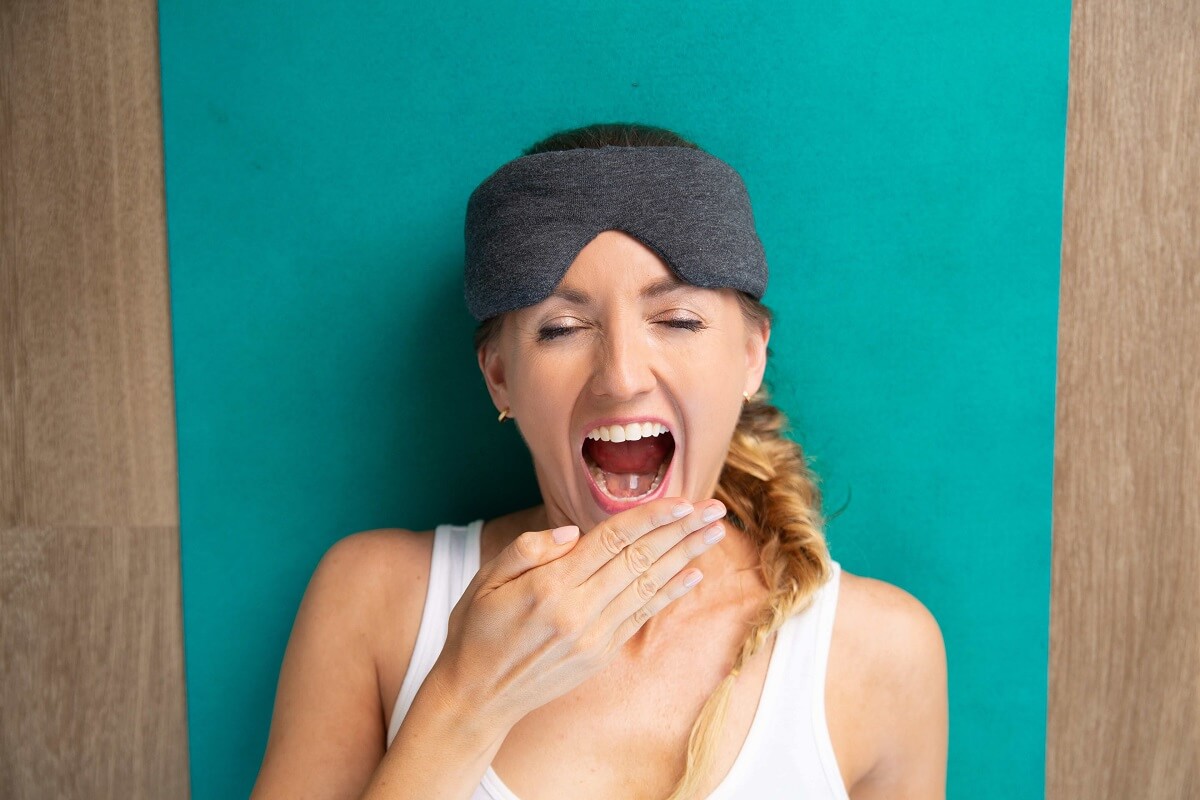
Beauty, if I can give you one cheat phrase to think about while you’re on cycle it is “SLOW DOWN” — both on and off the mat. Why?
Menstruation is a natural reset for your body. A built in “time out” that’s nature architected into your anatomy. A literal release to begin anew. When your menstrual cycle is nearing, your body begins to give you loving warning signs to start slowing down: aka premenstrual symptoms like headaches, breast tenderness, mood swings, fatigue, bloating and cramping. Instead of fighting it, use this time to start nurturing yourself. Take care of your body, both physically and emotionally. Coming to the yoga mat is the perfect way.
Remember: No two women’s cycles are the same and what sucks is you never know how PMS is going to hit you. Unpredictability is hard, and your mat is your sanctuary, giving you the tools to deal with anything that comes your way.
And you know what? That’s part of the beauty of being a woman, you’re so unique in your body and experience, yet you can still find camaraderie in shared experiences.
Yoga provides you more regularity in all aspects of your life, more relaxation, and reduces stress and pain. This is why it’s my go to for most things in life. Women suffering from PMS or other symptoms during their periods, deserve to take time for themselves. Schedule this in for yourself if you can! Track your cycle in your calendar and factor it into your planning. YOU deserve to take time for yourself to SLOW DOWN, relax and honor your body.
Your periods should remind you of the AMAZING, POWERFUL GODDESS that you are. Treat yourself like one.
Yoga and PMS: How it works
I don’t know about you but when I’m feeling crampy and tired the last thing I want to do is get on my mat (yes, even me!). So now it’s normal that you may be tempted to skip your practice during this time, but DON’T! Because your practice can help ease menstrual pain and serve as a springboard to connecting with your intuition, which is heightened during this time. I guarantee it will make you feel better. I mean, doesn’t it always?
Studies have shown that regular yoga practice improves menstrual symptoms and quality of life. Even just doing yoga twice a week shows improvements! Yoga therapists have observed that yogic breathing and restorative poses alleviate period pain or painful menstrual cramps associated with dysmenorrhea or endometriosis.
The Uplifted Perspective
Work with your body’s natural intelligence during your menstrual cycle. Your body is preparing to move energy down and shed the lining of your uterus, so you don’t want to perform poses or breathing techniques to move energy up. Adapt your practice to this time when you need extreme self care.
Your practice is part of your self care routine and it is there to nurture you. Prioritize ease; even if you only take a couple of mild stretches and then spend the rest of your practice in savasana with a heating pad on your belly. This is a time to BE (not DO), so let your practice reflect that. Surrender and relinquish control. Just like your uterine lining sheds and releases ask yourself, “what can I release and let go of?”.
Hot tip: I have an entire section dedicated to women’s health in my Uplifted membership that will help you during this part of your cycle.
Movements I love to sequence in a class for premenstrual syndrome:
- Gentle asana close to the ground (reclined twist, legs up the wall, or prone twists over a bolster)
- Poses that invite in a sense of release and surrender(child’s pose, wide leg forward fold with your hamstrings against the wall, savasana)
- Hip opening postures(bound angle, pigeon)
- Constructive rest (feet as wide as the mat, knees in to touch)
- Intuitive movement(let your body tell you what it needs, or lots of spiral movements)
Top Yoga Poses for PMS Symptoms (Bloating, Cramps, Low Energy)
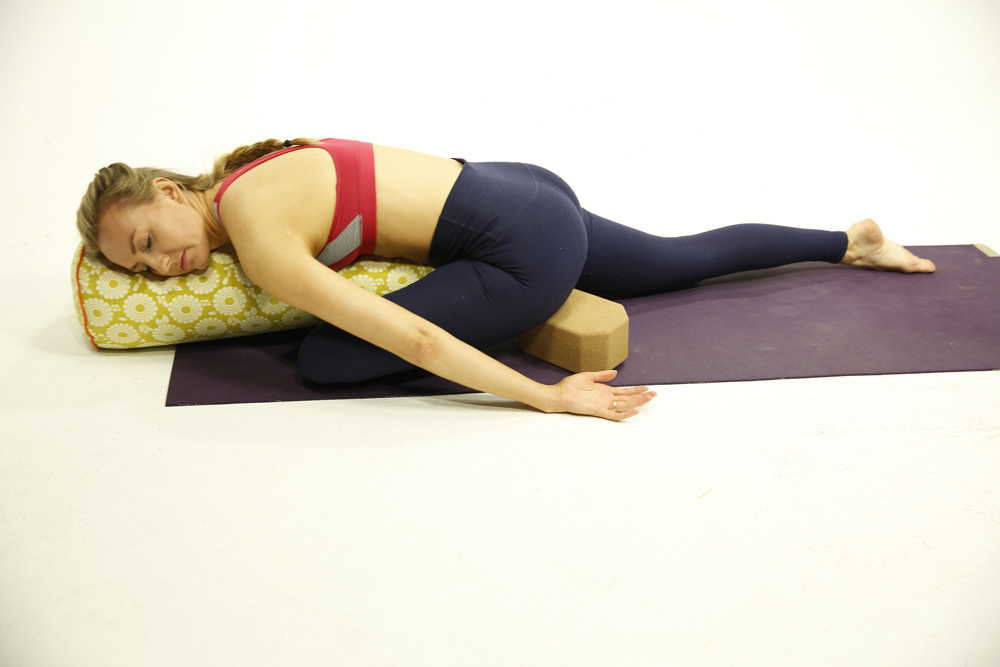
1. Child’s Pose (Balasana)
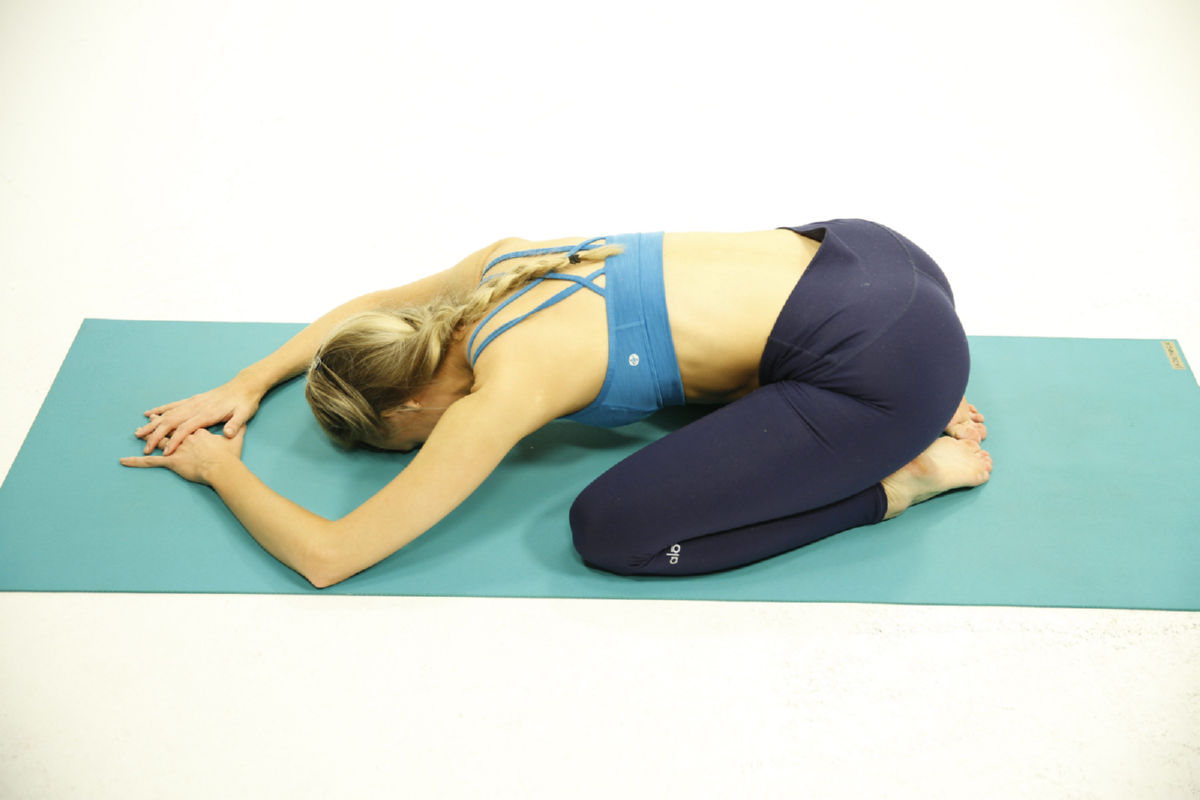
- Step 1: Start on hands and knees, take your hips back to your heels. Knees can be touching or as wide as the mat.
- Step 2: Rest the forehead to the mat, close your eyes.
- Step 3: Soften the upper body and extend the arms in front of you.
- Step 4: Simply inhale rise back to all fours to come out of the pose.
Variations: Hug a bolster to your chest to make this more restorative. Another great variation is to place a block under the seat between the heels or under the forehead. You can play with the position of your arms too!
Benefits: Child’s pose opens the back body and releases the glutes and hips. This pose takes attention inward, cooling the body and soothing the nervous system.
Pro Tips for Yoga Teachers:
- Have students ball their fists and place them just above the hips to massage the internal organs to relieve bloat or painful cramps. Or place a rolled up blanket over their thighs.
- Start out in a child’s pose to calm students’ and bring their attention inward before flowing. Ask them how they might want to adjust their practice based on the body scan they do in Child’s Pose? This will make them more mindful and present throughout the flow and they’ll get the most out of the experience! (Learn more about mindfulness in this blog post)
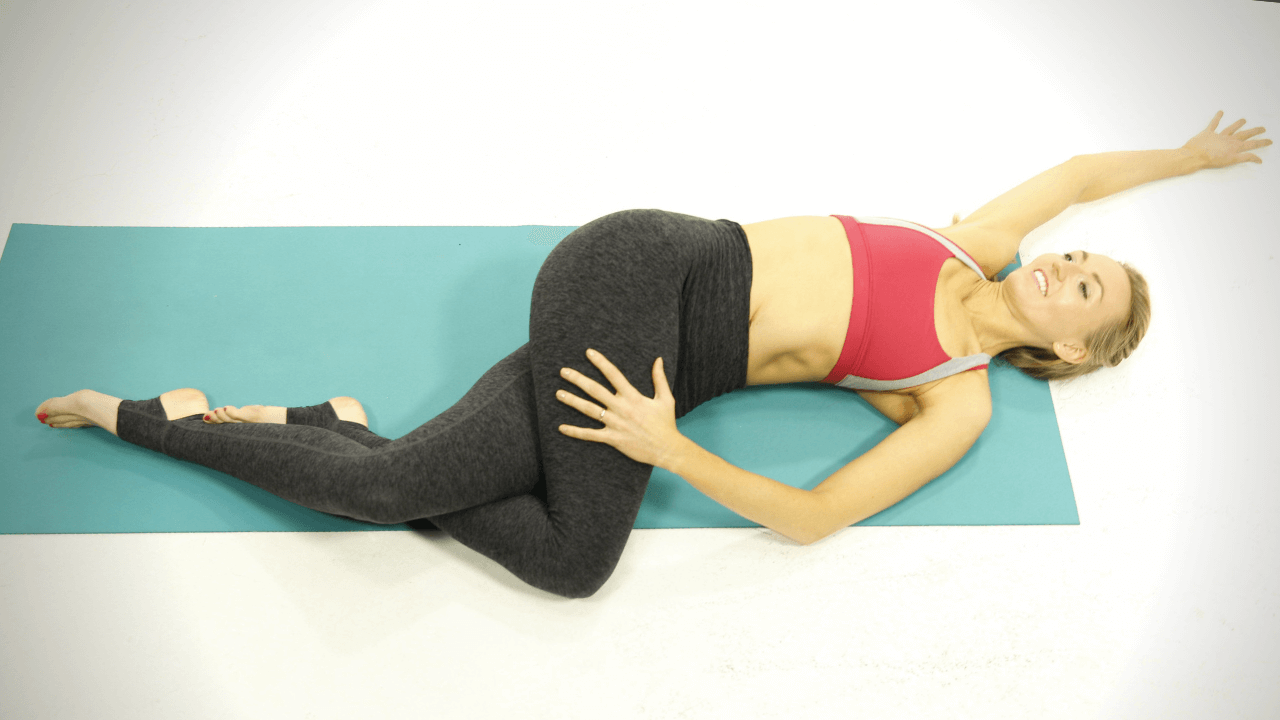
2. Cat Pose (Marjaryasana)
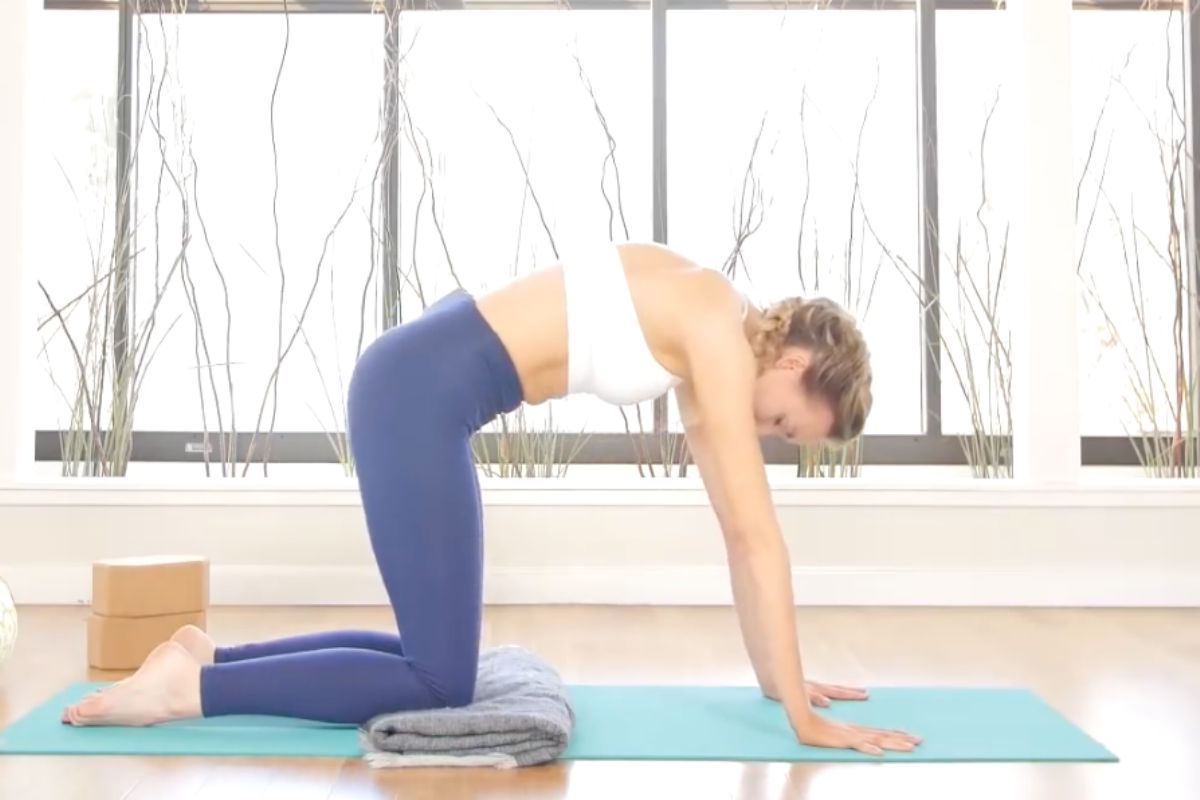
- Step 1: Start in a tabletop position(on all fours) with knees hip width apart and wrists under elbows, under shoulders.
- Step 2: On an exhale press palms into the mat, pull the navel towards the ceiling.
- Step 3: Let the head drop and upper body round as the tailbone lengthens down to the space between the knees.
- Step 4: Inhale bring the spine back to a neutral table top position.
Variations: This pose can be done on hands and knees or a seated position. You can pad the hands or knees if you need to with a blanket or come to the forearms.
Benefits: This move in conjunction with cow pose is great for relieving tension and increases circulation in the pelvis, decreasing the pain from period cramps.
Pro Tips for Yoga Teachers:
- Play with movement: curl the toes under and push hands harder into the mat to take the seat closer to the heels, round the back and intensifying the stretch in the lower spine.
- When doing this in conjunction with a PMS yoga class, sequence this in again the end of the flow instead of the beginning to cool down and calm the nervous system.
3. Cow Pose (Bitilasana)

- Step 1: From all fours with knees hip width apart and wrists under elbows, under shoulders.
- Step 2: On an inhale open across the chest move the collarbones back in space. Keep the belly engaged as it slightly drops down, draw the shoulder blades down the spine, gaze forward.
- Step 3: Gently stretch along the front side of the body as the heart yearns forward.
- Step 4: Exhale bringing the spine back to a neutral table top position.
Variations: Do this sitting up in a chair if it’s too hard on the knees or wrists. You can also pad those areas with blankets or blocks, or turn the hands to fists.
Benefits: Combined with the former these poses help the digestive system move better which can create pain relief from bloating or constipation during menses.
Pro Tips for Yoga Teachers:
- Roll the hips in gentle circles or move them back and forth to open them further and release tension in the side body. Remember to keep the core engaged to protect the low back.
- Make this a juicy flow with cat pose by allowing the head and neck to release — add head and neck circles with slow deep breaths.
4. Bound Angle (Baddha Konasana)
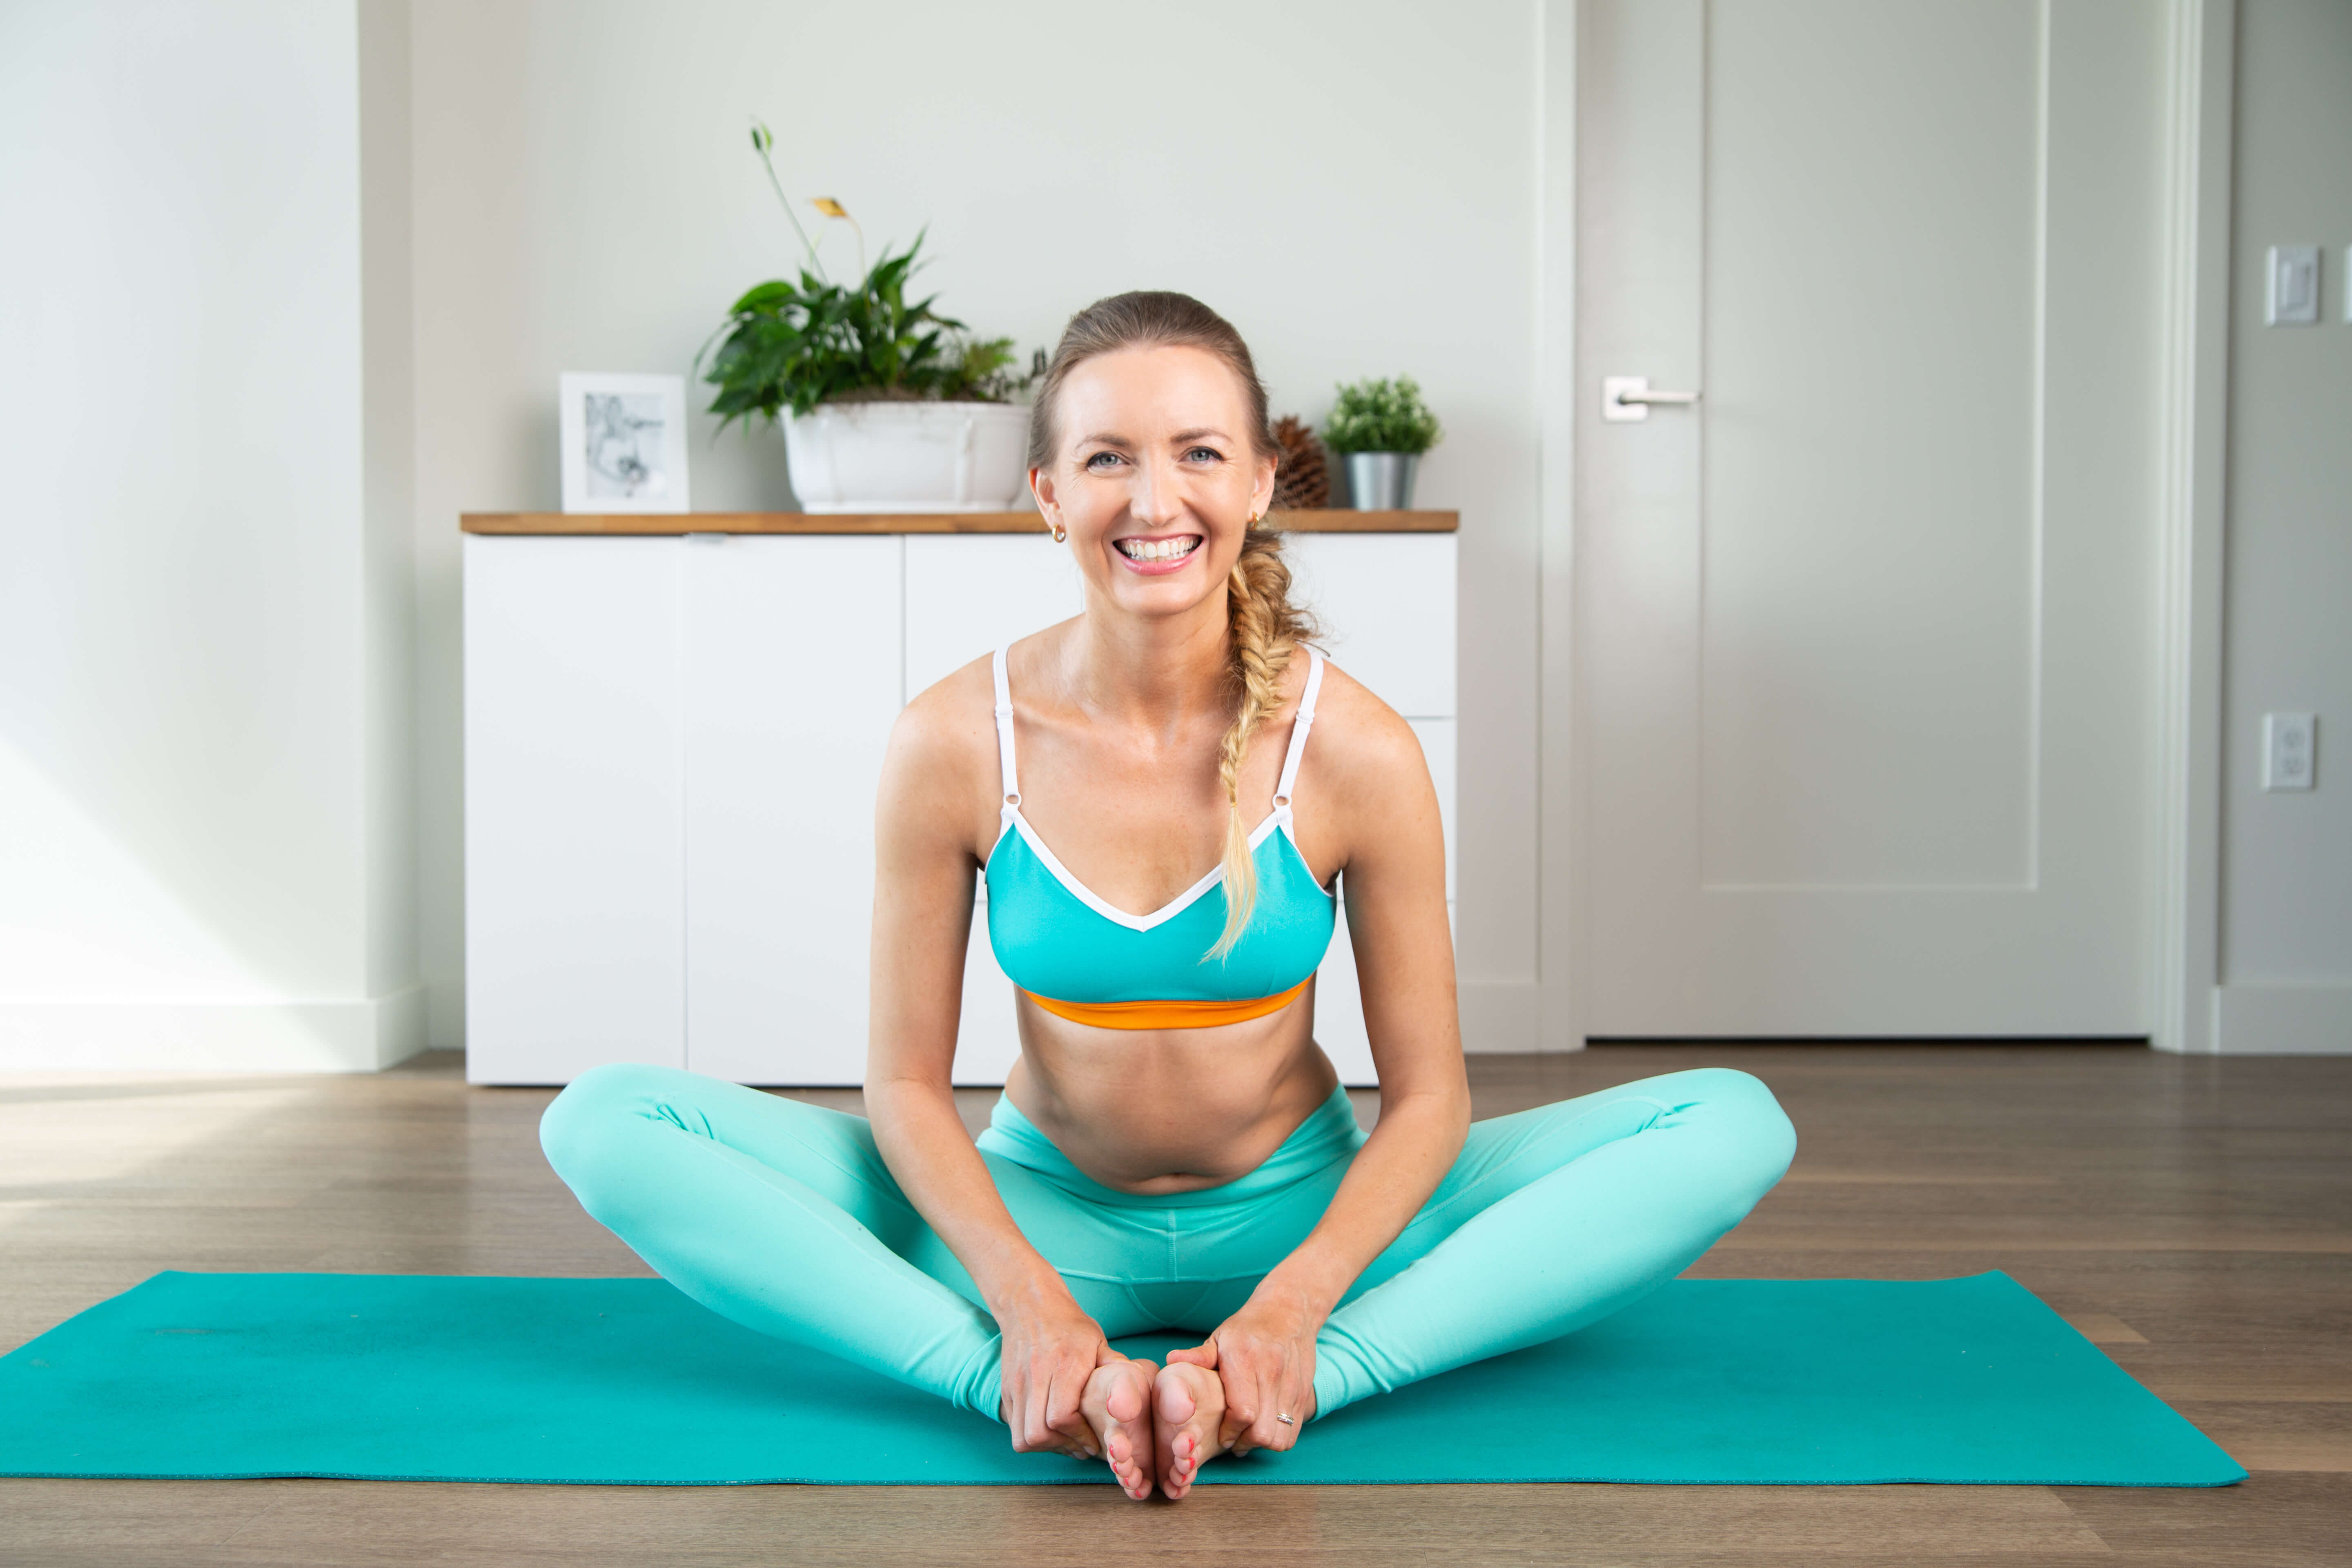
- Step 1: From Dandasana, legs extended: bring the soles of your feet to touch create a diamond shape.
- Step 2: Root the sits bones down, hold the soles of the feet as you inhale, get tall.
- Step 3: Exhale as you fold forward over the legs, keep the spine long. Hold for several breaths and round: rest.
- Step 4: Breathe in as you slowly rise up to sit tall. Take the legs back out in front of you.
Variations: Knees up high? Place blocks or blankets underneath them. Make this more restorative by reclining back on a bolster or some cushions.
Benefits: This hip opener relieves menstrual cramps and low back pain in addition to stimulating the gut to help when you feel bloated. Bound angle is one of my favorite yoga poses for when experiencing menstrual pain.
Pro Tips for Yoga Teachers:
- Gently rock side to side to massage the abdominal organs even further.
- Have students use a block or their thumbs to press into the third eye in this posture to invite awareness and pull energy inward. The block also makes the pose more comfortable to stay in for a longer time (and allows the low back to release).
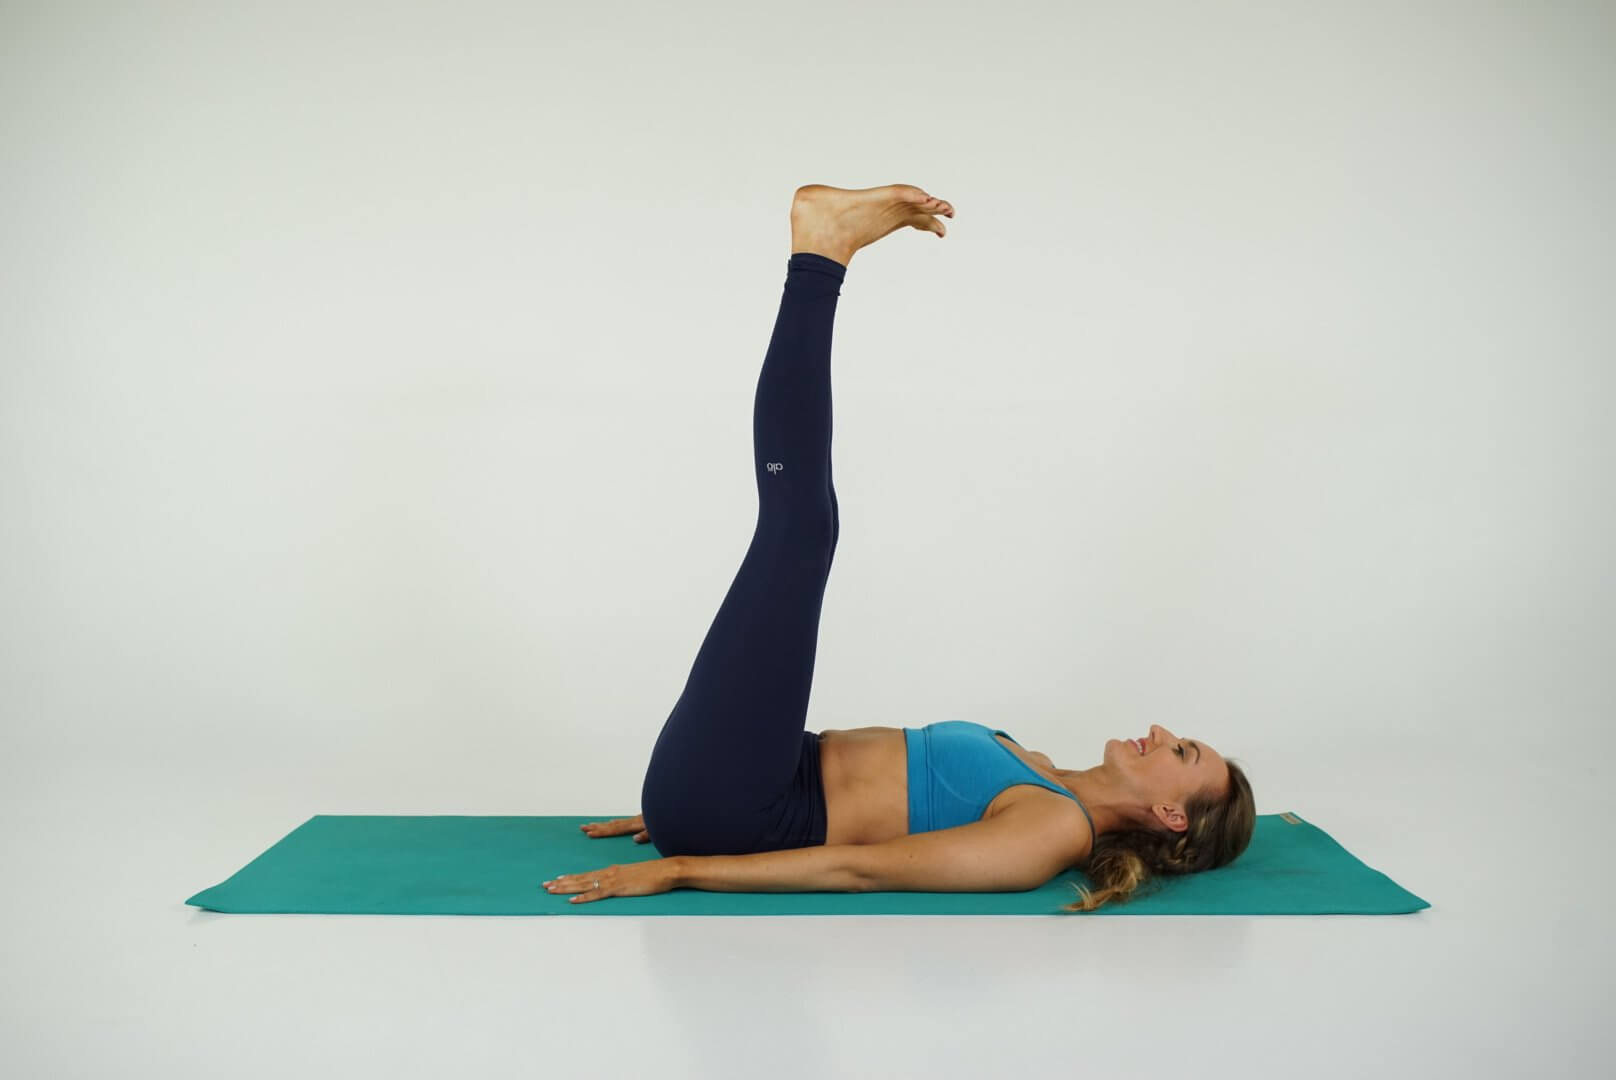
5. Reclining Twist (Supta Matsyendrasana)
- Step 1: Lay flat on your back. Pull your right leg into your chest. Breathe in.
- Step 2: As you breathe out gently let the knee cross the body and float to the ground on the opposite side.
- Step 3: You can gently place the opposite hand of the leg onto the knee, keep the shoulders to the mat and the other arm extended to the side. Deep breaths.
- Step 4: Inhale as you untwist the body, hug that knee back to the chest.
- Step 5: Exhale release the leg long laying back completely flat.
- Step 6: Repeat with the left knee.
Variations: Place a block or pillow under the knee if it doesn’t meet the ground. Play with the position of your arm to see what is most comfortable. Or if you don’t like having one leg extended you can always bring the knees together and twist them both to one side, then the other.
Benefits: Twists help with stagnant energy in the body. These yoga poses will increase blood flow in addition to stretching the abdominal muscles, hip and spinal muscles.
Pro Tips for Yoga Teachers:
- Make this a really beautiful shoulder opener by sliding the extended arm slowly up and down as if you were making a snow angel.
- If with a private client or small group: place a cushion between or under the bent knees and add an arm pull assist (I teach this and other myofascial hands on assists in 300-Hour YTT). It will make your student feel amazing and well-cared for.
6. Pigeon Pose (Eka Pada Rajakapotasana)
- Step 1: From an all fours position(hands and knees), carry your right leg to the front of the mat. Place the shin to the mat across the front of your body. Note: The shin does not need to be a perfect right angle or parallel to the mat. Play with the placement, bring it closer or further away from your body, flex and relax the foot, to see what feels best in YOUR OWN body.
- Step 2: Send the back leg out in a straight line behind you; make sure it stays in line with the hip.
- Step 3: Square the hips to make sure your weight is evenly distributed. Inhale lengthen through the spine and exhale as you bend forward over the front leg. Great opportunity for a few moments of deep breathes here.
- Step 4: Inhale as you press through the hands to rise and gently roll onto the right hip to bring the left leg back around to meet the right and end in an easy seat.
- Step 5: Repeat on the other side.
Variations: Use a block or bolster under the front side of your body if going to the floor feels uncomfortable. Place a folded blanket under the front thigh if there is a lot of space between the hip and the floor. If this version doesn’t work for you at all then try the ankle to knee version on your back.
Benefits: Pigeon pose provides a deep physical stretch through the lower half of your body. When you do pigeon you stretch through all the major muscles of the hips and upper legs.
Pigeon is also nice for balancing the second chakra. When the second chakra is balanced you can embrace change more readily and accept the fluidity of life. As the ultimate juggler of life, you already know things change at the drop of a hat. Don’t you want to be able to flow through those changes with ease? Learn more about the importance of the second chakra in this article.
Pro Tips for Yoga Teachers:
- Be mindful of transitioning your students in and out of this posture. Give your students plenty of time to move slowly to prevent injury.
- Hold space for your students here. Remind them that emotional release is normal in this position. If tears come up, that’s okay. Take a moment in easy seat to breathe and reflect before switching sides.
- Remind everyone they can always switch to Ankle to Knee on their back for a stretch with the same benefits.
7. Bridge Pose (Setu Bandha Sarvangasana)
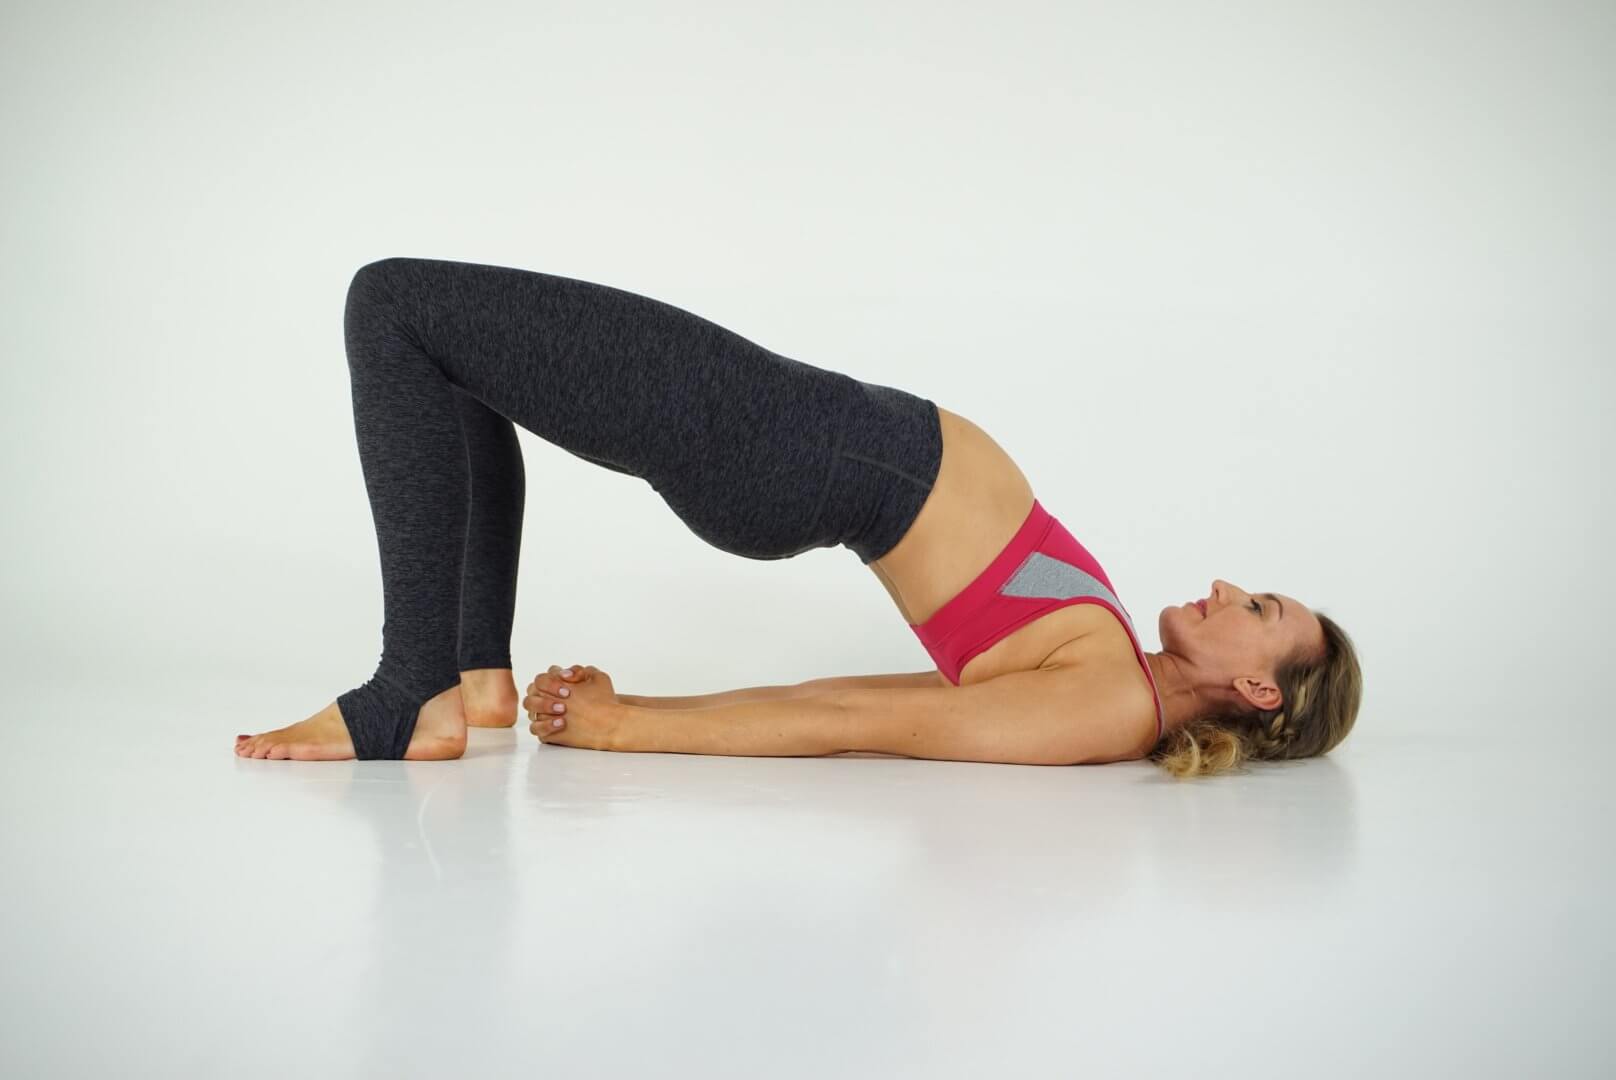
- Step 1: Start on your back, bring the soles of your feet hip width apart flat on the mat, ankles under knees. Keep your arms by your sides.
- Step 2: Breathe in as you squeeze through the glutes to lift the hips up. Scooch the shoulders together, interlace the hands underneath you.
- Step 3: Exhale here and hold for several breaths. Squeeze the inner thighs together. When you are ready to come out slowly release the hands and exhale as you send the hips back to the ground.
Variations: You can always keep the hands alongside the body and press the palms into the floor or place a block under the hips for extra support.
Benefits: Bridge stretches the front body gently and opens it, strengthens the back body, releases tension and leads to reduced severity of period cramps and back pain.
Pro Tips for Yoga Teachers:
- Let students support their low back with their hands or a block in order to relax deeper into this posture making it less active. Remember: you want to SLOW DOWN when it comes to premenstrual symptoms and period pain.
- Bridge opens the heart. Invite your students to let loving energy flow through them in this posture. Release any bitterness they may have and surrender to joy and love. Ask what they can invite in for the new cycle to come. Add in heart chakra affirmations for them to choose from.
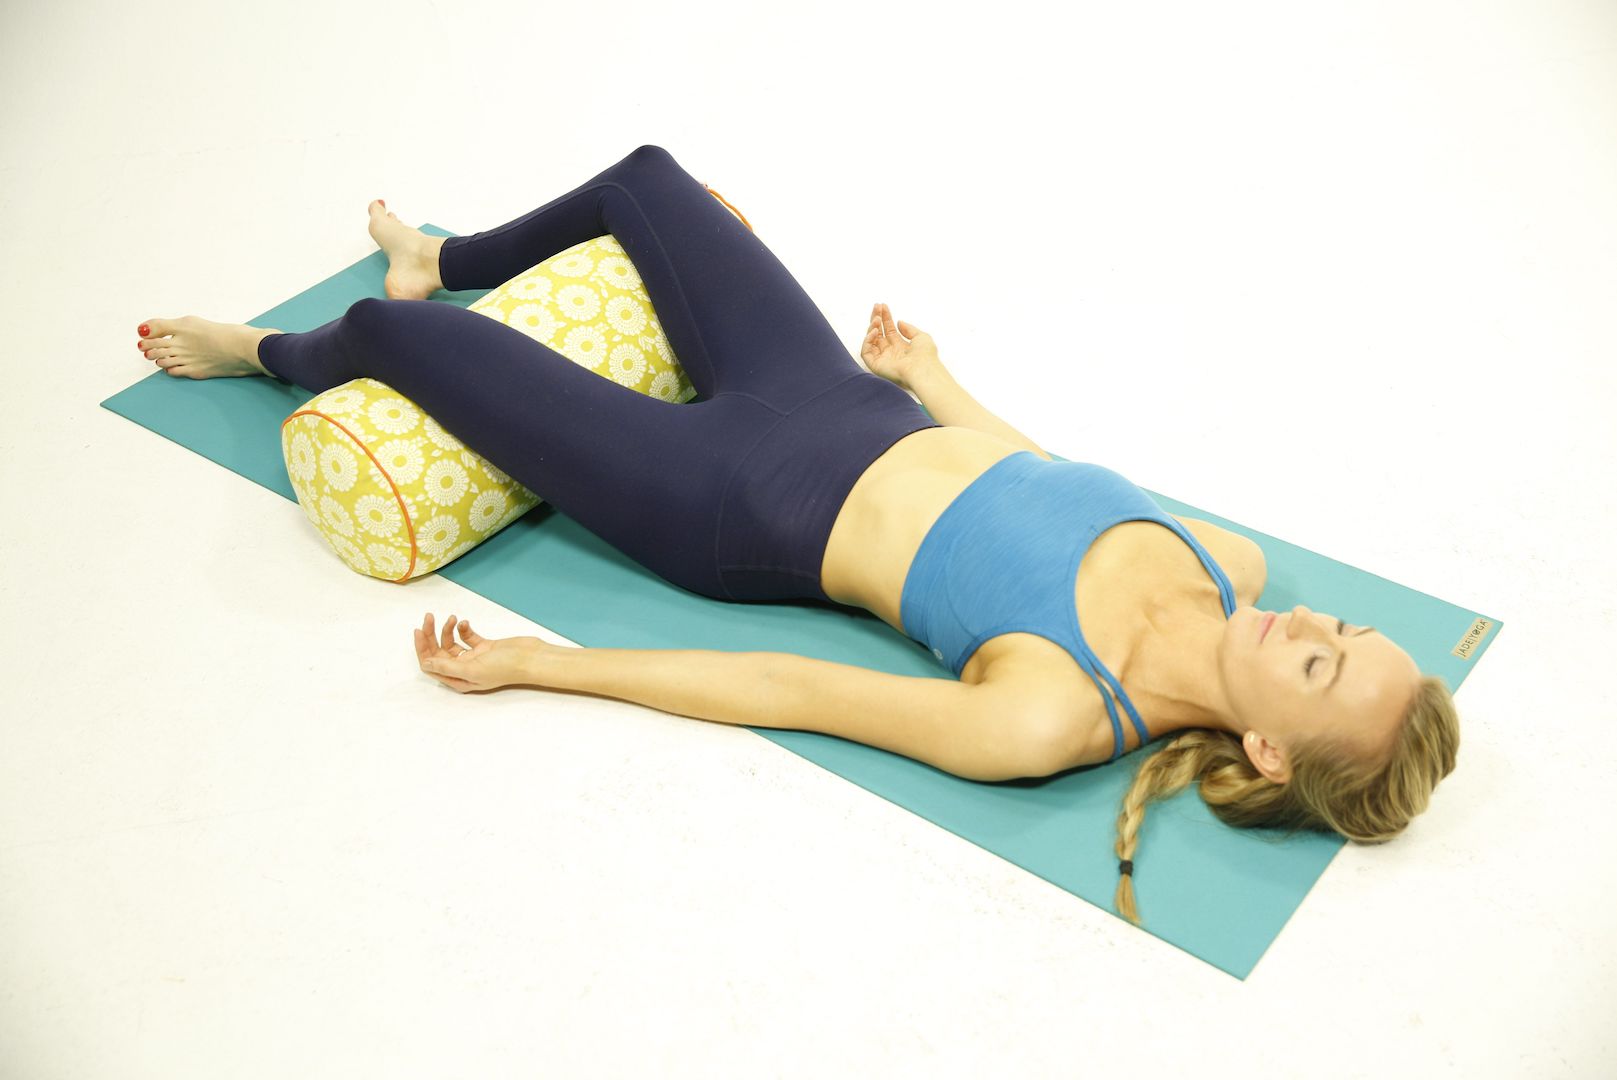
8. Legs Up the Wall (Viparita Karani)
- Step 1: From the ground, bring the base of your seat to a wall.
- Step 2: Carefully lay the body back on your yoga mat and extend the legs up against the wall towards the ceiling. Breathe deeply.
- Step 3: Slowly bring your legs down from the wall, roll to the side and push yourself back to a seated position.
Variations: You can do this pose in bed against your headboard or even against the back of your couch while watching TV!
Benefits: Legs up the wall affects the nervous system and can instantly calm you, reduce stress and anxiety, and improve mood. It also helps to increase blood flow and circulation making this pose a reproductive health power pose.
Pro Tips for Yoga Teachers:
- Place a block or blanket under the hips to provide a more comfort.
- Use the Yoni Mudra in this position to calm the mind, provide mental clarity, along with connection with your life force energy and inner consciousness.
9. Corpse Pose (Savasana)
- Step 1: Lie flat on your back. Feet as wide as the mat, arms by your sides. Close your eyes and breathe.
- Step 2: To release the pose take small movements in the hands and feet then the rest of the body.
Variations: To help ease period pain make this as comfortable as possible. Put a bolster under the knees, Try placing a heating pad on the lower abdomen to ease period cramps.
Benefits: This is an awesome yoga pose to get all of those internal organs, even the reproductive organs, to relax, especially when you have major menstrual symptoms. Corpse pose puts us in just the right position to aid in full body relaxation, releasing tension, which you need more than ever during your period.
Pro Tips for Yoga Teachers:
- Start class with a savasana instead of ending with one. Your menstrual cycle is a time of rest so start there and if you want to move on do so, if not then just stay here.
- Let your students be here for a while or turn this into a Yoga Nidra practice. Because, again, this is the time to SLOW DOWN. If you aren’t sure where to start I have a Yoga Nidra course that is life-changing.
I hope this helped! But if you need more help with self care(cuz let’s face it, sometimes we can’t even figure out what self care for ourselves means) then my Yoga for Self Mastery course is your perfect solution.
Sending you so much love!
Next Steps
- Check out my YouTube channel and find some yoga classes that you can try out for yourself!
- Explore my knowledge hub for How to Become a Yoga Teacher
- Attend a 200 YTT info session to see what else you’ll learn in my online teacher training.
Find more yoga sequences by benefit.
YOU MIGHT ALSO LIKE
- How to Teach Somatic Yoga: A Practical Guide for Instructors
- The Best Somatic Exercises for Grief: Find Healing Through Movement
- The Best Somatic Exercises for Anger Management and Emotional Release
- Yoga to Reconnect with Yourself: 5 Essential Practices for Inner Peace
- Yoga for Connection: 10 Poses to Deepen Relationships and Bonding
- Yoga To Connect With Your Body For Mind-Body Harmony
- Yoga to Connect with Feminine Energy: 5 Transformative Practices
- Yoga to Connect with Your Heart: 3 Poses for Emotional Balance
- Myofascial Release Yoga: Unlock Tension and Improve Flexibility
- 6 Hip Openers For Emotional Release
- Office Yoga: 10 Poses You Can Do Right Now
- Ayurveda Food Combining: The Key to Balanced Digestion
- Yoga For Grief: 8 Yoga Poses For Support
- Yoga for Vata Dosha: Practice Poses and Tips
- Yoga for Pitta Dosha: Practice Poses and Tips
Learn how to do 11 of the most popular yoga poses correctly. Free video + PDF download.


