Trying to get pregnant is not always the smoothest journey.
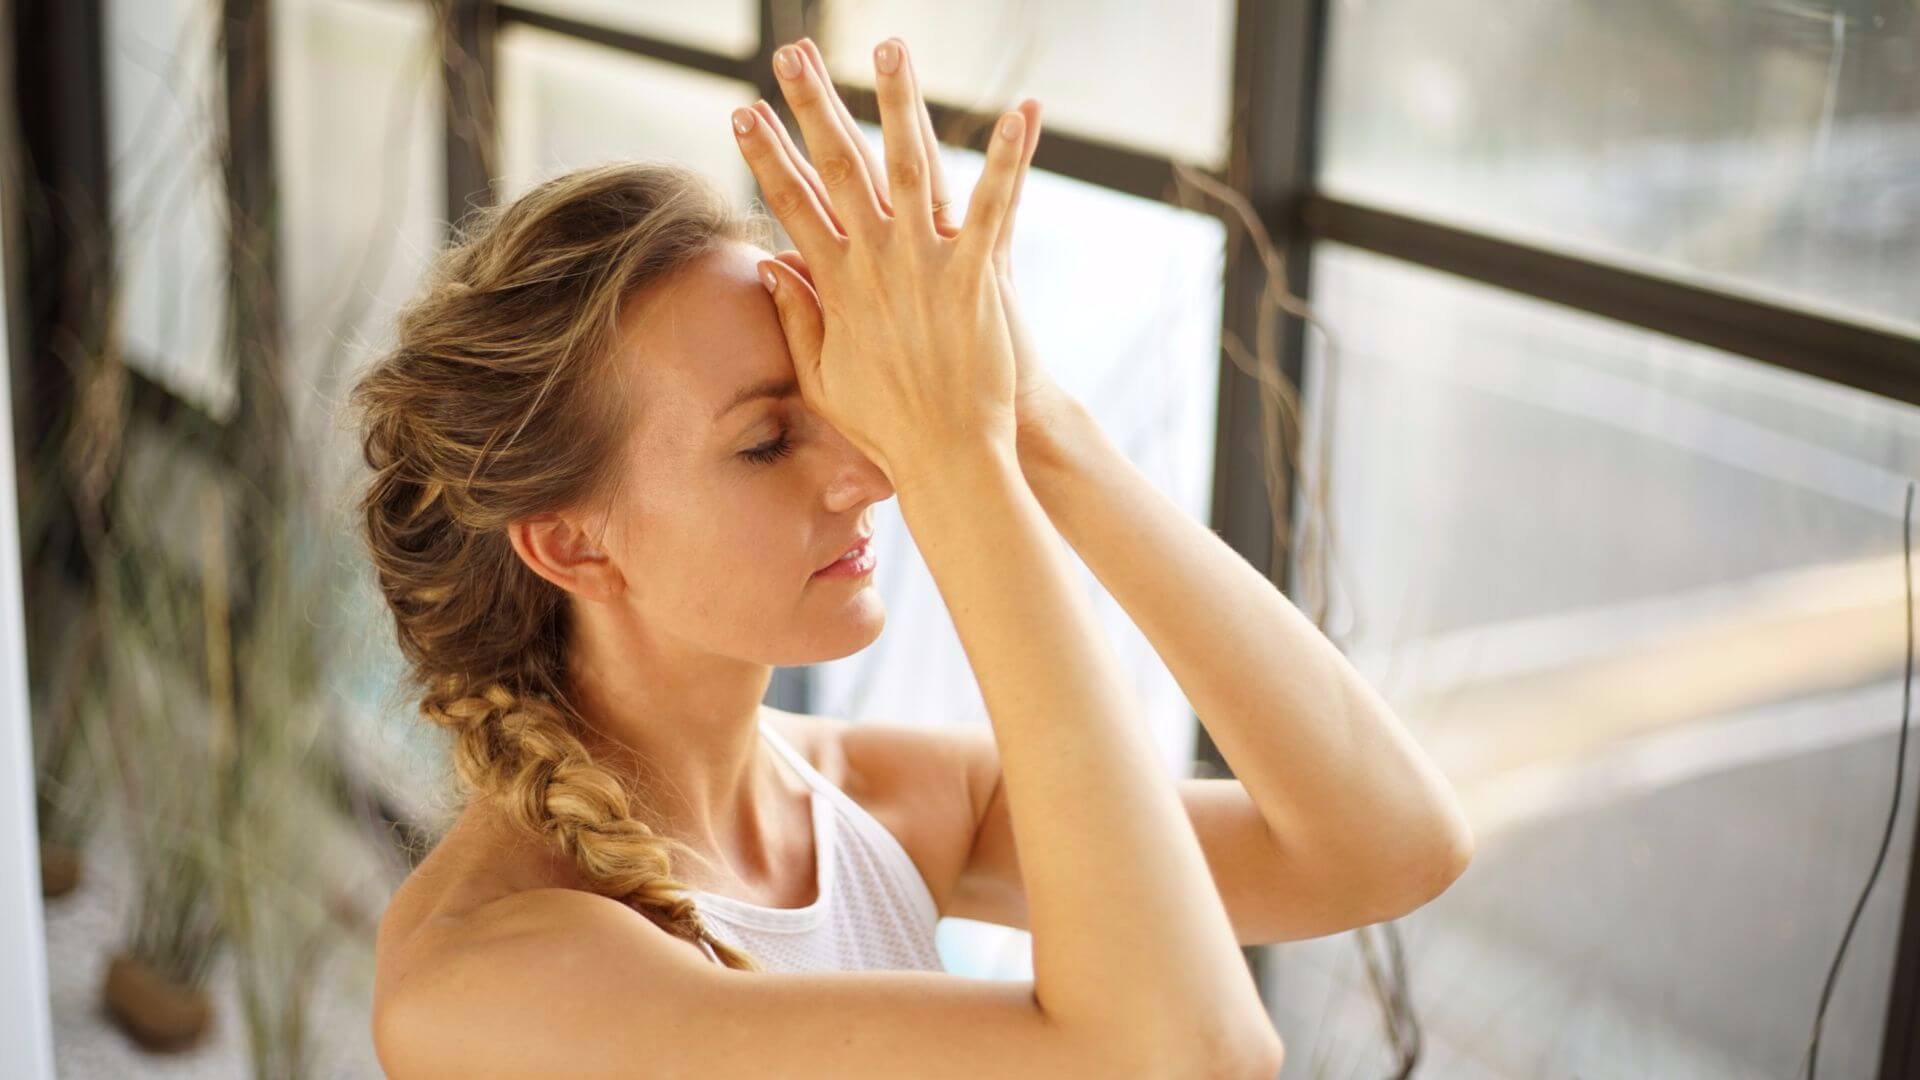
If you’ve been trying to conceive for some time and are having trouble, it’s normal to feel stressed or upset. Assisted reproductive technology and fertility treatments can be draining on your time and energy.
It’s in these challenging moments that you need your yoga practice more than ever. And although yoga won’t get you pregnant, you can allow it to support you.
Yoga can improve your physical and mental health, stimulate your internal organs (including reproductive organs), clear stagnant energy and aid you in staying positive as you move through your journey to achieve a healthy pregnancy.
Best Types of Yoga for Fertility
Science says: There are many reasons a couple could be having fertility difficulties. According to studies, one reason might be weight. Obesity not only affects fertility in women but it also affects a man’s fertility. Yoga is a great practice to begin your health journey if you struggle in this area. Another big factor is stress levels. Mental stress and anxiety can affect your hormone levels. In fact, more than 50 percent of women and 30 percent of men experiencing infertility display symptoms of depression. Yoga and mindfulness are great practices to reduce stress levels and balance your hormones. Actually, it’s possible that yoga can even increase odds of success with assisted reproduction technology outcomes and fertility treatments..
The Uplifted Perspective: Fertility has a yin quality to it. You must be receptive. It’s not something you can achieve; it’s something you need to make space to happen. Let your mat be a refuge; instead of trying to manifest fertility on your mat, use your mat time as a place to refocus totally on you. Focus on how brave you are to want to bring new life into the world, how strong you are to persevere despite health challenges, because YOU ARE!
It’s not just about the physical yoga poses. You work to learn to surrender to the moment, celebrate yourself, and reaffirm your connection to your body. Thank your body for all it CAN and does do for you, digesting your food, etc. Trust your body, even if you feel betrayed right now. If you are not sure where to begin with this, I have an entire section for women’s health in my Uplifted membership to get you started.
Also note: Fertility isn’t just about trying to conceive a child. Maybe you want to invite in an idea for a project you’re working on, you’re creatively stuck or blocked. Fertility and creative energies reside in the second chakra. Water is the element of the second chakra, so focus on fluid movements and open up the inner thighs and hips. Try my 18 Days of Abundance or Chakra Healing courses to help you in this area.
Whether you just started practicing yoga or you’ve been teaching yoga for years and want to find fertility yoga classes, here are my favorite fertility classes to start your morning with, come practice with me!:
Movements I love to add in a fertility yoga practice(for you to use whether you are a yoga student or yoga teacher):
- Fluid movements(windshield wiper the legs, rocking side to side, hip rolls)
- Movements of surrender(child’s pose, pigeon, savasana)
- Postures bringing awareness to the reproductive organs(bound angle, bridge)
- Intuitive movement(let your body tell you what it needs)
If you aren’t sure how to guide intuitive movement this class will be great for you: Personal Practice Series: Intuitive Movement – 22 min | Uplifted Yoga
Here are some specific poses I love to help you on your fertility journey:
Top Poses Yoga for Fertility
1. Warrior II (Virabhadrasana II)
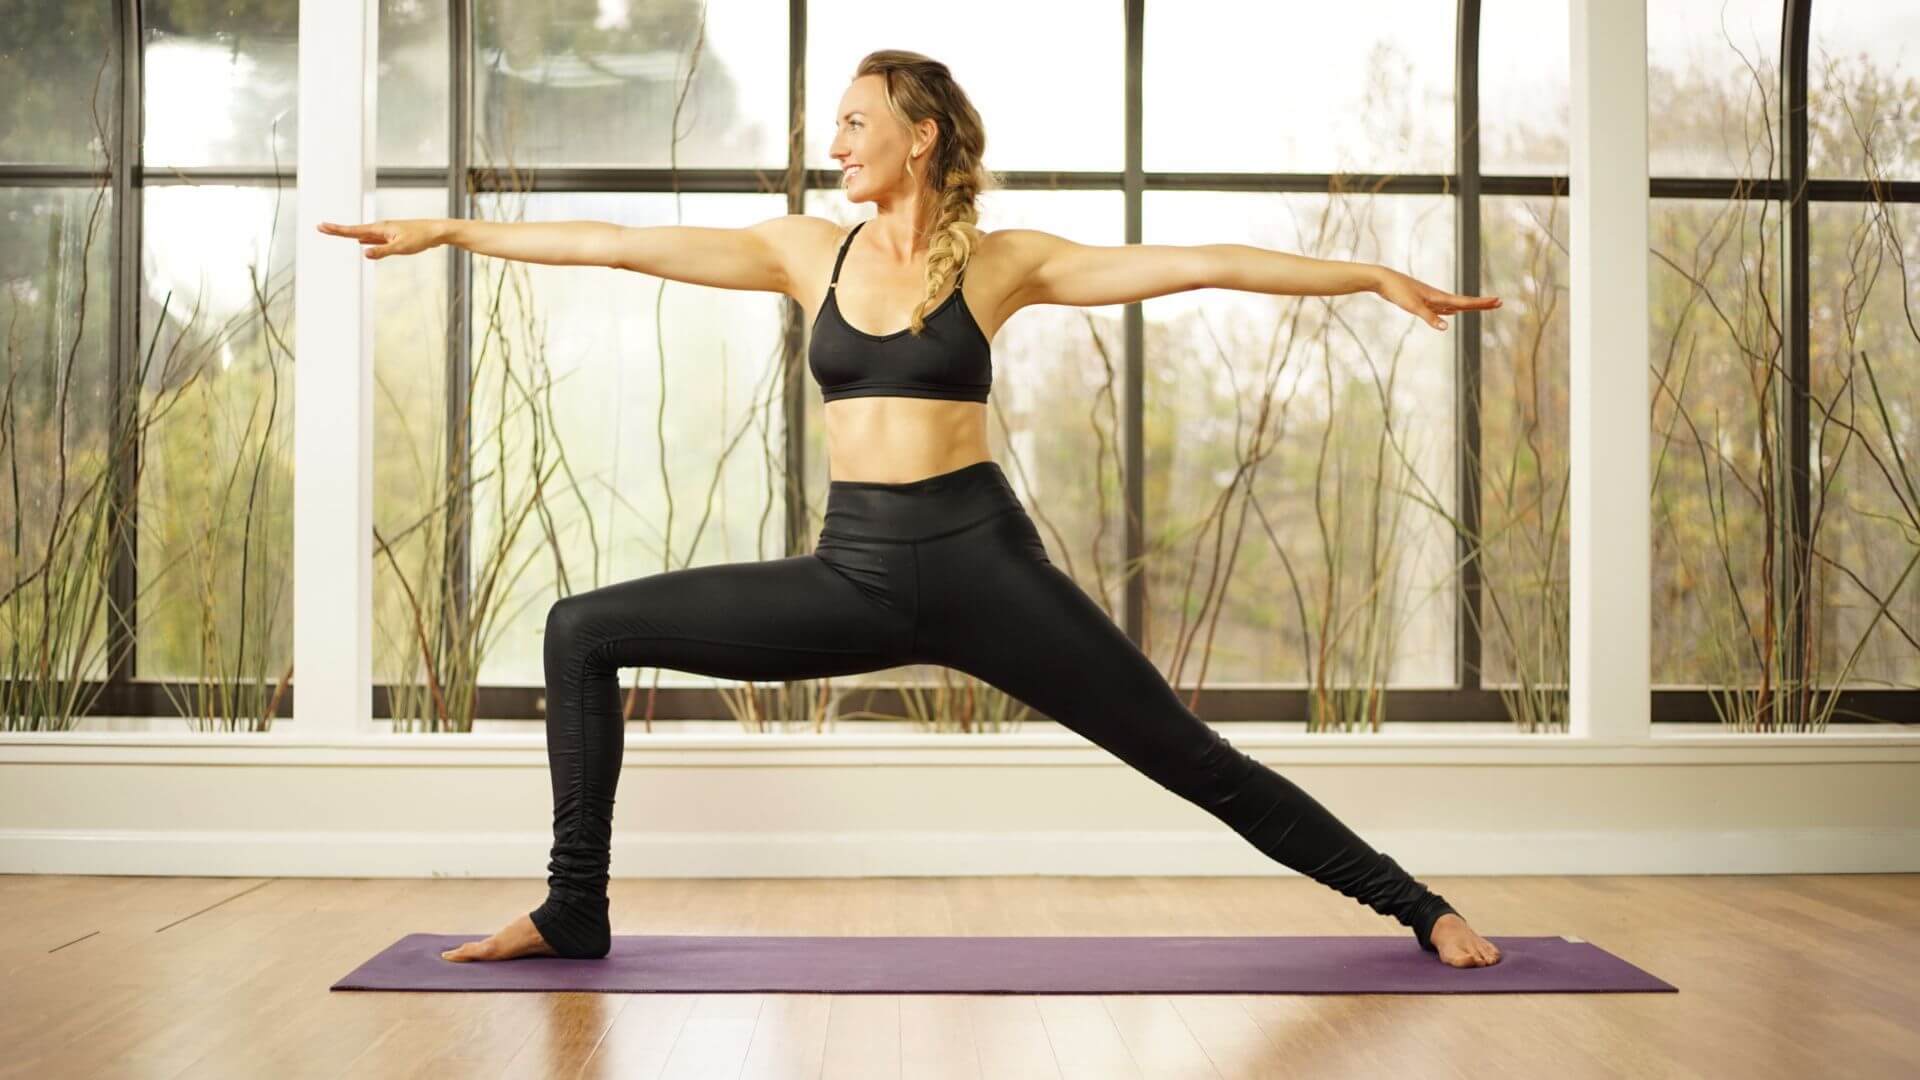
- Step 1: Begin in Mountain pose (Tadasana) at top of mat. Exhale, take a big step back with your left foot, bring hands to hips.
- Step 2: With your front foot pointed toward the top of the mat and the back foot parallel to the back edge of the mat align your heel of front foot with arch of back foot
- Step 3: Bend your front knee, stack knee over ankle, thigh parallel to floor, rotated externally. Lengthen your back thigh, engage your muscles, ground through the outer edge of the back foot.
- Step 4: Hips are square to the side edge of mat, abs are firm, in and up, knit front ribs to find length in the front, sides and back of torso.
- Step 5: Shoulders stacked over hips, inhale arms up over head, exhale arms parallel to floor, inline with shoulders, palms face down. Gentle Gaze over the front middle finger. Shoulder blades yearn down the back.
- Step 6: To come out of the pose, heal toe your back foot in to shorten stance, step back to the top of the mat. Prepare for the second side.
Variations: Put your hands on your hips if you have shoulder issues or put your back against a wall to keep a straight spine.
Benefits: Warrior II strengthens and stretches legs and hips. Improves balance and concentration, opens the shoulders and chest. It also energizes the body and strengthens the will. What makes this nice in yoga for fertility is that this pose opens up the pelvic region and releases stagnant energy there to allow new energy to flow.
Pro Tips for Yoga Teachers:
- Make this a heart opener by putting arms in goal post position and drawing the elbows back in space.
- Empower students to the multitude of possibilities along their path. This posture can transition to so many others, just like you can choose your own path in life. Allow them to choose which posture they want to go to from here.
2. Bridge Pose (Setu Bandha Sarvangasana)
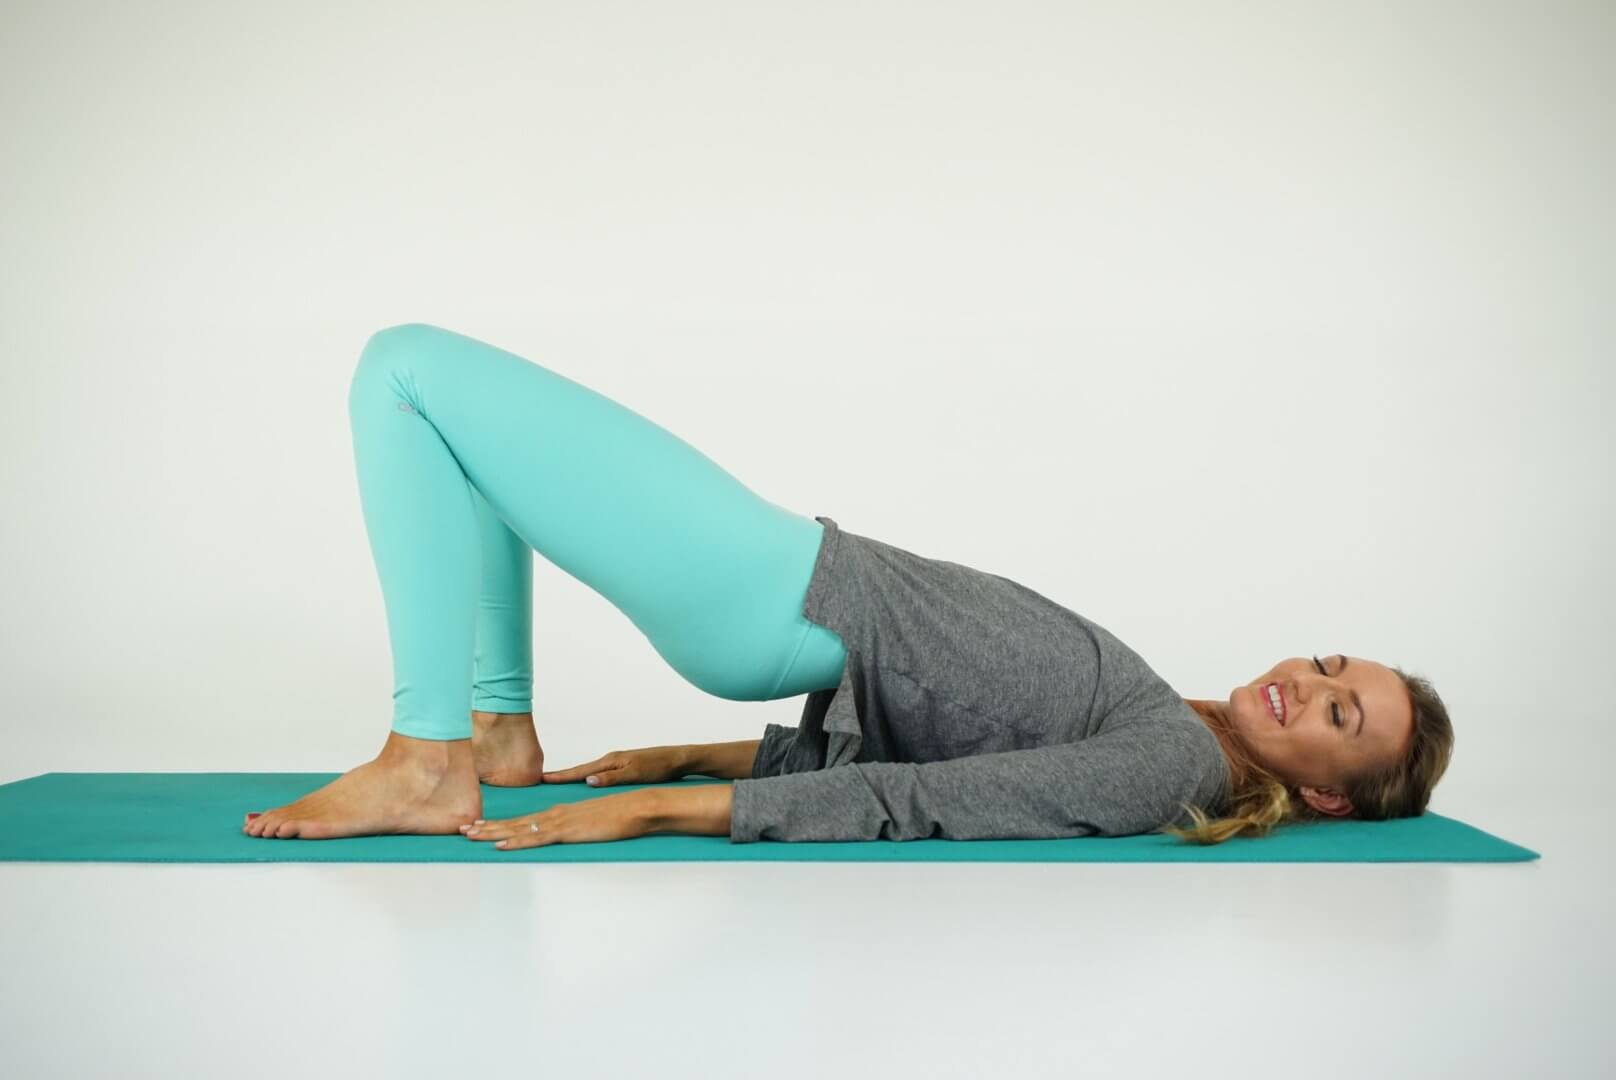
- Step 1: Start on your back, bring the soles of your feet to the mat hip width apart, ankles under knees. Keep arms by your sides.
- Step 2: Inhale as you squeeze through the glutes lift the hips up. Snuggle the shoulder blades together, interlace the hands underneath you.
- Step 3: Exhale here and hold for several breaths. When you are ready to come out slowly release the hands and exhale as you send the hips back to the ground.
Variations: You can always press the palms flat into the floor alongside the body or place a block under the hips for extra support.
Benefits: Bridge pose strengthens the muscles of the back body and opens the front body with a mild stretch which opens the breath. This calms the nervous system to induce relaxation. In a fertility yoga class bring your awareness to the pelvis. Again, open and invite in new energy.
Pro Tips for Yoga Teachers:
- Make this posture fluid: Have students move with their breath. Inhale hips rise, exhale hips float down to the ground.
- Reminder: restorative bridge resets the nervous system and lets students really tune into their bodies and breath. This does not always need to be an active posture.
3. Seated Torso Circles (Sufi Grind)
- Step 1: Come to an easy seat, cross the legs, and place the palms of your hands on your knees.
- Step 2: Keep the sit bones stable and only move from the torso and spine.
- Step 3: Inhale as the belly comes forward to move clockwise, exhale as the navel pulls in, the spine rounds continuing the clockwise motion back to the front. It’s like you’re stirring a giant pot with your torso.
- Step 4: Go at your own pace, continue to move the spine in these circles with the breath and after a few moments switch directions.
Variations: Sit on a blanket to make the position more comfortable. Make the circles as big or as small as you like as long as they feel good in your body.
Benefits: Torso circles release tension in the midsection of the body. They bring self awareness, ground you, and awaken your energy centers. Specifically, energy flow to the lower chakras and the reproductive organs, bringing awareness to reproductive health..
Pro Tips for Yoga Teachers:
- Cue students to make this movement leading with ribs to bring full spinal mobility in.
- This pose can be its own meditative practice and is a great way to introduce some kundalini to your students.
Experience this for yourself in this quick yoga for fertility and ovulation class:
4. Bound Angle (Baddha Konasana)
- Step 1: From Dandasana, legs extended in front of you,: bring the soles of your feet to touch, create a diamond shape.
- Step 2: Root the sits bones down, hold the soles of the feet as you inhale and get tall.
- Step 3: Exhale as you fold over the legs to keep the spine long. Hold for several breaths and round: rest.
- Step 4: Breathe in as you slowly rise up to sit tall. Take the legs back out in front of you.
Variations: Place blocks or blankets underneath the knees. Move your feet further away or closer to your body to increase or decrease sensation in this posture.
Benefits: This pose is a great hip opener and stimulates the abdominal organs. It is a nice release for tension in the low back.
Pro Tips for Yoga Teachers:
- Turn this into a fluid movement with twists to massage the midsection even further.
- Have students use a block or their thumbs to press into the third eye in this posture to invite awareness and pull energy inward. Add in my third eye affirmations too.
5. Reclined Bound Angle (Supta Baddha Konasana)
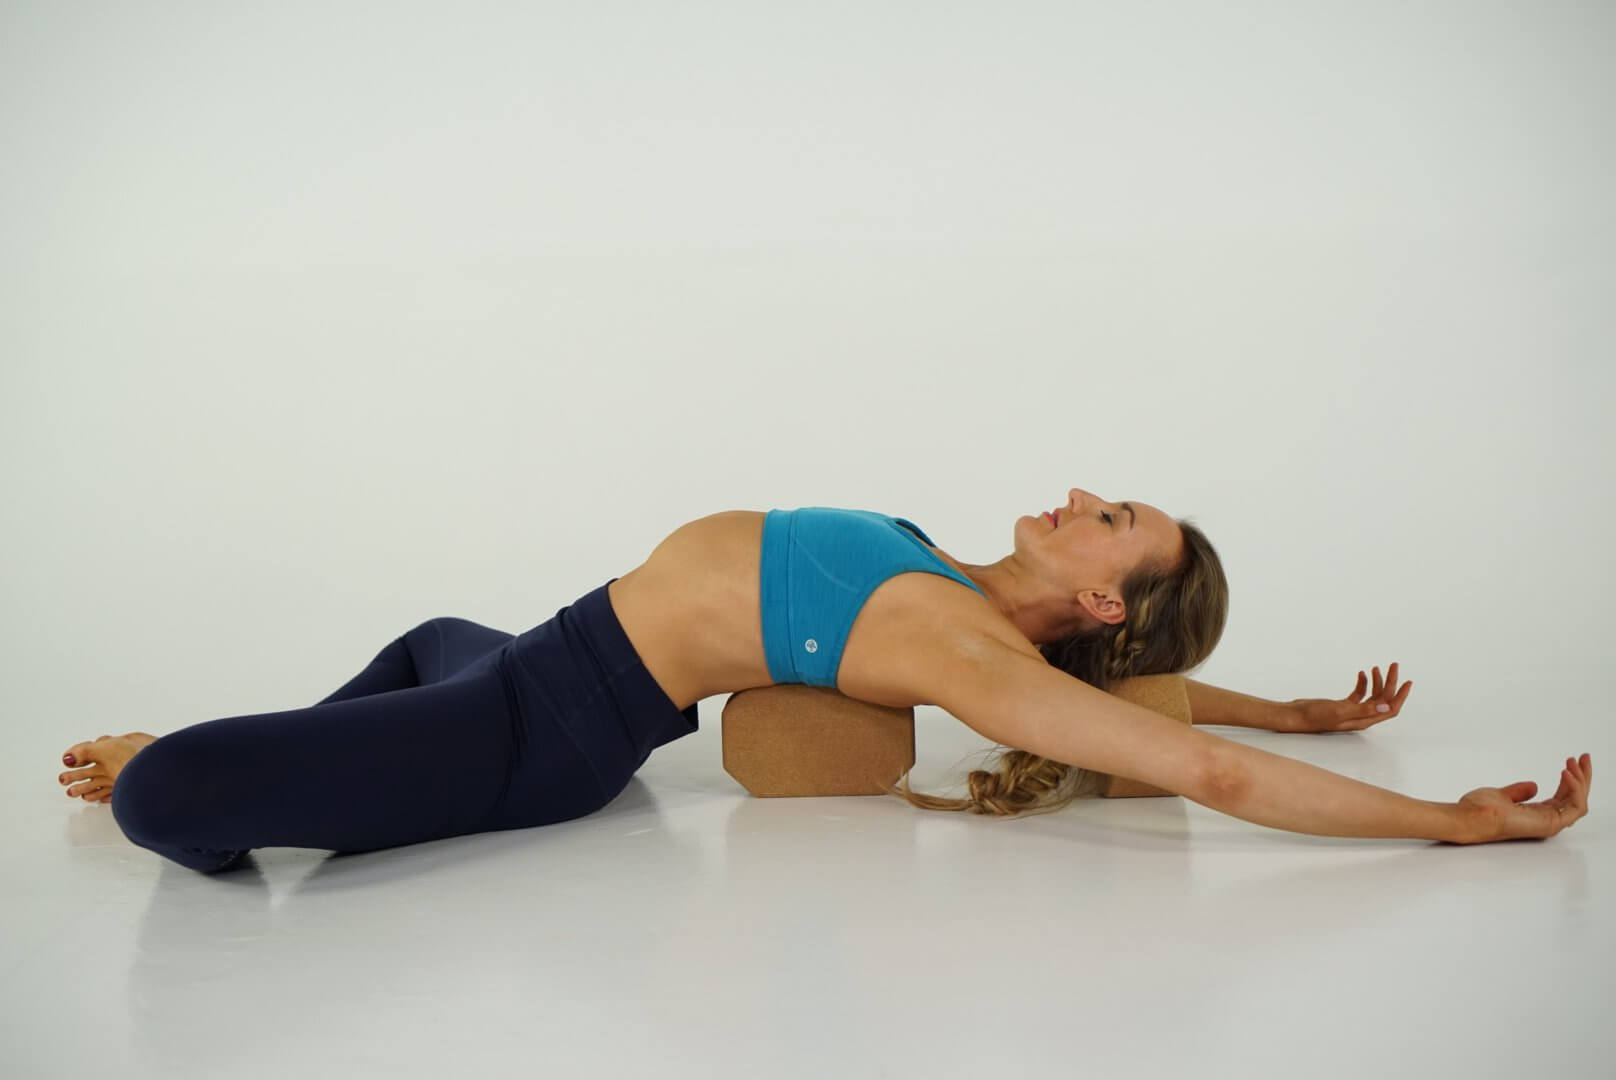
- Step 1: From Dandasana: place a bolster at the base of your spine, bring the soles of your feet to touch to create a diamond shape. Place blocks or blankets under the knees for extra support.
- Step 2: When your props are positioned comfortably, lay back over your cushion(s). Cover yourself with a blanket and maybe you have an eye mask you can place over the face.
- Step 3: Breathe deeply as you let all your body parts get heavy, come to complete relaxation.
- Step 4: Stay as long as you like, but when you are ready begin with small movements and slowly lift yourself out of the posture.
Variations: Props! Props! Props! Use as much special equipment as you want/can to make this the yummiest part of your yoga routine.
Benefits: Supta Baddha Konasana mimics your body’s resting state and regulates hormone levels. It opens the hips, the chest and relaxes the mind. It’s the perfect posture to rest and bring down cortisol levels. I love reclining bound angle to release my hip area and open my upper body at the same time.
Pro Tips for Yoga Teachers:
- Play with arm position here to intensify the heart opener and bring a stretch to the shoulders as well. Invite students to slide the backs of their hands up and down along the floor several times before they find stillness.
- Add this posture to a class to bring harmony into the heart space. If you don’t have blocks, have your students roll a blanket under their shoulder blades to increase the backbend and further open the chest.
6. Cobra (Bhujangasana)
- Step 1: Come to lie down on your stomach, take both hands underneath the shoulders.
- Step 2: Elbows stay tucked into the sides instead of splaying out. Press your hip points into the ground.
- Step 3: Push down through the tops of the feet and engage the legs so much so that your kneecaps lift up off the floor.
- Step 4: Inhale, engage the core and lift the chest forward and up. Lengthen the spine and keep a slight dip in the chin.
- Step 5: Send your shoulder blades down and back.
- Step 6: Exhale, slowly lower the chest back down with control.
Variations: Take the hands out wider for more support. You can place a blanket under the hips to keep the low back neutral.
Benefits: Cobra pose strengthens the muscles of the back body. Expands the chest and throat. It strengthens the core muscles and opens the lungs and puts gentle pressure on the abdomen and pelvis.
Pro Tips for Yoga Teachers:
- Slowly move the torso to the left and then the right to deepen this stretch and explore range of motion.
- Make this a fluid movement also, transition from the floor and up with the breath. When students come down, allow them this moment of surrender to release attachments.
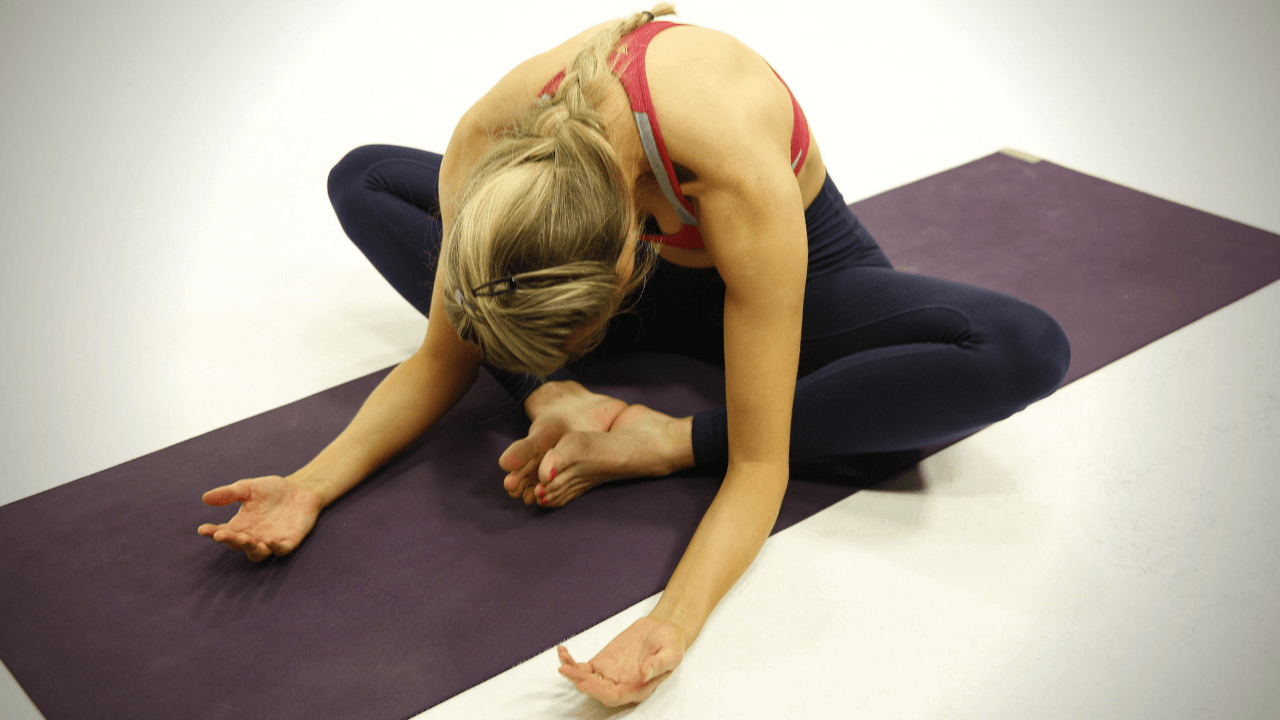
7. Head-to-Knee Pose (Janu Sirsasana)
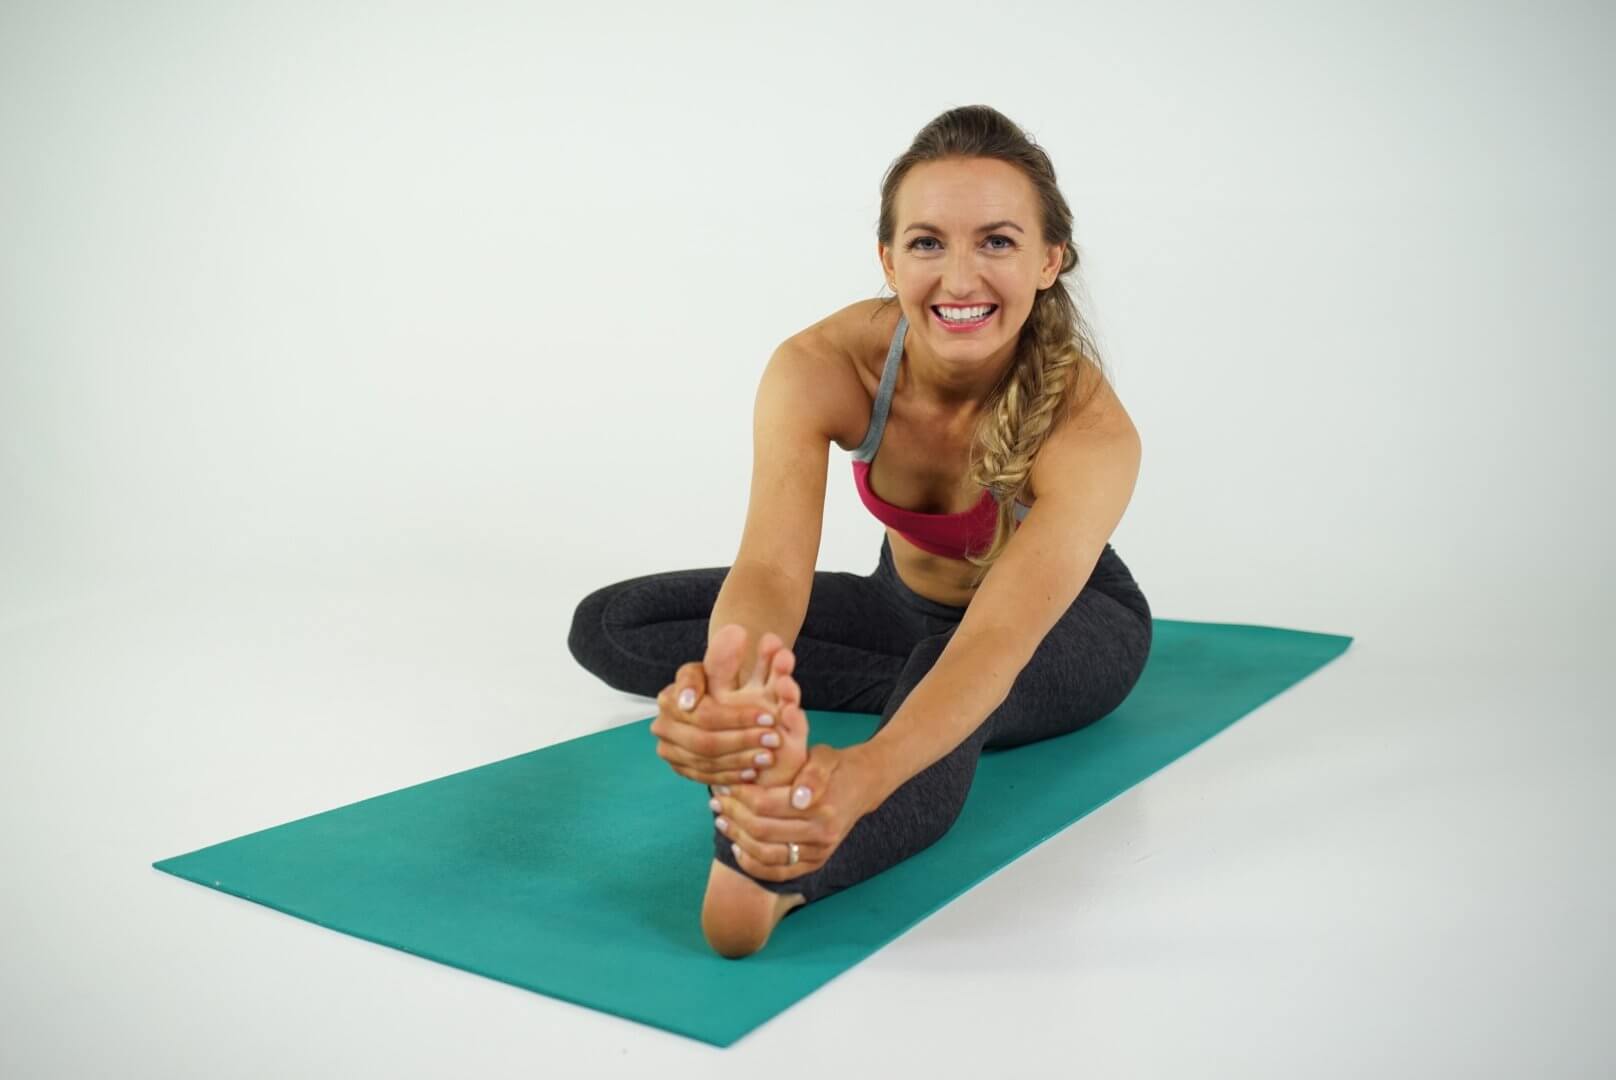
- Step 1: Begin in Staff Pose. Bend one knee, sole of foot rests lightly on the inner thigh of the opposite leg (avoid your knee). Your extended foot should be flexed, energy out the heel.
- Step 2: Breathe in, arms come slightly forward and up, reach toward ceiling, fingers spread wide. Firm your low abs up and in, find length in the front, sides and back of the torso.
- Step 3: Breathe out as your torso folds over the extended leg, heart to the shin. Arms come alongside extended legs or hands come to the foot.
- Step 4: Breath is steady, extended leg and abdominals energized and engaged, soften tops of shoulders away from the ears.
- Step 5: To come out, inhale, torso rises back to an upright position, arms up, reach toward the ceiling. On an exhalation hands come to prayer at heart center. Prepare for the second side.
Variations: Use a strap around the foot so you don’t overreach. You can also prop your seat on a blanket or bolster to elevate the hips.
Benefits: This pose builds stability in the hips and pelvic area. Will release physical tension in the low back, spinal extensors, hamstrings and groins. alms the mind, improves digestion and relieves anxiety, fatigue and headaches. Great to add to fertility yoga for its pelvic opening and induction of relaxation.
Pro Tips for Yoga Teachers:
- Here is another opportunity to add fluidity. Inhale, let the chest come up and rise, then exhale bow the head down. Cycle through several breaths like this.
- Let this be another moment of surrender for your students. Have them bow here to the divine creative consciousness and release creative blockages. Have them ask themselves, “What can I surrender in this moment” and journal on it even while in this position.
8. Happy Baby (Ananda Balasana)
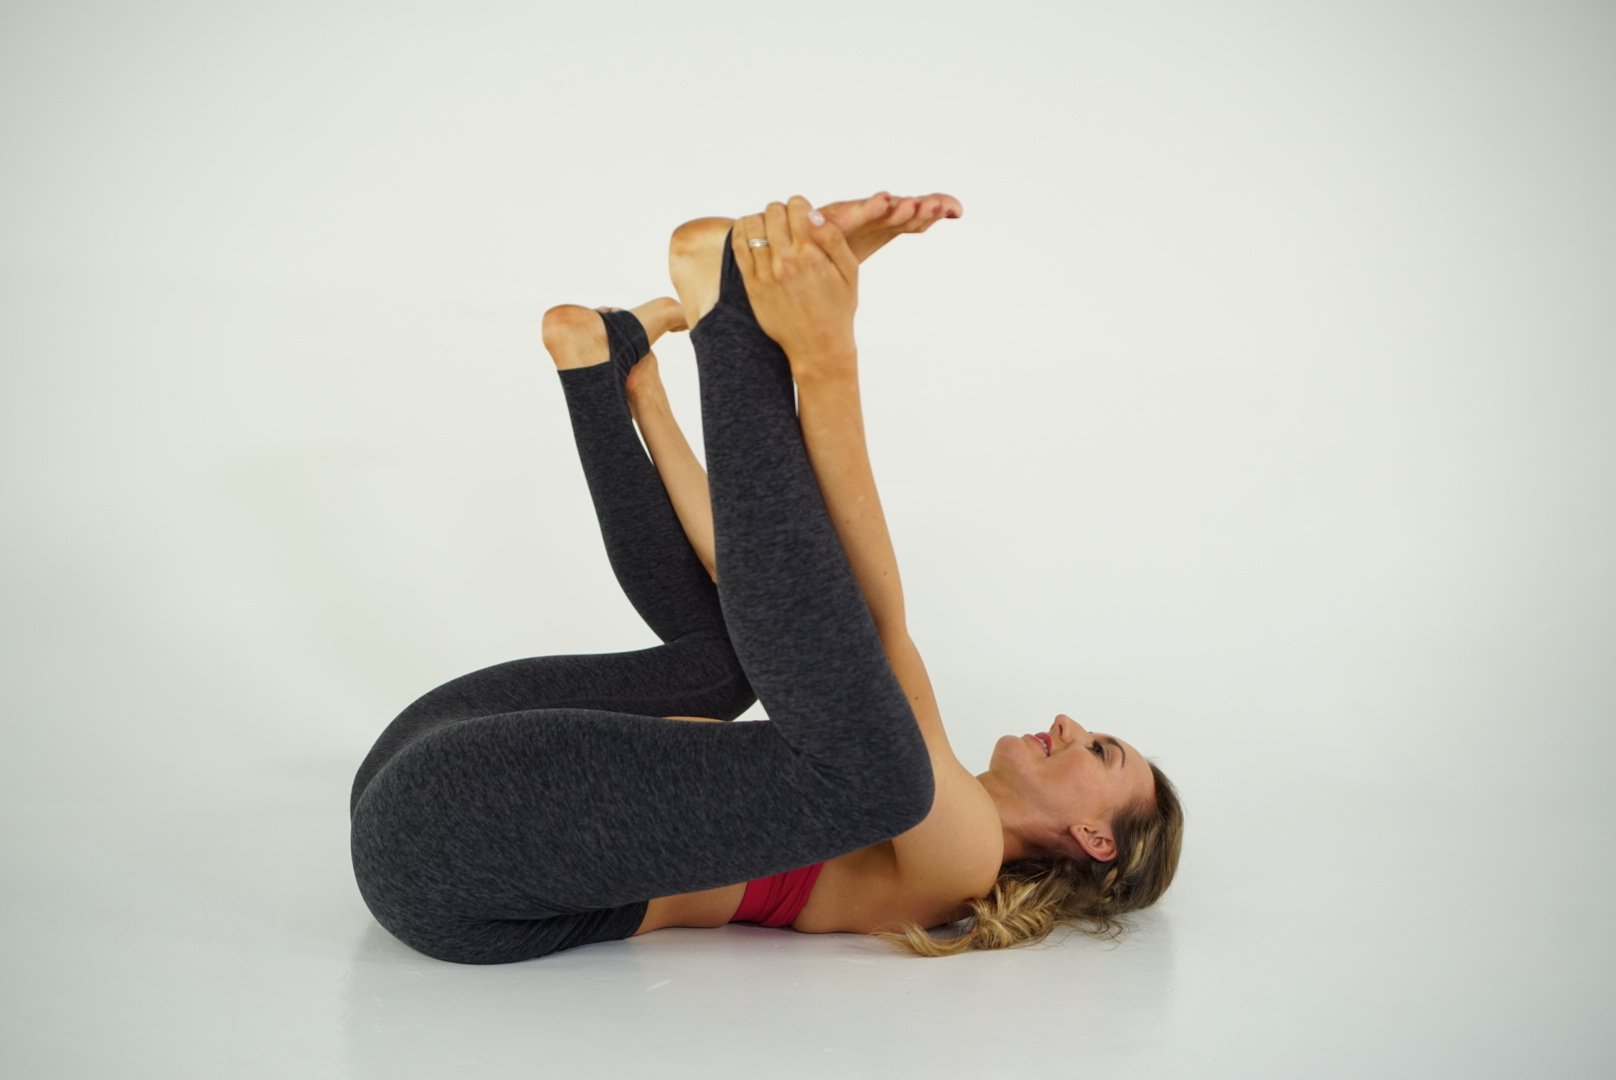
- Step 1: Lie flat on your back. Bring the knees to the chest.
- Step 2: Point the soles of your feet to the sky and grab the feet(inside or outside whichever is more comfortable for you) as you spread the knees apart and toward your underarms.
- Step 3: Flex the feet. You can either be still here or gently rock back and forth and breathe.
- Step 4: When ready, release the feet and hug the knees back to the chest.
- Step 5: Extend one leg to the ground, and then the other.
Variations: If holding both feet is a super intense stretch to you then don’t! Hold one foot at a time keeping the opposite leg extended and after a few breaths switch sides.
Benefits: This yoga pose elongates the lower back and opens the hips, releases the pelvic floor and gives it a deep stretch. Relieves cramps and low back pain in addition to mood elevation. Do happy baby regularly to keep stress levels down.
Pro Tips for Yoga Teachers:
- Loop a strap around both feet so students don’t have to overreach if they can’t. Or use the strap and do one foot at a time.
- Sequence happy baby with a plow pose or spinal twist to make your flow smooth and easy to understand.
- Bring awareness to the reproductive organs here. Invite relaxation to the surrounding muscles, release the pelvic floor. Increase awareness of this area for students who are looking for yoga for fertility classes..
9. Spinal Twist (Supta Matsyendrasana)
- Step 1: Lie on your back. Pull one leg into the chest. Breathe in.
- Step 2: Breathe out, gently let the knee cross the body and float to the ground on the opposite side.
- Step 3: You can softly place the opposite hand of the leg onto the knee. Keep the shoulders to the mat and the other arm extended to the side. Deep breaths.
- Step 4: Inhale as you untwist the body, hug that knee back to the chest.
- Step 5: Exhale release the leg long lay back completely flat.
- Step 6: Repeat on the other side.
Variations: Place a block or pillow under the knee if it doesn’t meet the ground. Play with the position of your arm to see what is most comfortable.
Benefits: Twists help with stagnant energy in the body. These yoga poses will increase blood flow in addition to stretching the abdominal muscles, hip and spinal muscles. It’s also a great one to just relax and take a few nice long breaths in.
Pro Tips for Yoga Teachers:
- Give your students options with the legs. They can keep one leg extended, or bring both knees together before they twist, or they can cross one knee over the other before twisting. Just make sure they adjust the position of their spine before they twist with those last two.
- Have students windshield wiper their legs before they settle into this position. It will get out any remaining fidgets and help them relax further into the posture.
10. Legs up the wall (Viparita Karani)
- Step 1: From the ground, bring the base of your seat to a wall.
- Step 2: Carefully lay the body back on your yoga mat and extend the legs up against the wall towards the ceiling. Breathe deeply.
- Step 3: Slowly bring your legs down from the wall, roll to the side and push yourself back to a seated position.
Variations: You can do this pose in bed against your headboard or even against the back of your couch while watching TV!
Benefits: Legs up the wall affects the nervous system and can instantly calm you, reduce stress and anxiety, and improve mood. It also helps with increasing blood flow and circulation.
Pro Tips for Yoga Teachers:
- Place a block or blanket under the hips to provide a gentler bend for students.
- Use the Yoni Mudra in this position to calm the mind, provide mental clarity, along with connection with your life force energy and inner consciousness.
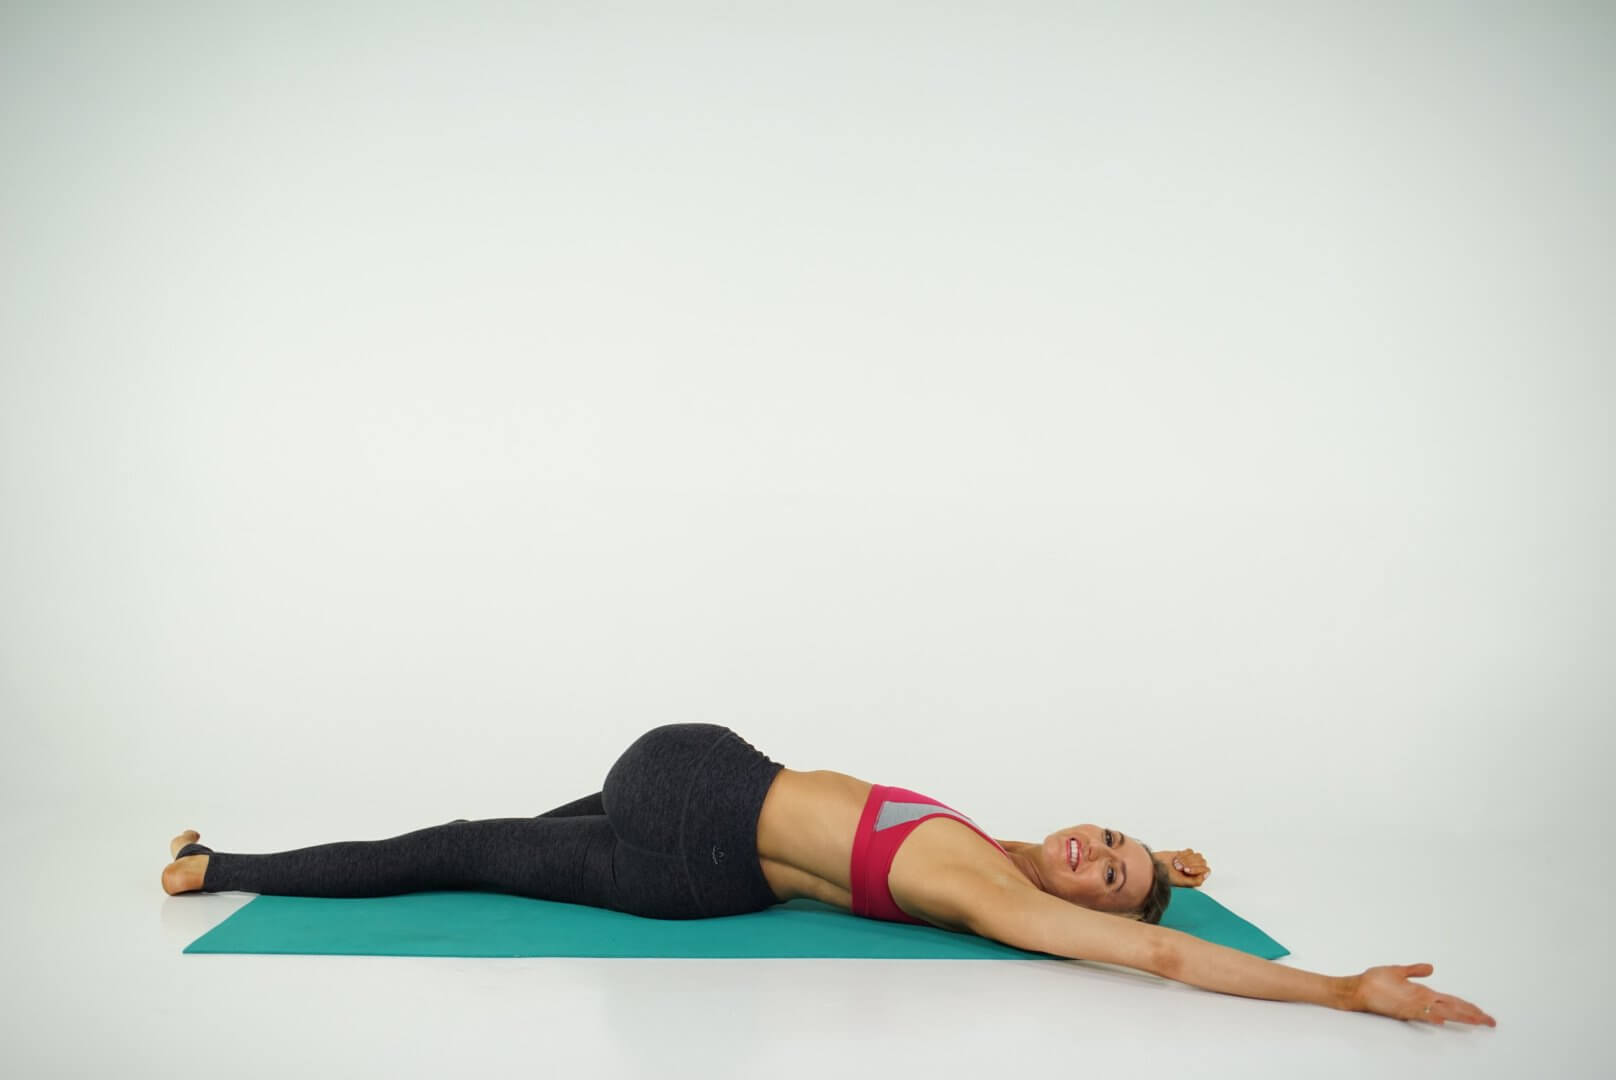
Stress can be a major factor when you’re stuck creatively or having trouble conceiving. You need to let the body unwind and do therapeutic gentle movement to hack your nervous system and keep you feeling yourself in the present moment. This opens you up to receive abundance and happiness. Your practice is the perfect solution. Get free prenatal resource center brettlarkin.com/prenatal and soon “trying to conceive” option when sign up
Don’t forget your affirmations when doing your fertility yoga: I am open. I receive what gifts the universe has to offer. I am powerful.
Next Steps
- Check out my YouTube channel and find some yoga classes that you can try out for yourself!
- Explore my knowledge hub for How to Become a Yoga Teacher
- Attend a 200 YTT info session to see what else you’ll learn in my online teacher training.
Find more yoga sequences by benefit.
YOU MIGHT ALSO LIKE
- How to Teach Somatic Yoga: A Practical Guide for Instructors
- The Best Somatic Exercises for Grief: Find Healing Through Movement
- The Best Somatic Exercises for Anger Management and Emotional Release
- Yoga to Reconnect with Yourself: 5 Essential Practices for Inner Peace
- Yoga for Connection: 10 Poses to Deepen Relationships and Bonding
- Yoga To Connect With Your Body For Mind-Body Harmony
- Yoga to Connect with Feminine Energy: 5 Transformative Practices
- Yoga to Connect with Your Heart: 3 Poses for Emotional Balance
- Myofascial Release Yoga: Unlock Tension and Improve Flexibility
- 6 Hip Openers For Emotional Release
- Office Yoga: 10 Poses You Can Do Right Now
- Ayurveda Food Combining: The Key to Balanced Digestion
- Yoga For Grief: 8 Yoga Poses For Support
- Yoga for Vata Dosha: Practice Poses and Tips
- Yoga for Pitta Dosha: Practice Poses and Tips
Learn how to do 11 of the most popular yoga poses correctly. Free video + PDF download.


