If you have PCOS (Polycystic Ovarian Syndrome) then you know what a frustrating condition it can be. The irregular periods and/or difficulty conceiving, acne, weight gain and extra hair might have you feeling like less of a woman. The anxiety and depression that comes with it certainly doesn’t help.
Then add in the potential future conditions it can lead to like Type 2 Diabetes or high cholesterol and heart issues. I’d be a ball of stress too.
You may feel like your body is working against you, but remember, your body is working FOR YOU. You can heal and manage symptoms and there are treatments to help you. One thing that can definitely help? Your yoga practice!!

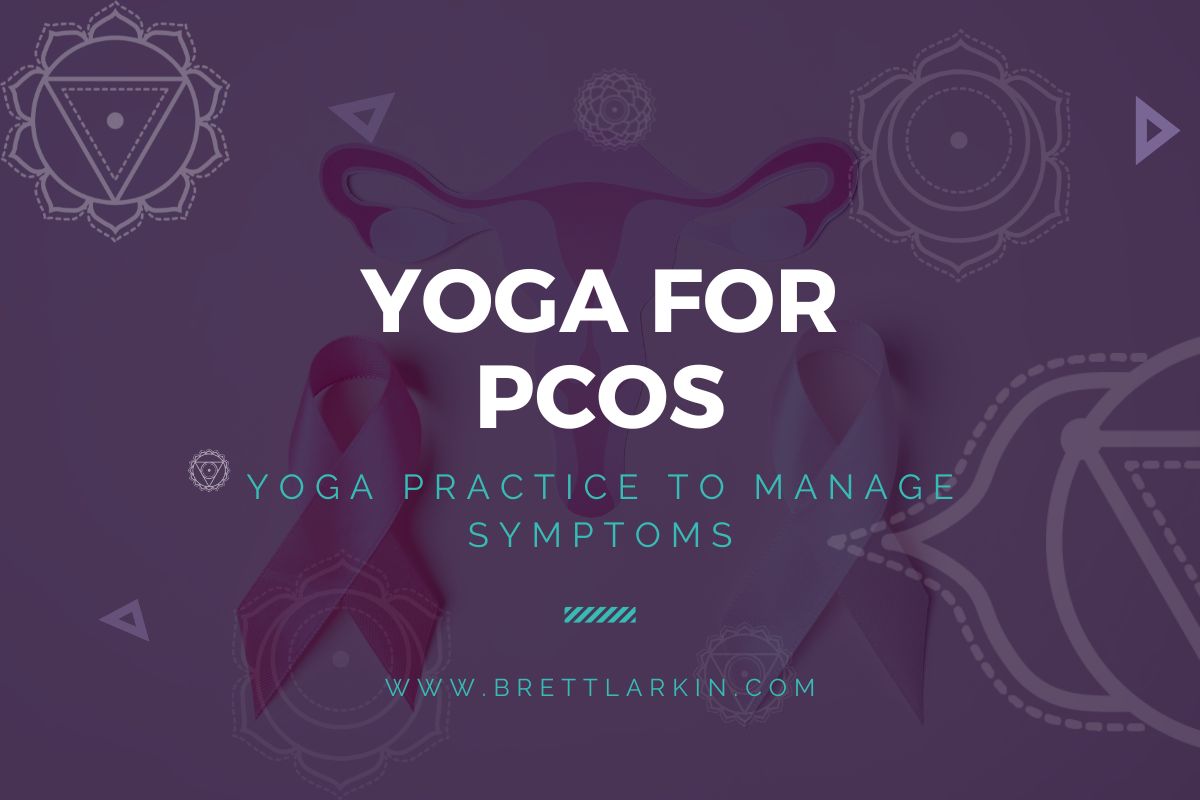
Yoga for PCOS
A regular mindful yoga practice has so many health benefits. With something like polycystic ovary syndrome, practicing yoga regularly gives you greater body awareness. By becoming more in tune with your body you can learn those cues for when your menstrual cycle may be near. It is also a great tool for hormone regulation and has been known to help cholesterol and Type 2 Diabetes, which are risks when you live with polycystic ovarian syndrome.
How Can Yoga for PCOS Help PCOS Symptoms?
What the science says: You may think, why yoga? Can’t I just exercise regularly doing conventional exercise to manage my polycystic ovarian syndrome? Well, here’s why:
- Studies found that a holistic yoga program was more effective in regulating PCOS symptoms over other forms of exercise.
- Yoga brought testosterone levels down in PCOS patients.
- A combination of yoga and naturopathy was shown to decrease symptoms of PCOS and regulate a woman’s system better than modern medications.
- Yoga has even shown to regulate thyroid hormonal imbalances, which are common in women with polycystic ovary syndrome.
- Science has also confirmed that yoga relieves stress and reduces instances of depression, something a lot of women with PCOS suffer from.
The Uplifted Perspective: Feeling like your body is working against you by being unable to conceive or being unable to monitor or predict your menstrual cycle can put you in a scarcity mindset. You need to bring abundance into your daily world and work on your mindset. Here’s how:
- Cultivate the opposite: Do the things that soothe you(not just yoga, maybe a nice massage) in order to achieve the things you need.
- Release control: let go of the ultimate outcome, focus on taking care of yourself and trust your body.
- Do an abundance practice like this one from my Uplifted membership
- Invite in kriya yoga for PCOS symptoms(not sure what kriya yoga is? I got you covered, read this post)
- Grounding practices to help you manage the uncertainties of your condition(think yoga postures like butterfly pose, bridge pose, or corpse pose).
- Try a fertility practice to bring more self awareness to your pelvic region like this one:
- Yoga Nidra is known to enhance parasympathetic nervous system activity in big ways. Since polycystic ovarian syndrome is greatly affected by the sympathetic nervous system you need to slow down. Try the 40 day nidra course in Uplifted and see how you feel.
Infertility is one of the biggest symptoms of polycystic ovary syndrome. Check out my Pregnant & Powerful course to help you on your fertility journey.
1. Cat/Cow Pose(Marjaryasana/Bitilasana)
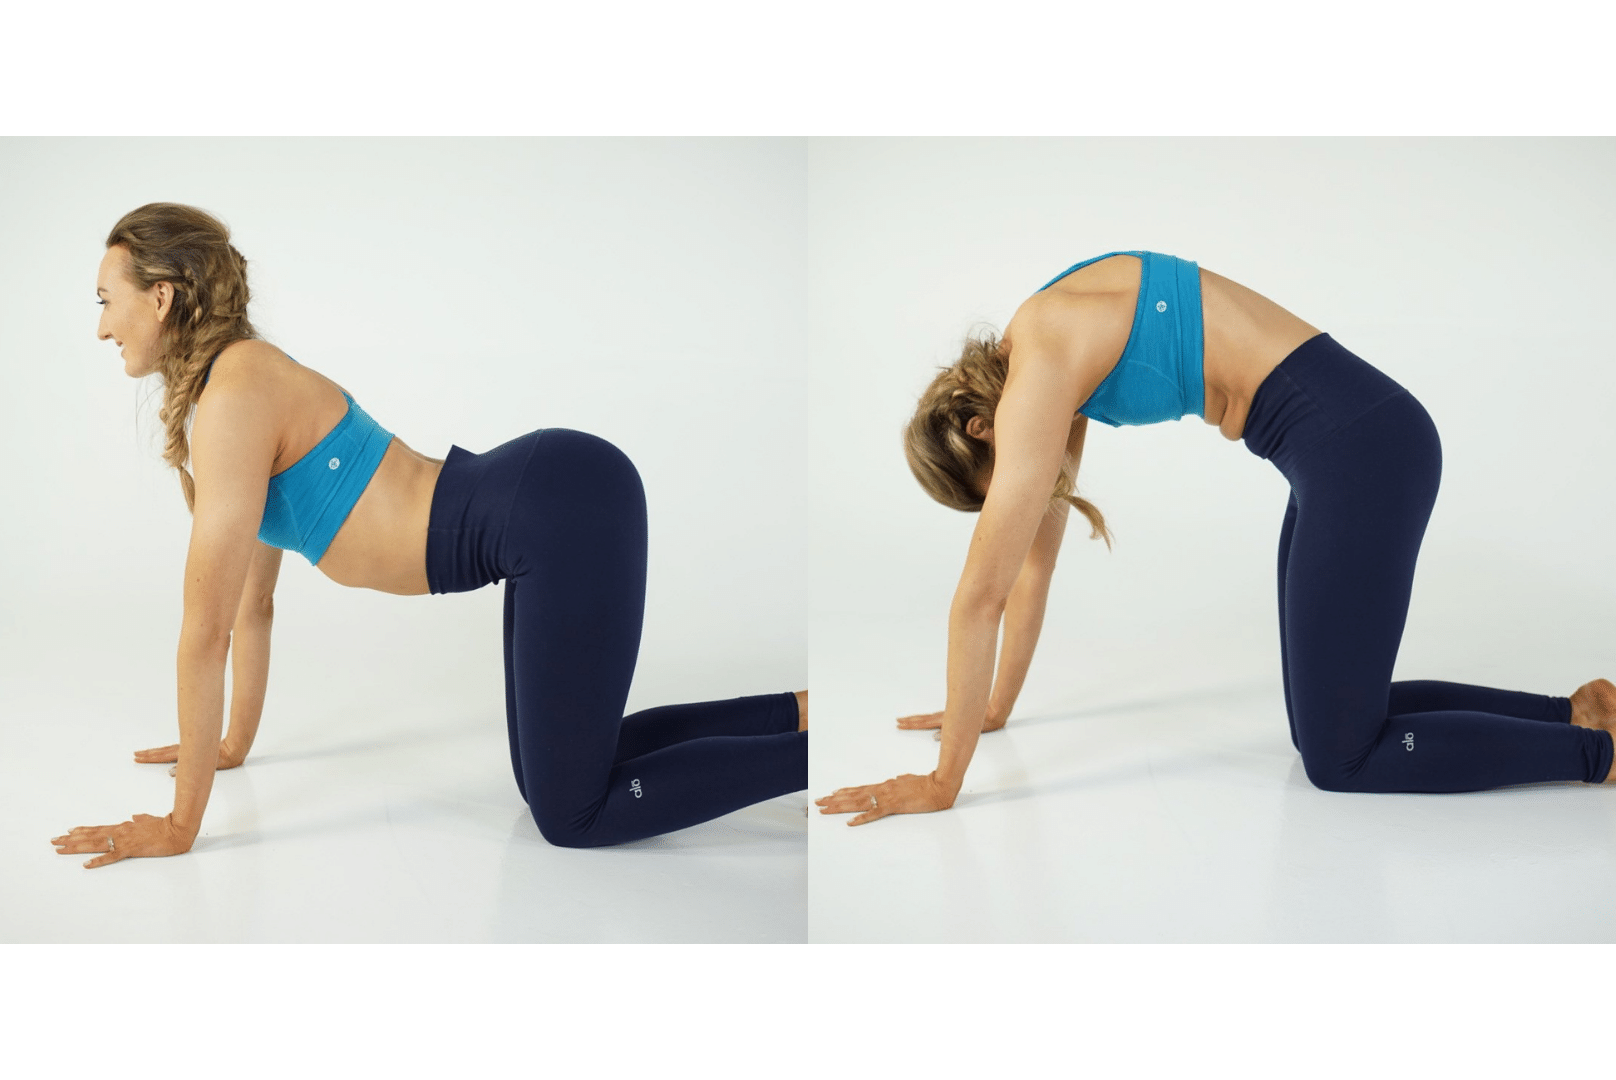
- Step 1: From tabletop, hands underneath your shoulders and knees underneath the hips.
- Step 2: Inhale, drop the belly, and keep the abs engaged. Open your chest and send your heart forward, shoulders down and back. This is cow pose. Use the muscles of your lower back to send your tailbone toward the ceiling.
- Step 3: Exhale, round the back, drop your head, tailbone draws down between the knees. This is cat pose.
- Step 4: Repeat the postures, linking the breath to the movement.
Variations: Pad the knees with a folded blanket or put the hands on blocks for wrist issues. This can also be done in a seated position.
Benefits: Cat cow pose is the perfect way to warm up the spine and work through any tightness. These yoga postures open up the chest and shoulders and brings calm to the nervous system.
Uplifted Pro Tips:
- Add a twist between rounds by pausing and doing thread the needle to encourage more movement through the mid body and get a juicy shoulder stretch.
- Encourage intuitive movement with these postures. Do what feels best in YOUR body as you flow back and forth between the two.
2. Bridge Pose (Setu Bandha Sarvangasana)
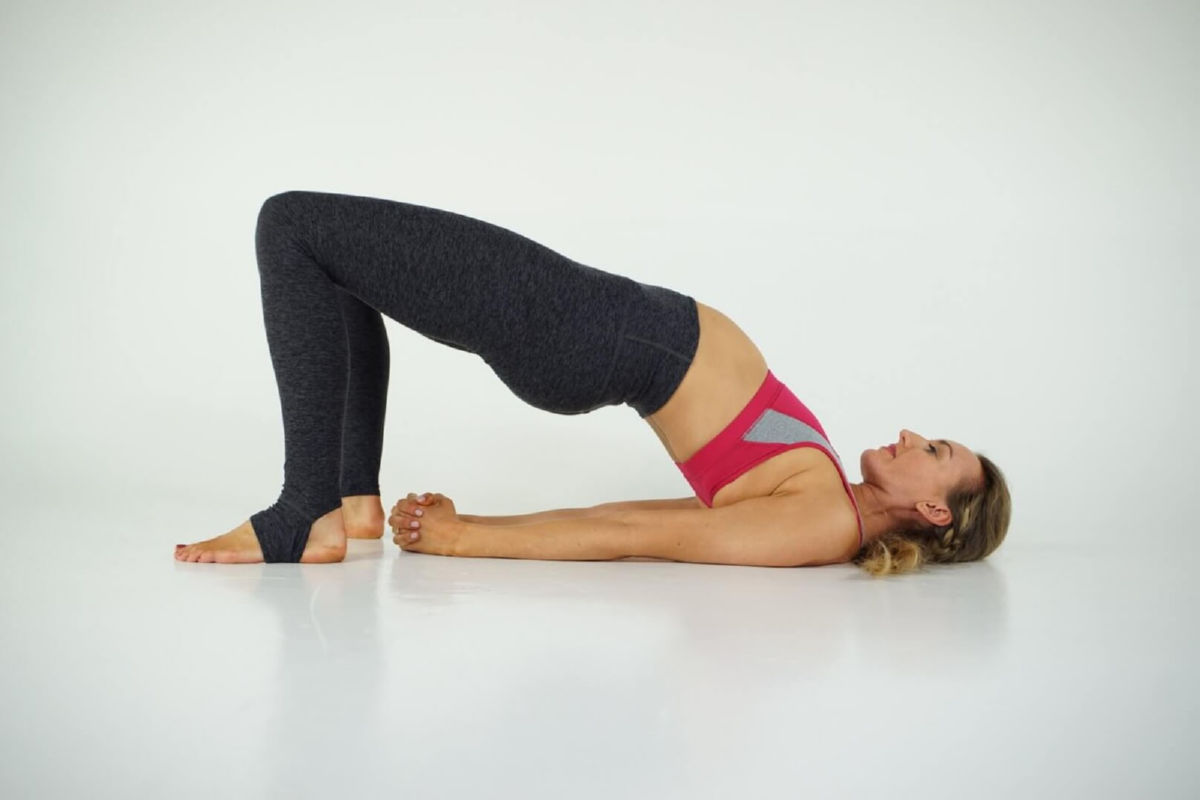
- Step 1: On your back, bring the soles of your feet to the mat hip width apart, ankles under knees. Keep arms by your sides.
- Step 2: Inhale as you squeeze through the glutes and lift the hips up. Snuggle the shoulder blades together, interlace the hands underneath you.
- Step 3: Exhale here and hold for several breaths. When you are ready to come out slowly release the hands and exhale as you send the hips back to the ground.
Variations: Press the palms flat into the floor alongside the body or place a block under the hips for extra support.
Benefits: Bridge pose strengthens the muscles of the back body and opens the front body with a mild stretch and opens the breath. This calms the nervous system to induce deep relaxation.
Uplifted Pro Tips:
- Make this posture fluid: move with the breath. Inhale hips rise, slowly exhale hips float down to the ground.
- Challenge yourself by taking one leg up and testing where you are at. Use this pose to work up to deeper backbends like wheel.
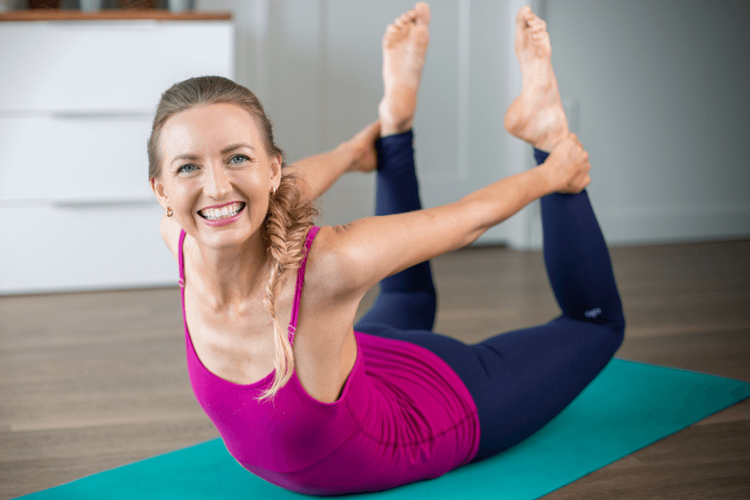
3. Boat Pose (Navasana)
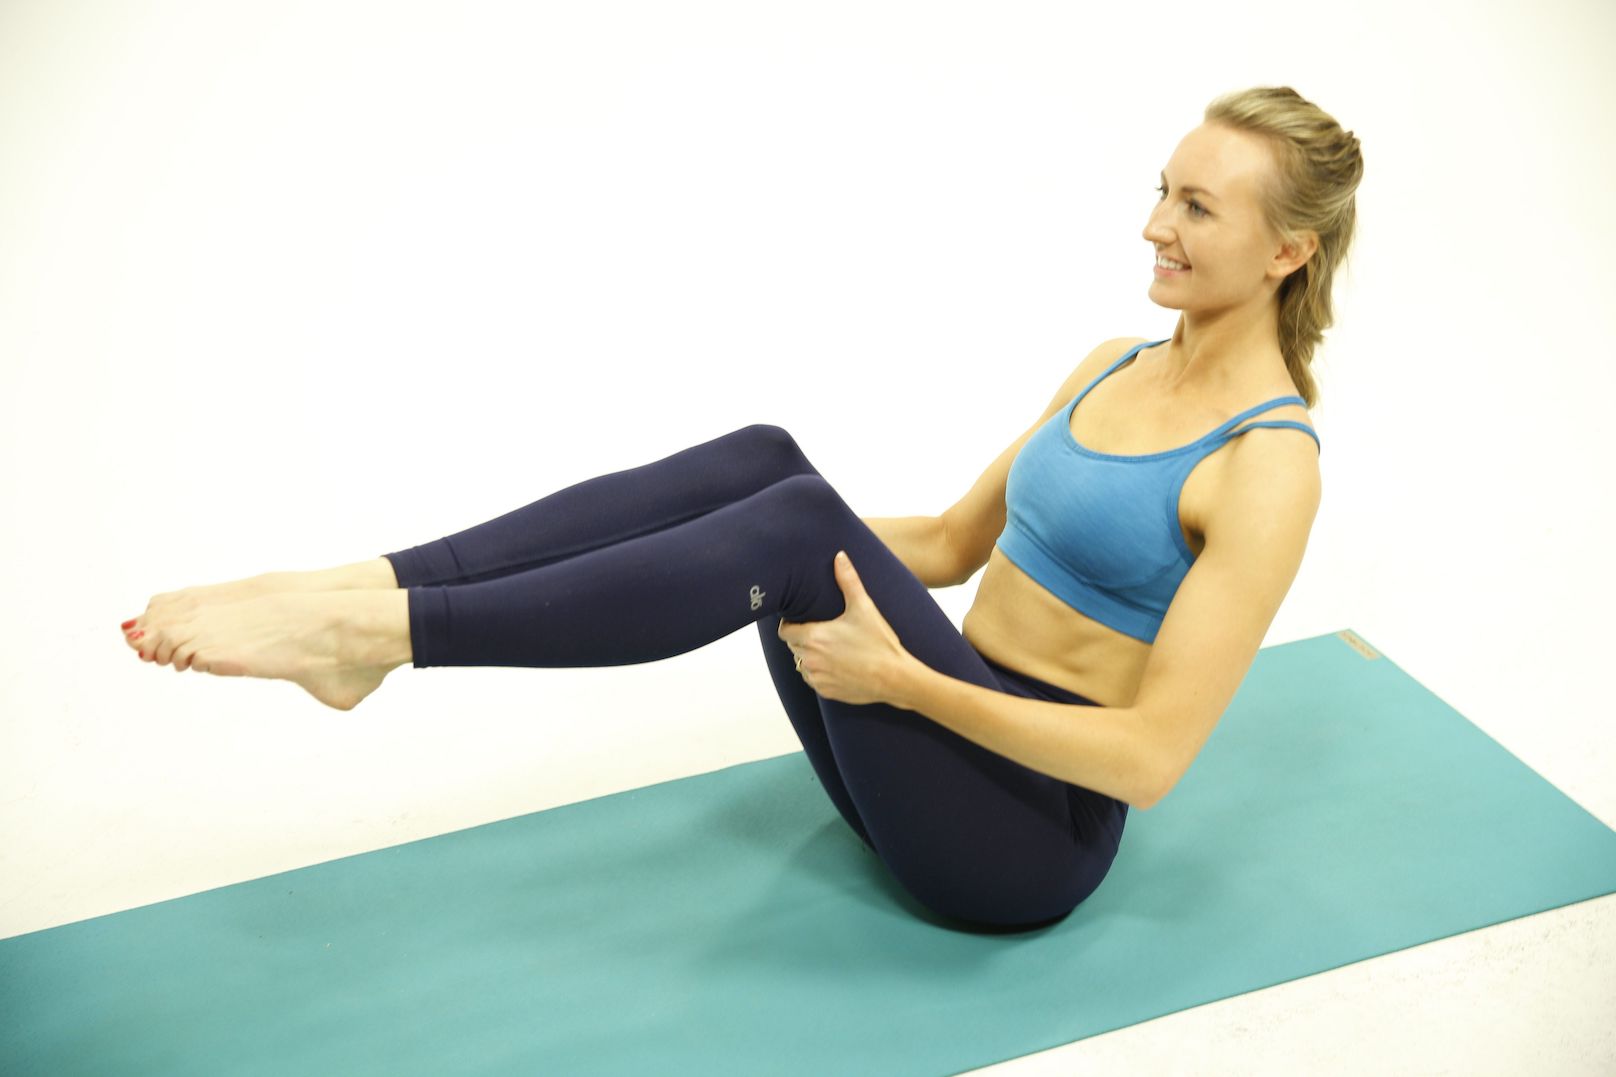
- Step 1: From seated, bring the soles of your feet to your yoga mat and grip the backs of the thighs.
- Step 2: Inhale, lengthening through the crown of the head to create a long spine.
- Step 3: Exhale, pull your belly up and in as you lean back on the sits bones.
- Step 4: When ready, engage your quadriceps and lift the feet off the mat as a single package. Hold here or opt to take the arms out straight. Keep the spine long.
- Step 5: Bring the soles of the feet back to the mat and come back to seated.
Variations: You can keep the hands on the back of the thighs for support or keep one foot down and only lift one at a time. For more advanced movement, take the legs out straight creating a “V” shape.
Benefits: Boat pose warms the abdominal wall and strengthens the entire core. It requires focus on your movement and breath which increases mindfulness and reduces stress. Weak pelvic floor muscles can lead to pelvic pain, making this a great option for reducing pelvic pain for women and strengthening those muscles in preparation for creating life.
Uplifted Pro Tips:
- Before you lift the feet and in some twists. Inhale arms up, tall spine, exhale, take the left arm behind and right in front as you twist to the left. Repeat to the right
- Keep the feet on the mat and play with the distance they are from your seat to make this more or less challenging, make sure to press down through the big toe.
4. Butterfly Pose (Baddha Konasana)
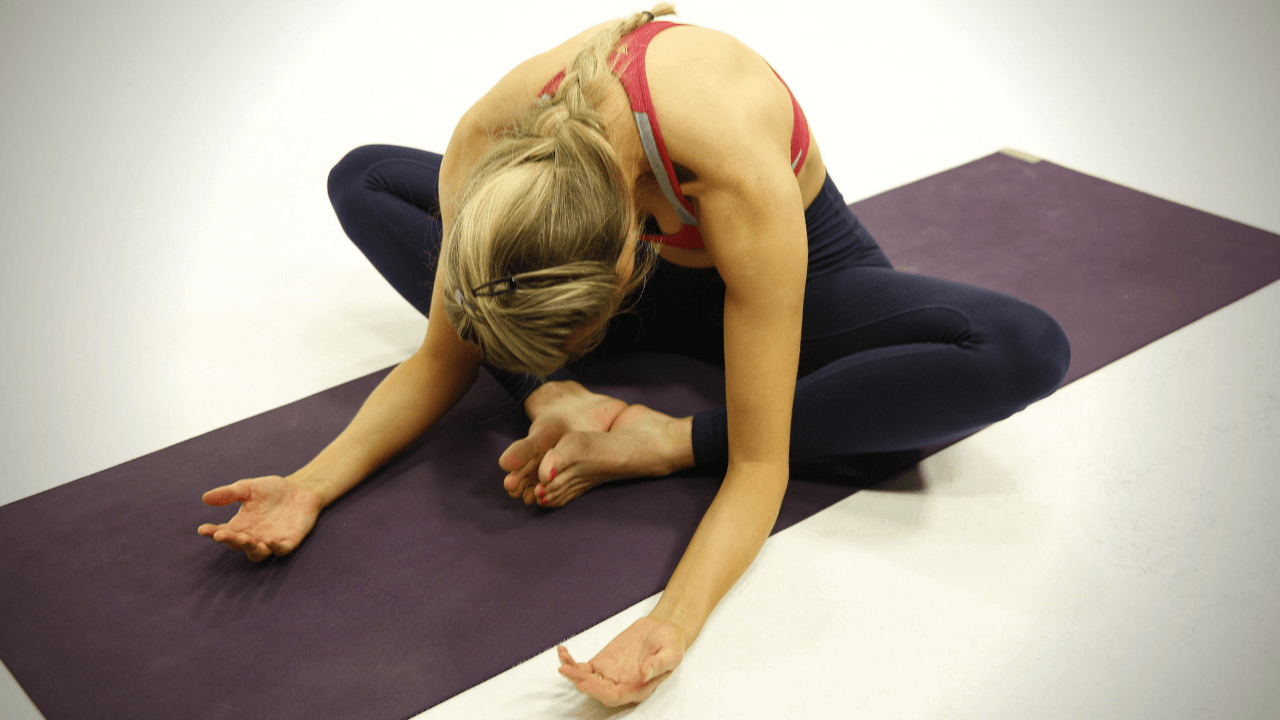
- Step 1: From Dandasana: bring the soles of your feet to touch creating a diamond shape.
- Step 2: Root the sits bones down, hold the soles of the feet as you inhale and get tall.
- Step 3: Exhale fold over the legs, keep the spine long. Hold for several breaths and round: rest.
- Step 4: Breathe in as you slowly rise up to sit tall. Take the legs back out in front of you.
Variations: Knees up high? Place blocks or blankets underneath them. Take the feet as far away from the body or as close to the body as is comfortable for you to fold.
Benefits: Bound angle pose is a great hip opener and will relieve stress, nausea, stomach cramps and low back pain. It brings you close to the ground to soothe the system.
Uplifted Pro Tips:
- Deep relaxation aids hormone regulation, take supta baddha konasana(reclining butterfly pose) instead to reset the nervous system and completely relax.
- Try a breathing exercise before you fold. This would be a good moment to do alternate nostril breathing, learn how here.
5. Cobra Pose (Bhujangasana)
- Step 1: Lie down on your stomach, take both hands underneath the shoulders.
- Step 2: Elbows stay tucked into the sides instead of splaying out. Press your hip points into the ground.
- Step 3: Push down through the tops of the feet and engage the legs so much that your kneecaps lift off the floor.
- Step 4: Inhale, engage the core and lift your chest forward and up. Lengthen the spine and keep a slight dip in the chin.
- Step 5: Send your shoulder blades down and back.
- Step 6: Exhale, slowly lower the chest back down with control.
Variations: Take the hands out wider for more support. You can place a blanket under the hips to keep the low back neutral.
Benefits: Cobra pose strengthens the back muscles. Expands the chest and throat. It strengthens the core muscles and opens the lungs. It puts gentle pressure on the abdominal muscles and pelvic region increasing blood flow to these areas to help irregular periods and PCOS symptoms.
Uplifted Pro Tips:
- Slowly move the torso to the left and then the right to deepen this stretch and explore range of motion.
- Start in baby cobra and work your way up to full cobra, then add a leg lift to test your back strength and monitor their progress.
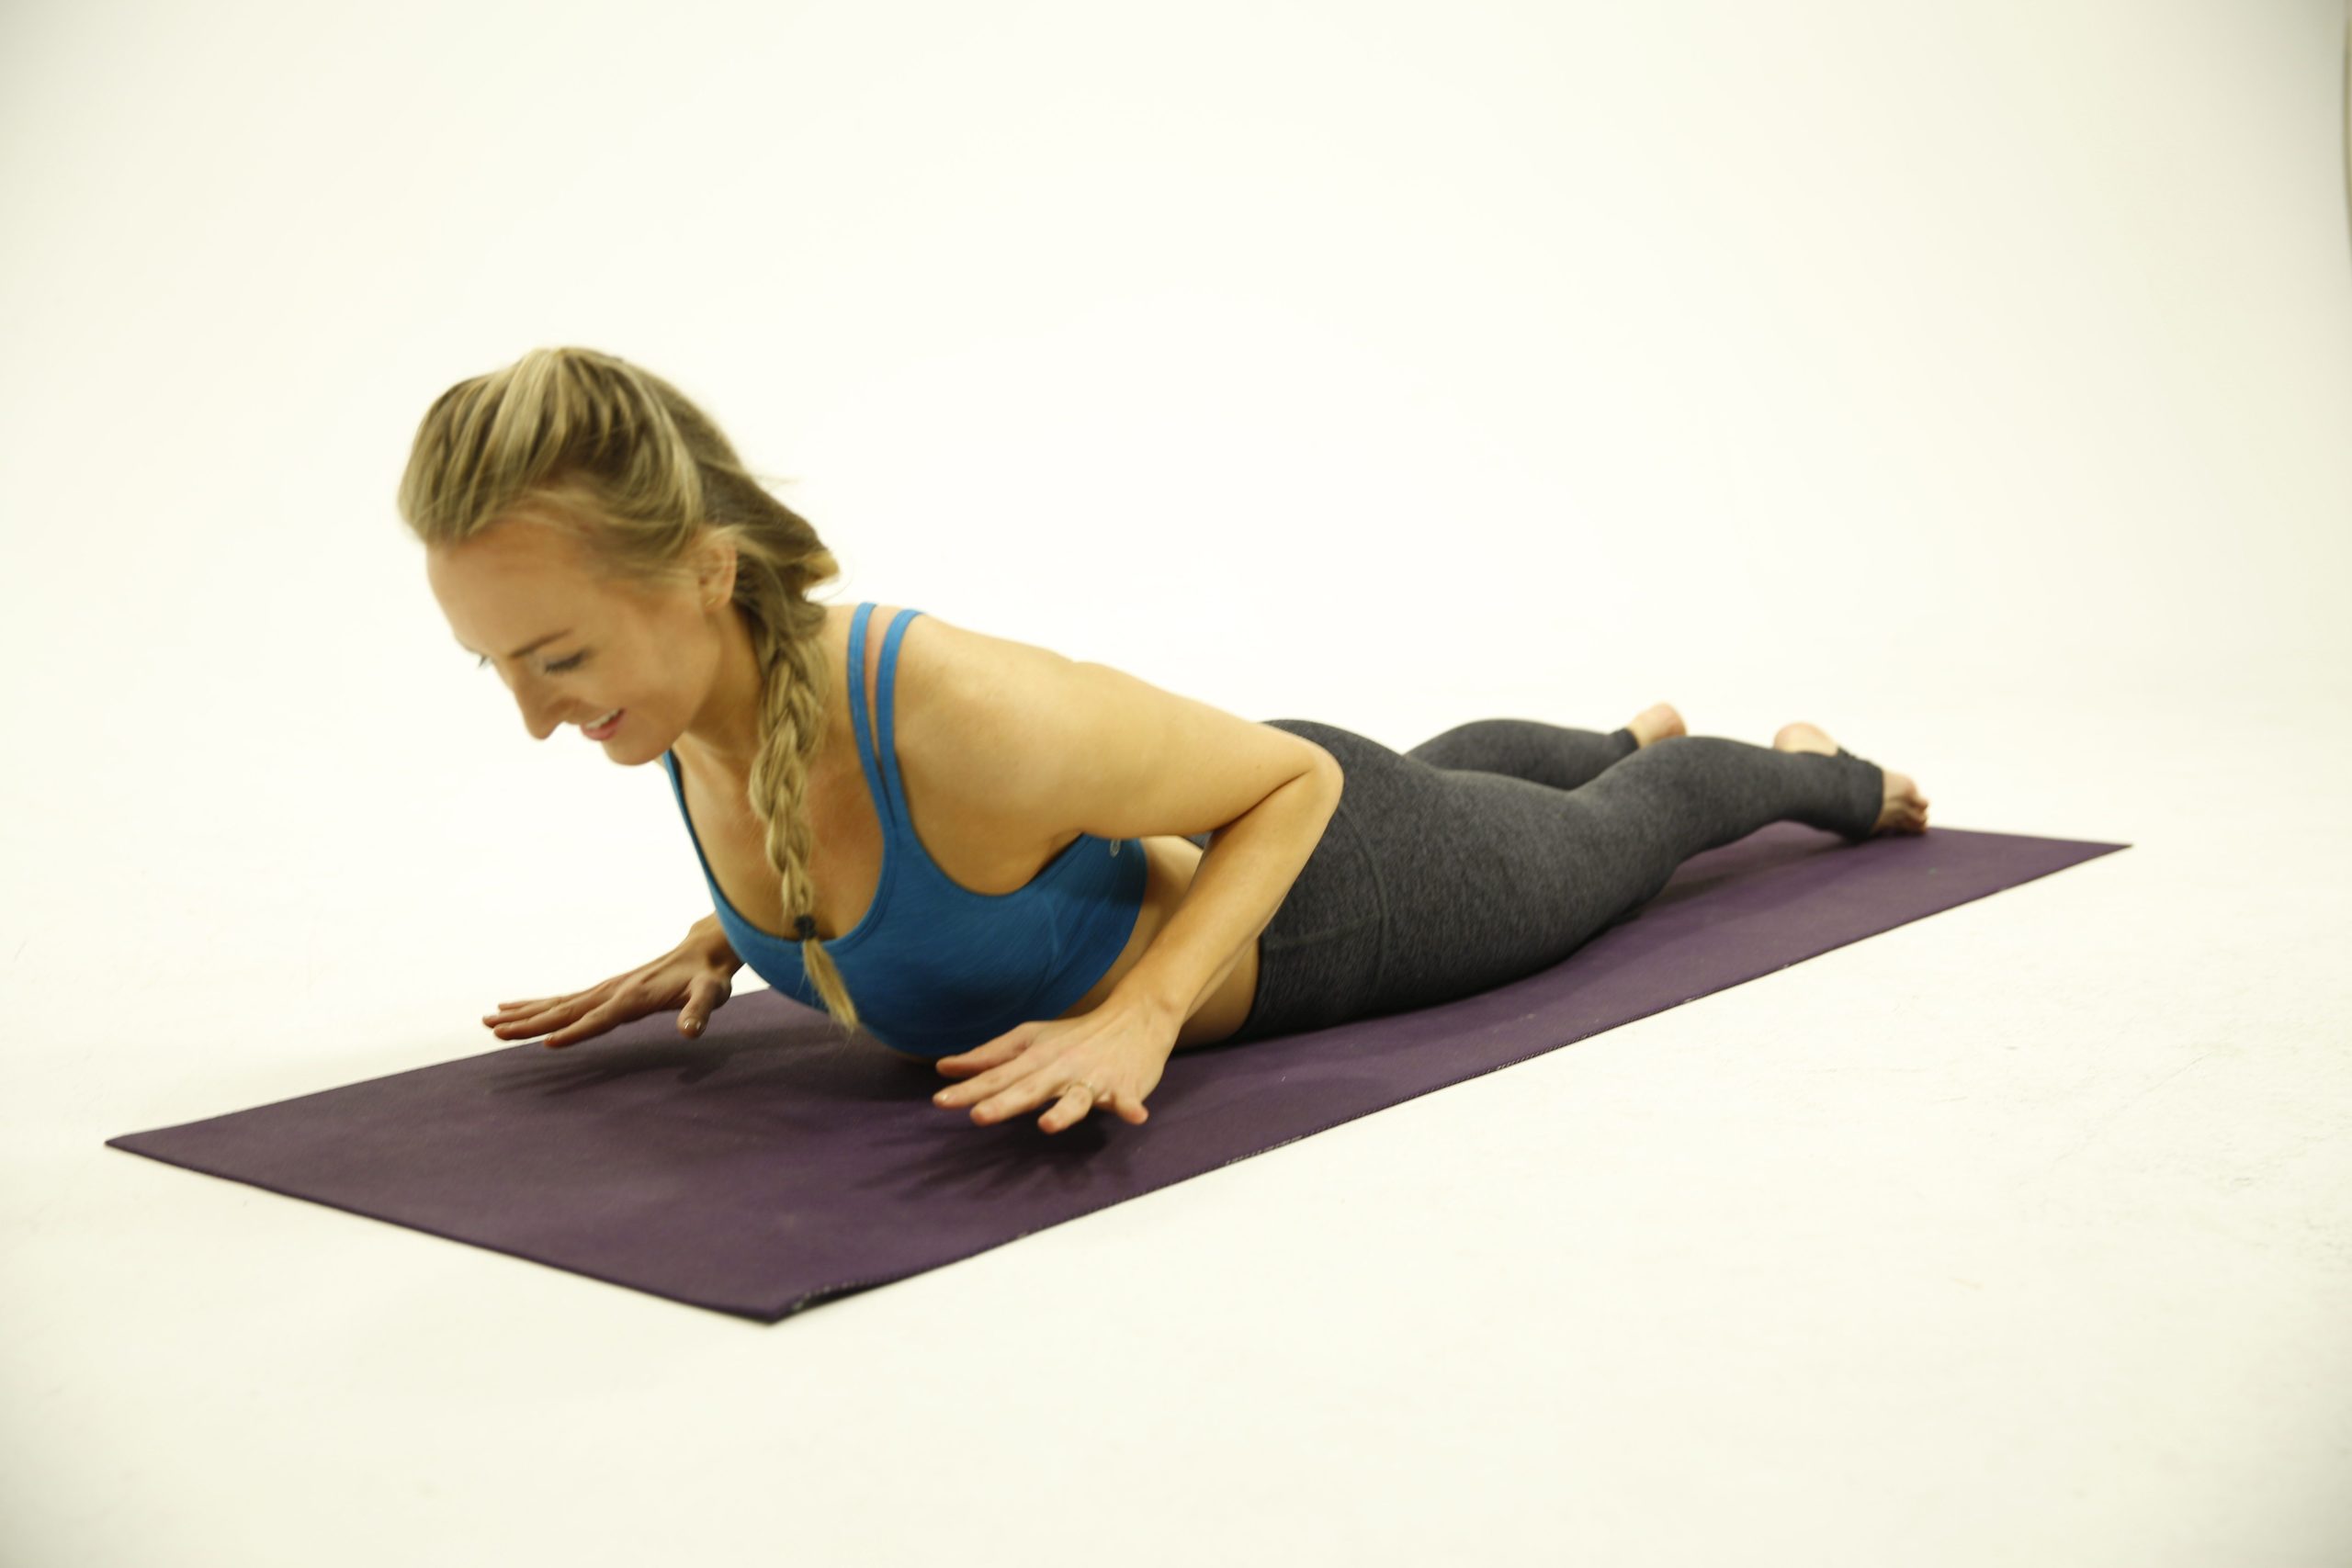
6. Bow Pose (Dhanurasana)
- Step 1: From your belly, place a folded blanket under hips and lower abdomen. Forehead on mat, arms by sides with palms up, legs and tops of feet extended onto mat.
- Step 2: Exhale, bend knees to bring your heels toward your buttocks. Arms reach back, hands take hold of outside of ankles, flex feet.
- Step 3: Shoulder blades draw slightly in toward the spine and down back (away from ears). Thighs are energized, knees hip-width apart. Buttocks are firm, but not clenched.
- Step 4: Inhale, lift your thighs and torso away from mat, heels move away from buttocks, low abs firm up and in, sides of waist lengthen evenly from hips to the ribcage, shoulders move away from ears as chest broadens and heart shines forward.
- Step 5: Soften the tops of the shoulders away from the ears, inner thighs lift slightly, outer thighs roll down, knees remain hip-width apart.
- Step 6: To come out, exhale, release down and relax the entire body in prone position.
Variations: Place a block between the thighs to activate the legs and maintain hip-distance in knees. Locust Pose (Salabhasana) is a good alternative too, or one-legged Bow (Ardha Dhanurasana) with or without strap
Benefits: Bow Pose strengthens all major muscles in the back body, stretches the entire front body and expands the chest, opening the diaphragm and shoulder joints. It stimulates abdominal organs and brings blood flow to the pelvis to regulate digestion and menstruation.
Uplifted Pro Tips:
- If you are unable to reach ankles, use a yoga strap around the outside of your ankles and hold on to either end, find the right length to maintain extension in arms, being mindful not to strain shoulders.
- Get used to the sensation and work up to full bow by placing a small cushion or bolster under the quads, bring elbows to the mat and bend the knees bringing your heels towards your rear.
7. Head to Knee Pose (Janu Sirsasana)
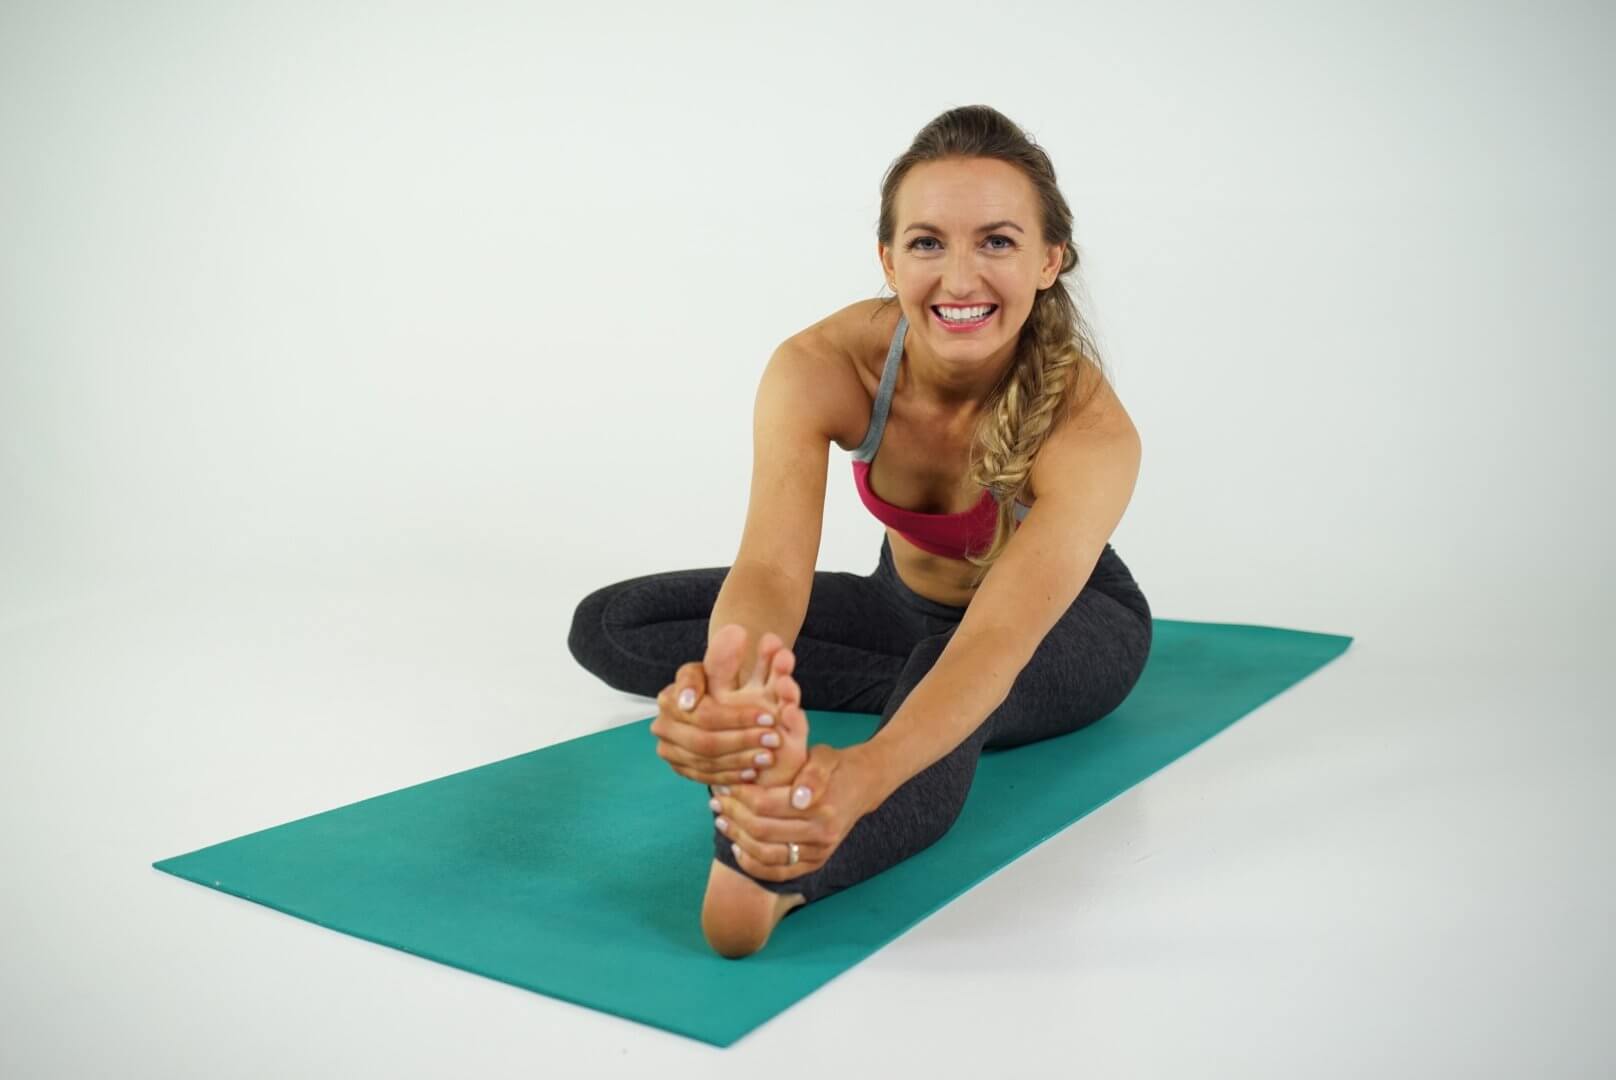
- Step 1: Begin in Staff Pose. Bend one knee, sole of foot rests lightly on the inner thigh of the opposite leg (avoid your knee). Your extended foot should be flexed, energy out the heel.
- Step 2: Breathe in, arms come slightly forward and up, reach toward ceiling, fingers spread wide. Firm your low abs up and in, find length in the front, sides and back of the torso.
- Step 3: Breathe out as your torso folds over the extended leg, heart to the shin. Arms come alongside extended legs or hands come to the foot.
- Step 4: Breath is steady, extended leg and abdominals energized and engaged, soften tops of shoulders away from the ears.
- Step 5: To come out, inhale, torso rises back to an upright position, arms up, reach toward the ceiling. On an exhalation hands come to prayer at heart center. Prepare for the second side.
Variations: Use a strap around the foot so you don’t overreach. You can also prop your seat on a blanket or bolster to elevate the hips.
Benefits: This yoga pose builds stability in the hips and pelvic region. Will release physical tension in the low back, spinal extensors, hamstrings and groin. It calms the mind, improves digestion and relieves anxiety symptoms, fatigue and headaches. Great to add to fertility yoga for its pelvic opening and induction of relaxation, which also makes it great to incorporate in yoga for PCOS symptoms.
Uplifted Pro Tips:
- Add fluidity. Inhale, let the chest come up and rise, then exhale and bow the head down. Cycle through several breaths like this.
- Ball the fists and place them on either side of your pelvis and fold. This adds a little extra love to those internal organs.
8. Corpse Pose (Savasana)
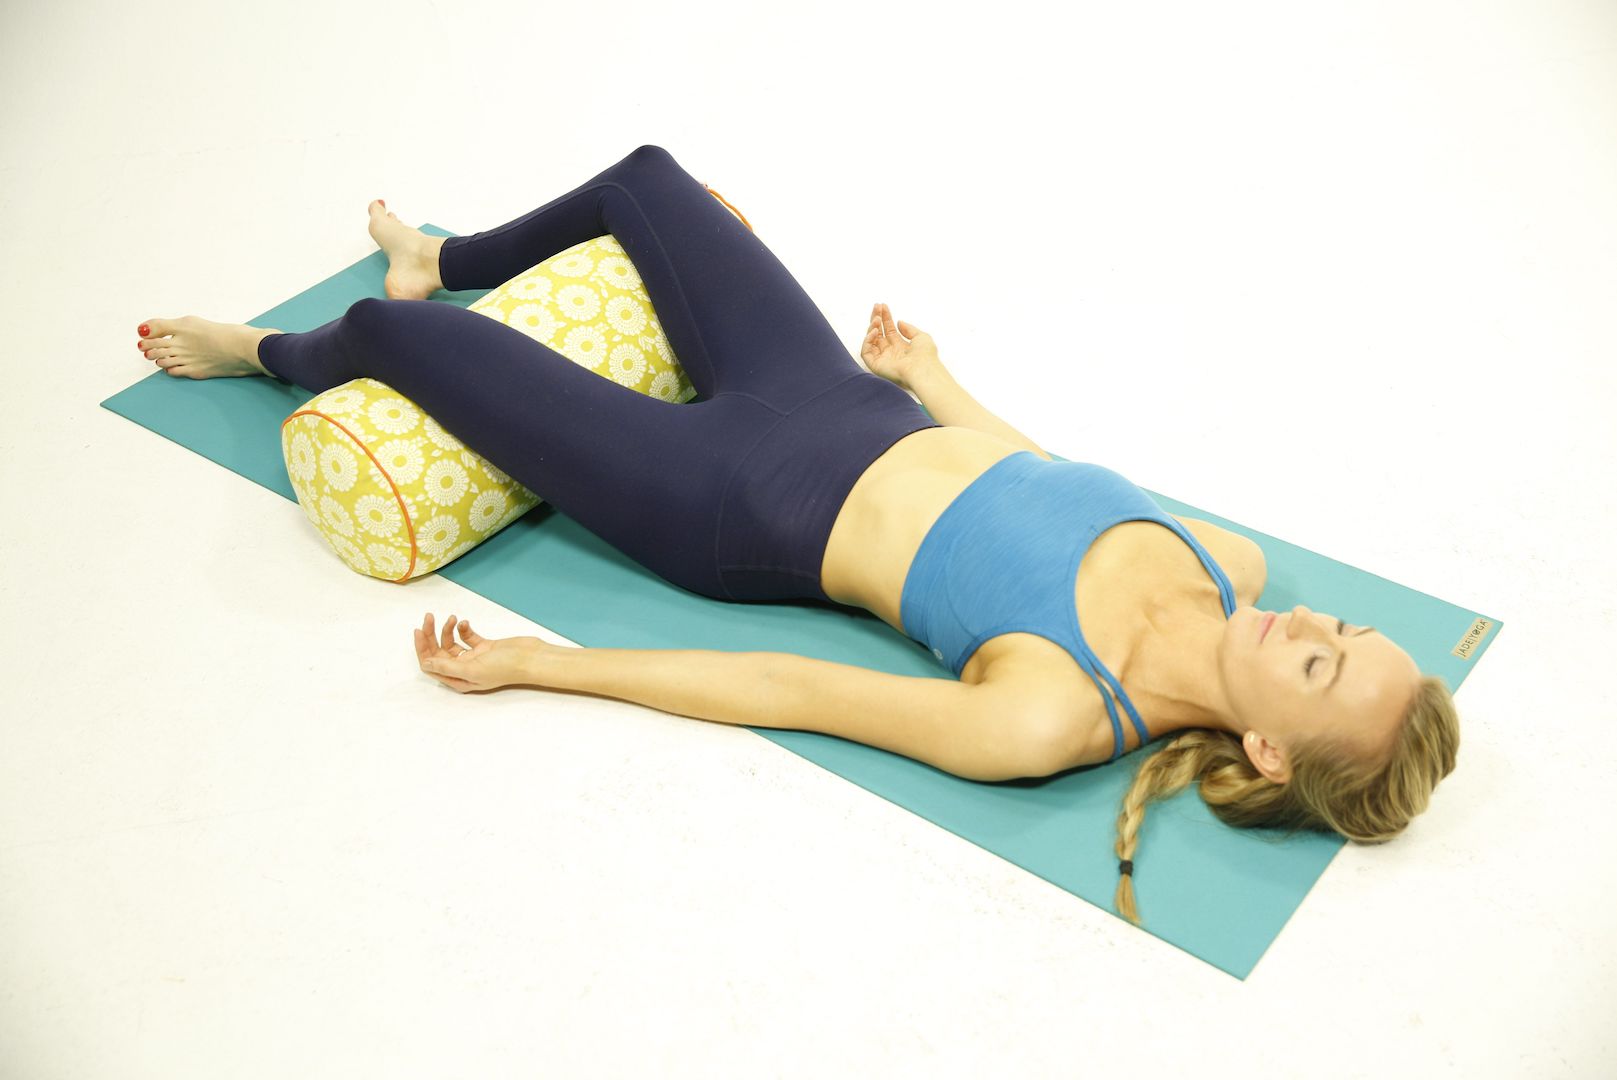
- Step 1: Lie down on your back. Feet as wide as the mat, arms by your sides. Close your eyes and breathe.
- Step 2: To release the pose take small movements in the hands and feet then the rest of the body.
Variations: Put a blanket or bolster under your knees to protect the low back. You can also cover the eyes or body to go deeper into the pose.
Benefits: Corpse pose has a calm and soothing effect, deepens the breath, aids in full body relaxation and reduces stress hormone levels. Corpse pose is the perfect easy move when you have a stressful lifestyle.
Uplifted Pro Tips:
- Place the hands in Yoni Mudra to bring greater awareness to your reproductive organs.
- The more time you spend in your parasympathetic nervous system the better your hormones can regulate. Don’t forget, add in a yoga nidra to your savasana and give yourself some extra rest. You deserve it.
I know it feels hard, but you are not a victim of this condition. Science has proven that a healthy diet and yogic lifestyle can help PCOS (polycystic ovary syndrome). Bring these concepts into your everyday life and see how you flourish.
Next Steps
- Check out my YouTube channel and find some yoga classes that you can try out for yourself!
- Download my Yoga Calendars for an at-home practice, guided by me on YouTube!
- Join Uplifted for exclusive content that you can access right from the app. Take a deep dive into your practice with me this year!
Find more yoga sequences by benefit.
YOU MIGHT ALSO LIKE
- How to Teach Somatic Yoga: A Practical Guide for Instructors
- The Best Somatic Exercises for Grief: Find Healing Through Movement
- The Best Somatic Exercises for Anger Management and Emotional Release
- Yoga to Reconnect with Yourself: 5 Essential Practices for Inner Peace
- Yoga for Connection: 10 Poses to Deepen Relationships and Bonding
- Yoga To Connect With Your Body For Mind-Body Harmony
- Yoga to Connect with Feminine Energy: 5 Transformative Practices
- Yoga to Connect with Your Heart: 3 Poses for Emotional Balance
- Myofascial Release Yoga: Unlock Tension and Improve Flexibility
- 6 Hip Openers For Emotional Release
- Office Yoga: 10 Poses You Can Do Right Now
- Ayurveda Food Combining: The Key to Balanced Digestion
- Yoga For Grief: 8 Yoga Poses For Support
- Yoga for Vata Dosha: Practice Poses and Tips
- Yoga for Pitta Dosha: Practice Poses and Tips
Learn how to do 11 of the most popular yoga poses correctly. Free video + PDF download.


