Having lower back pain?
It might be sciatica.
Sciatica is a term that describes low back pain that radiates through the hip, to the back of the thigh, and down the inside of the leg. It’s a symptom rather than a specific diagnosis.
What causes it? Compression, irritation, or injury of the sciatic nerve or lower vertebrae.
Yoga therapy is a holistic system of therapy where you use yogic practices to prevent and treat different problems with the body and mind – things like sciatica. In this article, we’ll go over the benefits of yoga exercises for sciatica pain relief and the best types of yoga for sciatica.
Benefits of Yoga for Sciatica Nerve Pain
In 2019, the Bharati Vidyapeeth Deemed University ran a clinical trial to see how successful yoga asanas (viz. Ardha-matsyendrasana and Pawanmuktasana) were with managing sciatica.
The result? The asanas were pretty damn useful for managing sciatica. (That’s my unscientific way of saying it LOL)
Scientifically speaking, out of the 30 patients in the trial, they noted a 76.8% relief in pain, 80% relief in stiffness, and 79.5% relief in pricking sensation.
How did they do this? The asanas helped relieve the spasms and pain by relaxing the spine and associated muscles thereby reducing the signs and symptoms of sciatica.
Need more proof? Two other studies also evaluated the effects of selective yoga techniques alone and the combined effects of selective yoga techniques and hot oil massage for managing sciatic pain. In both groups, the studies showed significant positive results in alleviating the symptoms of sciatica. (You can read the full articles online at the International Journal of Ayurveda and Pharma Research and the International Journal of Yoga.)
How Can Yoga Help With Sciatic Pain?
Yoga therapy has a far-reaching effect on the body and mind through regular practice. I know, that’s kind of a general statement. To get more into the weeds, yoga asanas relieve tension from muscles and bones and make the systems in our body function more smoothly.
Various research shows that a protein called PGC-1alpha plays a role with muscles in exercises such as yoga, and suppresses a broad array of inflammatory responses. In non-science-y terms, yoga proved to help with pain intensity and functional disability.
You might be thinking, “okay cool, but what actual results can I expect from this?”
Well, here’s the basics on how certain yoga poses can help with sciatica pain:
- Help align, straighten, and strengthen the lower back, the source of the sciatic nerve.
- Help relieve pain from compression of the sciatic nerve.
- Help lengthen and loosen the hip muscles, as time and activity could have made these muscles tight, applying pressure on the sciatic nerve.
- Simple yoga stretches also greatly ease the pain along the entire sciatic nerve.
Best Types of Yoga for Sciatica
Give this yoga class a try:
If you’re looking for a specific style of yoga, then these are the best types of yoga for sciatica pain:
Iyengar Yoga
Iyengar Yoga is one of the most widely practiced styles of yoga for sciatica and chronic low back pain. Why? Iyengar yoga has a strong focus on balance and works deeply with each posture. A research study in sciatica patients using Iyengar yoga for chronic back pain showed strong signs of improvement.
Yin Yoga
Yin yoga involves long-held poses, ensuring that the body can stretch further than you’re used to. It is a calming yet intense form of yoga practice good for people with back pain or neck pain.
Another tool used in yin yoga practice is the breath. Slowing down the breath activates the parasympathetic nervous system and turns off the stress-inducing sympathetic nervous system. This helps to reduce chronic inflammation and chronic contraction of the fascia (soft connective tissue) in the low back.
Most of the time sciatica occurs due to a fascial imbalance in the inner thigh, which causes a pelvic shift that irritates or compresses the sciatic nerve. So, reduce the fascial imbalance, and reduce some of your sciatica.
Restorative Yoga
In general, restorative postures are retained longer than more active postures. Restorative yoga can bring relief from sciatica pain, back pain and help alleviate stress. Restorative postures help quiet the nervous system, allowing your body to rest and begin the healing process.
Top Yoga Poses for Sciatica
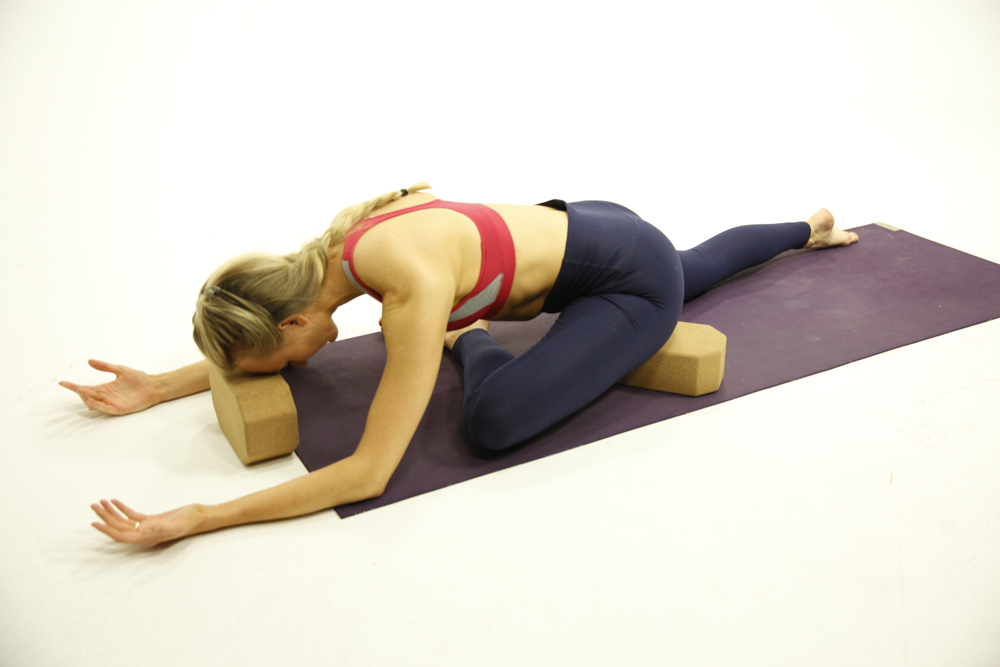
1. Child’s Pose (Balasana)
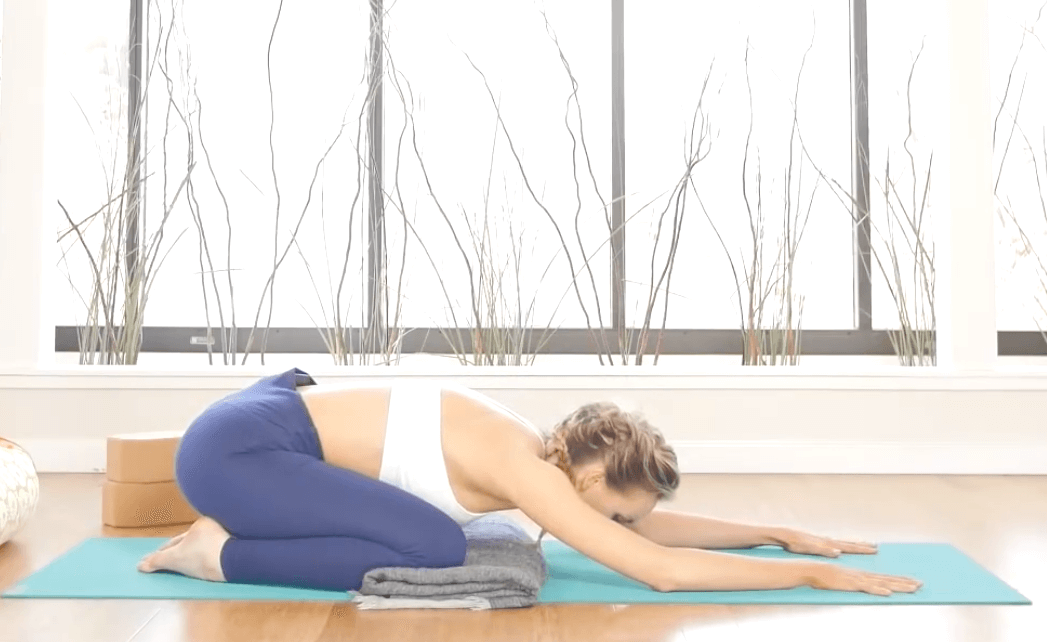
- Step 1: Start the pose on your hands and knees in a table position.
- Step 2: Place your knees together, then sink your hips into the back of your heels.
- Step 3: Either extend your arms in front of you or allow them to rest alongside your body.
- Step 4: As your body falls into your thighs, allow your torso to completely relax.
- Step 5: You can either rest your head on the floor or on a block for extra support.
- Step 6: Focus on deep breathing, and hold the pose for 5 – 10 breaths.
Variations: If you don’t feel comfortable doing balasana face down, then reverse this asana by getting on your back. All you have to do is lie down and hug your bent knee against your stomach, with your hands resting on your shins or your thighs on your back. Then widen your knees apart, drawing your knees toward your armpits.
Benefits: This is a perfect pose for lengthening and extending the lower spine. It does wonders towards sciatica relief and helps calm the whole body in the lower back, hips, and thighs while encouraging flexibility and openness.
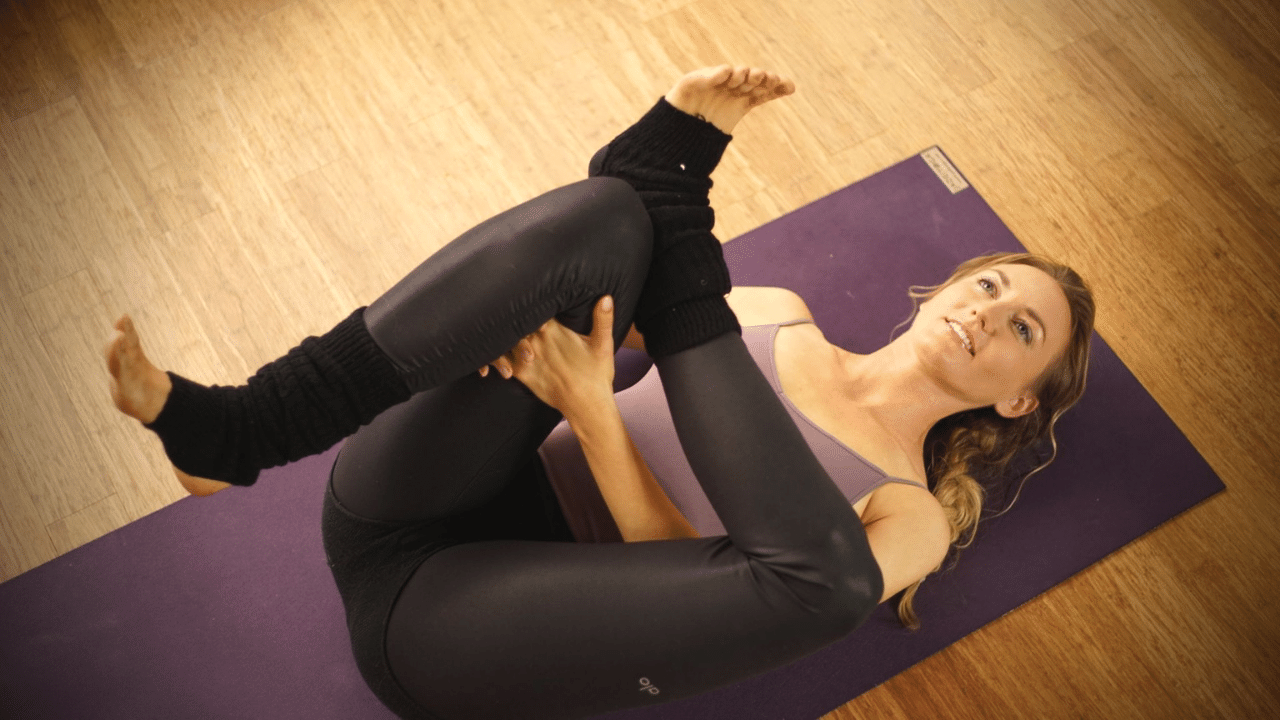
2. Knees-to-Chest Pose (Apanasana)
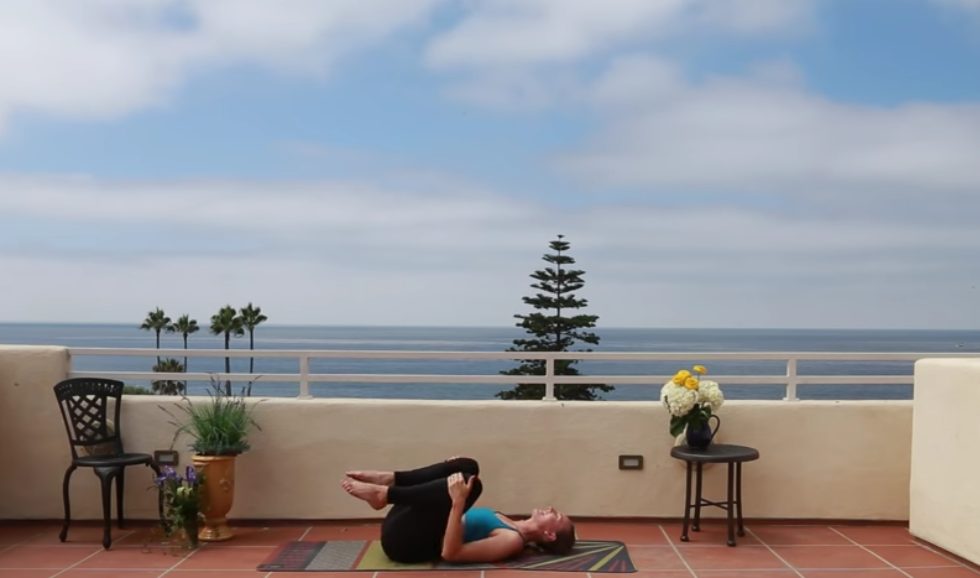
- Step 1: Start the pose by lying flat on your back with your legs straight, the back of your knees touching the ground, and inhale.
- Step 2: While exhaling, bend your knees and gently bring your thighs to your chest.
- Step 3: Hug your arms around your knees. Your back should be flat against the ground.
- Step 4: Hold this pose for 30 seconds to one minute, taking slow, deep breaths.
- Step 5: While exhaling, gently release your legs back to their original position on the ground.
- Step 6: Repeat this process 5 times or as you are comfortable.
Variations: A modification of this pose is the single knee-to-chest pose, where only one knee is bent at a time and lifted to the chest, while the other leg is straight. The process should be repeated alternately with both legs.
Benefits: The knees-to-chest pose helps stretch out the muscles in your lower back and your piriformis muscle.
3. Cobra Pose (Bhujangasana)
- Step 1: Lie flat on your stomach with your legs straight.
- Step 2: Place your palms on the ground next to you.
- Step 3: While inhaling, push through your arms, lifting your chest off the ground.
- Step 4: Your back should be arched, but your hips and lower body should be pressed against the ground.
- Step 5: Hold this pose for 10 to 20 seconds, taking in slow, deep breaths.
- Step 6: Gently lower your torso back to the ground.
- Step 7: Repeat this process 2 to 3 times as you are comfortable.
Variations: If the standard cobra pose is too challenging, bend your elbow and place your forearms on the ground instead of your palms while you push your chest off the ground. Keep your elbows directly under your shoulders.
Benefits: The cobra pose will work your core and stretch your lower back.
4. Bridge Pose (Setu Bandha Sarvangasana)
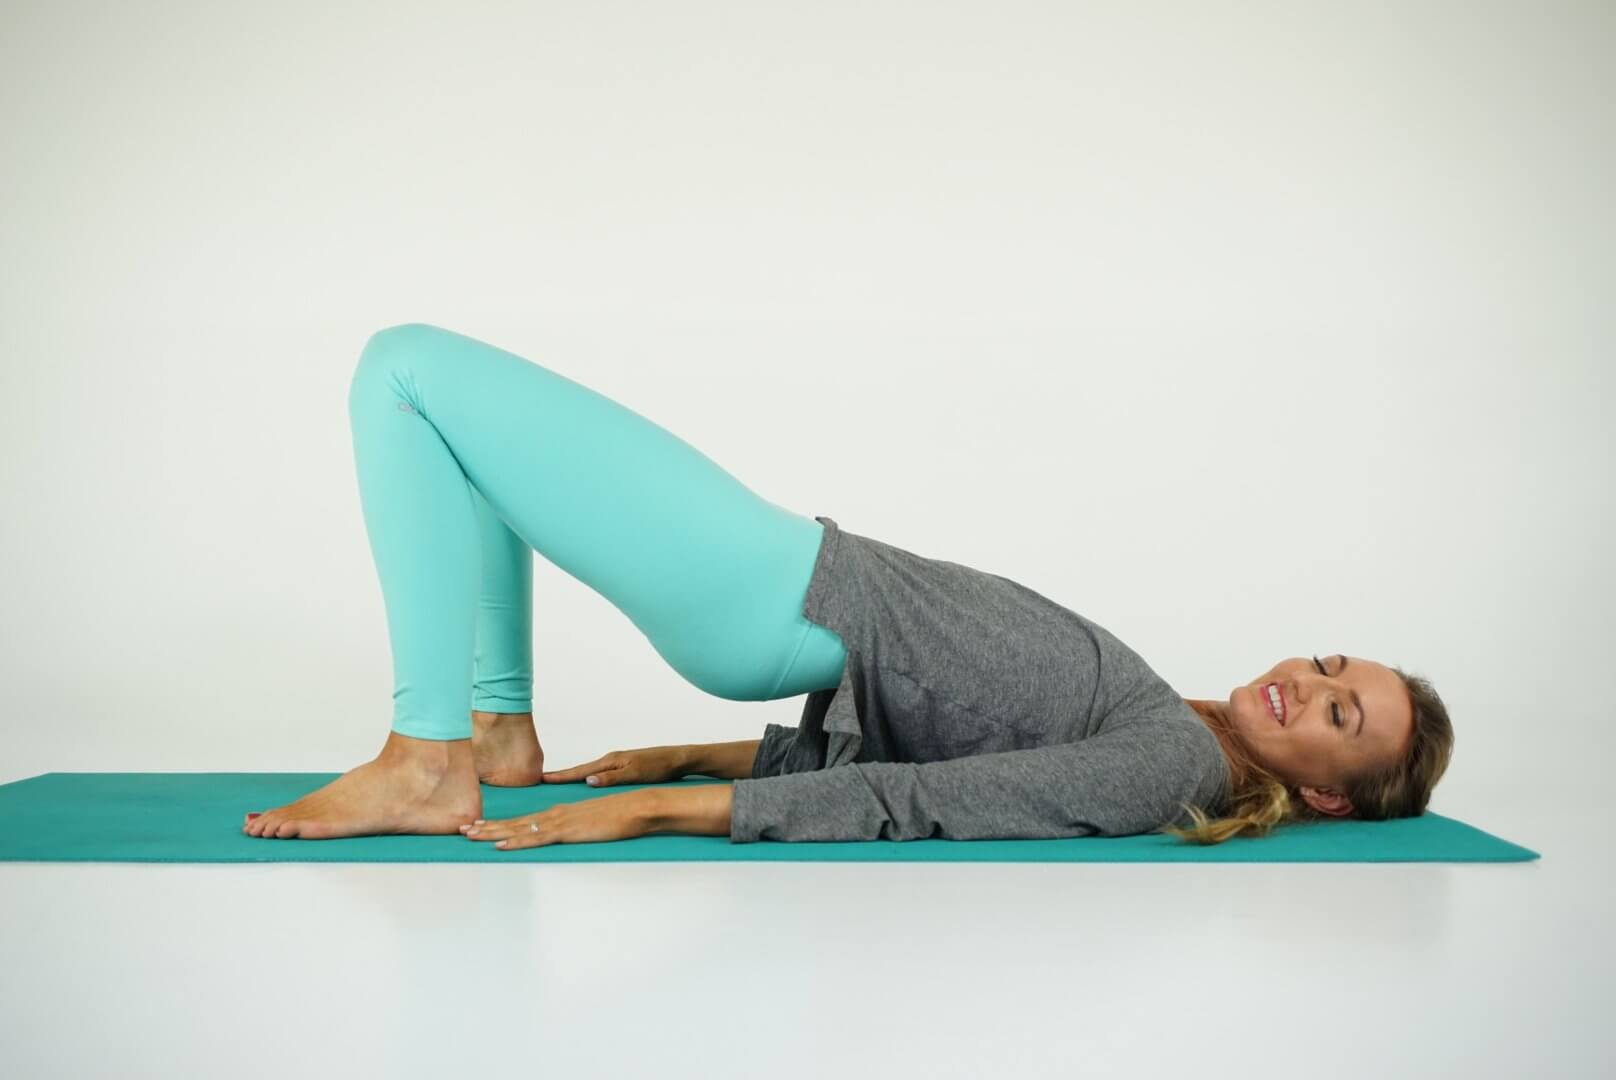
- Step 1: To begin, lie on your back. Fold your knees and keep your feet hip-distance apart on the floor, 10-12 inches from your pelvis, with knees and ankles in a straight line.
- Step 2: Keep your arms beside your body, palms facing down.
- Step 3: Lift your lower back, middle back, and upper back off the floor slowly by inhaling; gently roll your shoulders; touch the chest to the chin without bringing the chin down, supporting your shoulders, arms, and feet with your weight.
- Step 4: Keep breathing easily. Hold the posture for a minute or two and exhale as you gently release the pose.
Variations: You may support your lower back with your hands if that is comfortable for you.
Benefits: The bridge pose opens the hip flexors and extends them. It strengthens the muscles of the heart and back and relieves lower back pain as well.
5. Legs-up-the-wall Pose (Viparita Karani)
- Step 1: Sit next to a flat and straight wall with your hips touching the wall and feet on the wall.
- Step 2: Lean-to your left side, resting your left elbow on the floor in line with your shoulders.
- Step 3: Exhale and move your feet up the wall, one following the other, till they are flat on the wall, your back on the floor.
- Step 4: Ensure your pelvis is in a neutral position, as you lie in this inverted position.
- Step 5: Now, close your eyes, and keep taking deep breaths as you relax in the pose.
- Step 6: Stay in the pose for as long as you comfortably can. Then come out slowly, put your legs down, press them gently against the wall to descend until you lie on the floor next to the wall.
Variations: To add to your comfort, place a bolster under your hips to support it.
Benefits: Tired legs and feet are relaxed by this yoga pose. It relaxes the hips and back and decreases pain in the knee and ankle as well.
6. One-legged Pigeon Pose (Eka Pada Raja Kapotasana)
- Step 1: From cat stretch, bring your right knee forward to touch the right wrist.
- Step 2: Bending the knee, bring your ankle near the groin region. Now slide the right foot towards the left hand, till the toes touch the left wrist.
- Step 3: Slide the left leg back so that it touches the floor.
- Step 4: Lower your right buttock to the floor and press your tailbone forward to lengthen your lower back.
- Step 5: You may strengthen the lower back further by pushing your fingertips firmly to the floor.
- Step 6: Take a few deep breaths in this position.
- Step 7: Taking support from your hands, slide your left knee forward while exhaling and get back into the Cat stretch.
- Step 8: Stay in Cat stretch and take a couple of deep breaths and repeat the process with the other leg.
Variations: Drape your torso over your front shin for a more restorative variation on the pose. Stretch your arms forward along with the mat. As you continue to square the hips, allow your body weight to rest on your front leg.
Benefits: The lower part of your body is stretched by this yoga pose, relieving aching muscles. It makes the area of the hip more flexible and encourages good posture.
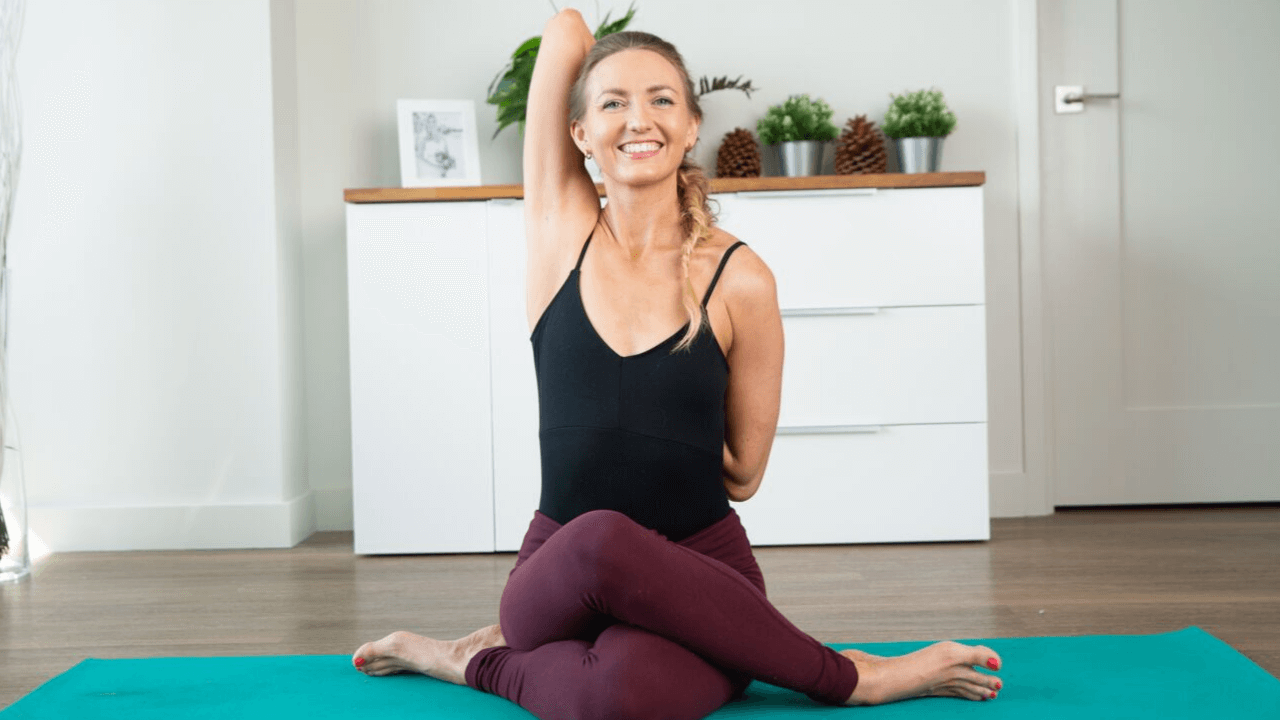
7. Cow Face Pose (Gomukhasana)
- Step 1: Sit with your back straight and legs extended in front of you. Put your feet together and place your palms next to your hips.
- Step 2: Bend your right leg and place the right feet under your left buttock.
- Step 3: Stack your left knee over your right knee.
- Step 4: Raise the left arm above your head and bend the elbow. Simultaneously, bring the right arm behind your back and interlock both hands.
- Step 5: Take deep breaths and stay as long as you are comfortable.
- Step 6: Now, as you exhale, release your arms.
- Step 7: Uncross your legs and repeat for the other leg.
Variations: Bring a blanket, block, or bolster under your buttocks if that makes the pose more comfortable. If it is uneven, use the props to even out your seat.
Benefits: The Cow face pose elongates the spine, correcting posture (bad posture is a major cause of back pain). It also strengthens the muscles of the back and hips.
8. Cobbler’s Pose (Baddha Konasana)
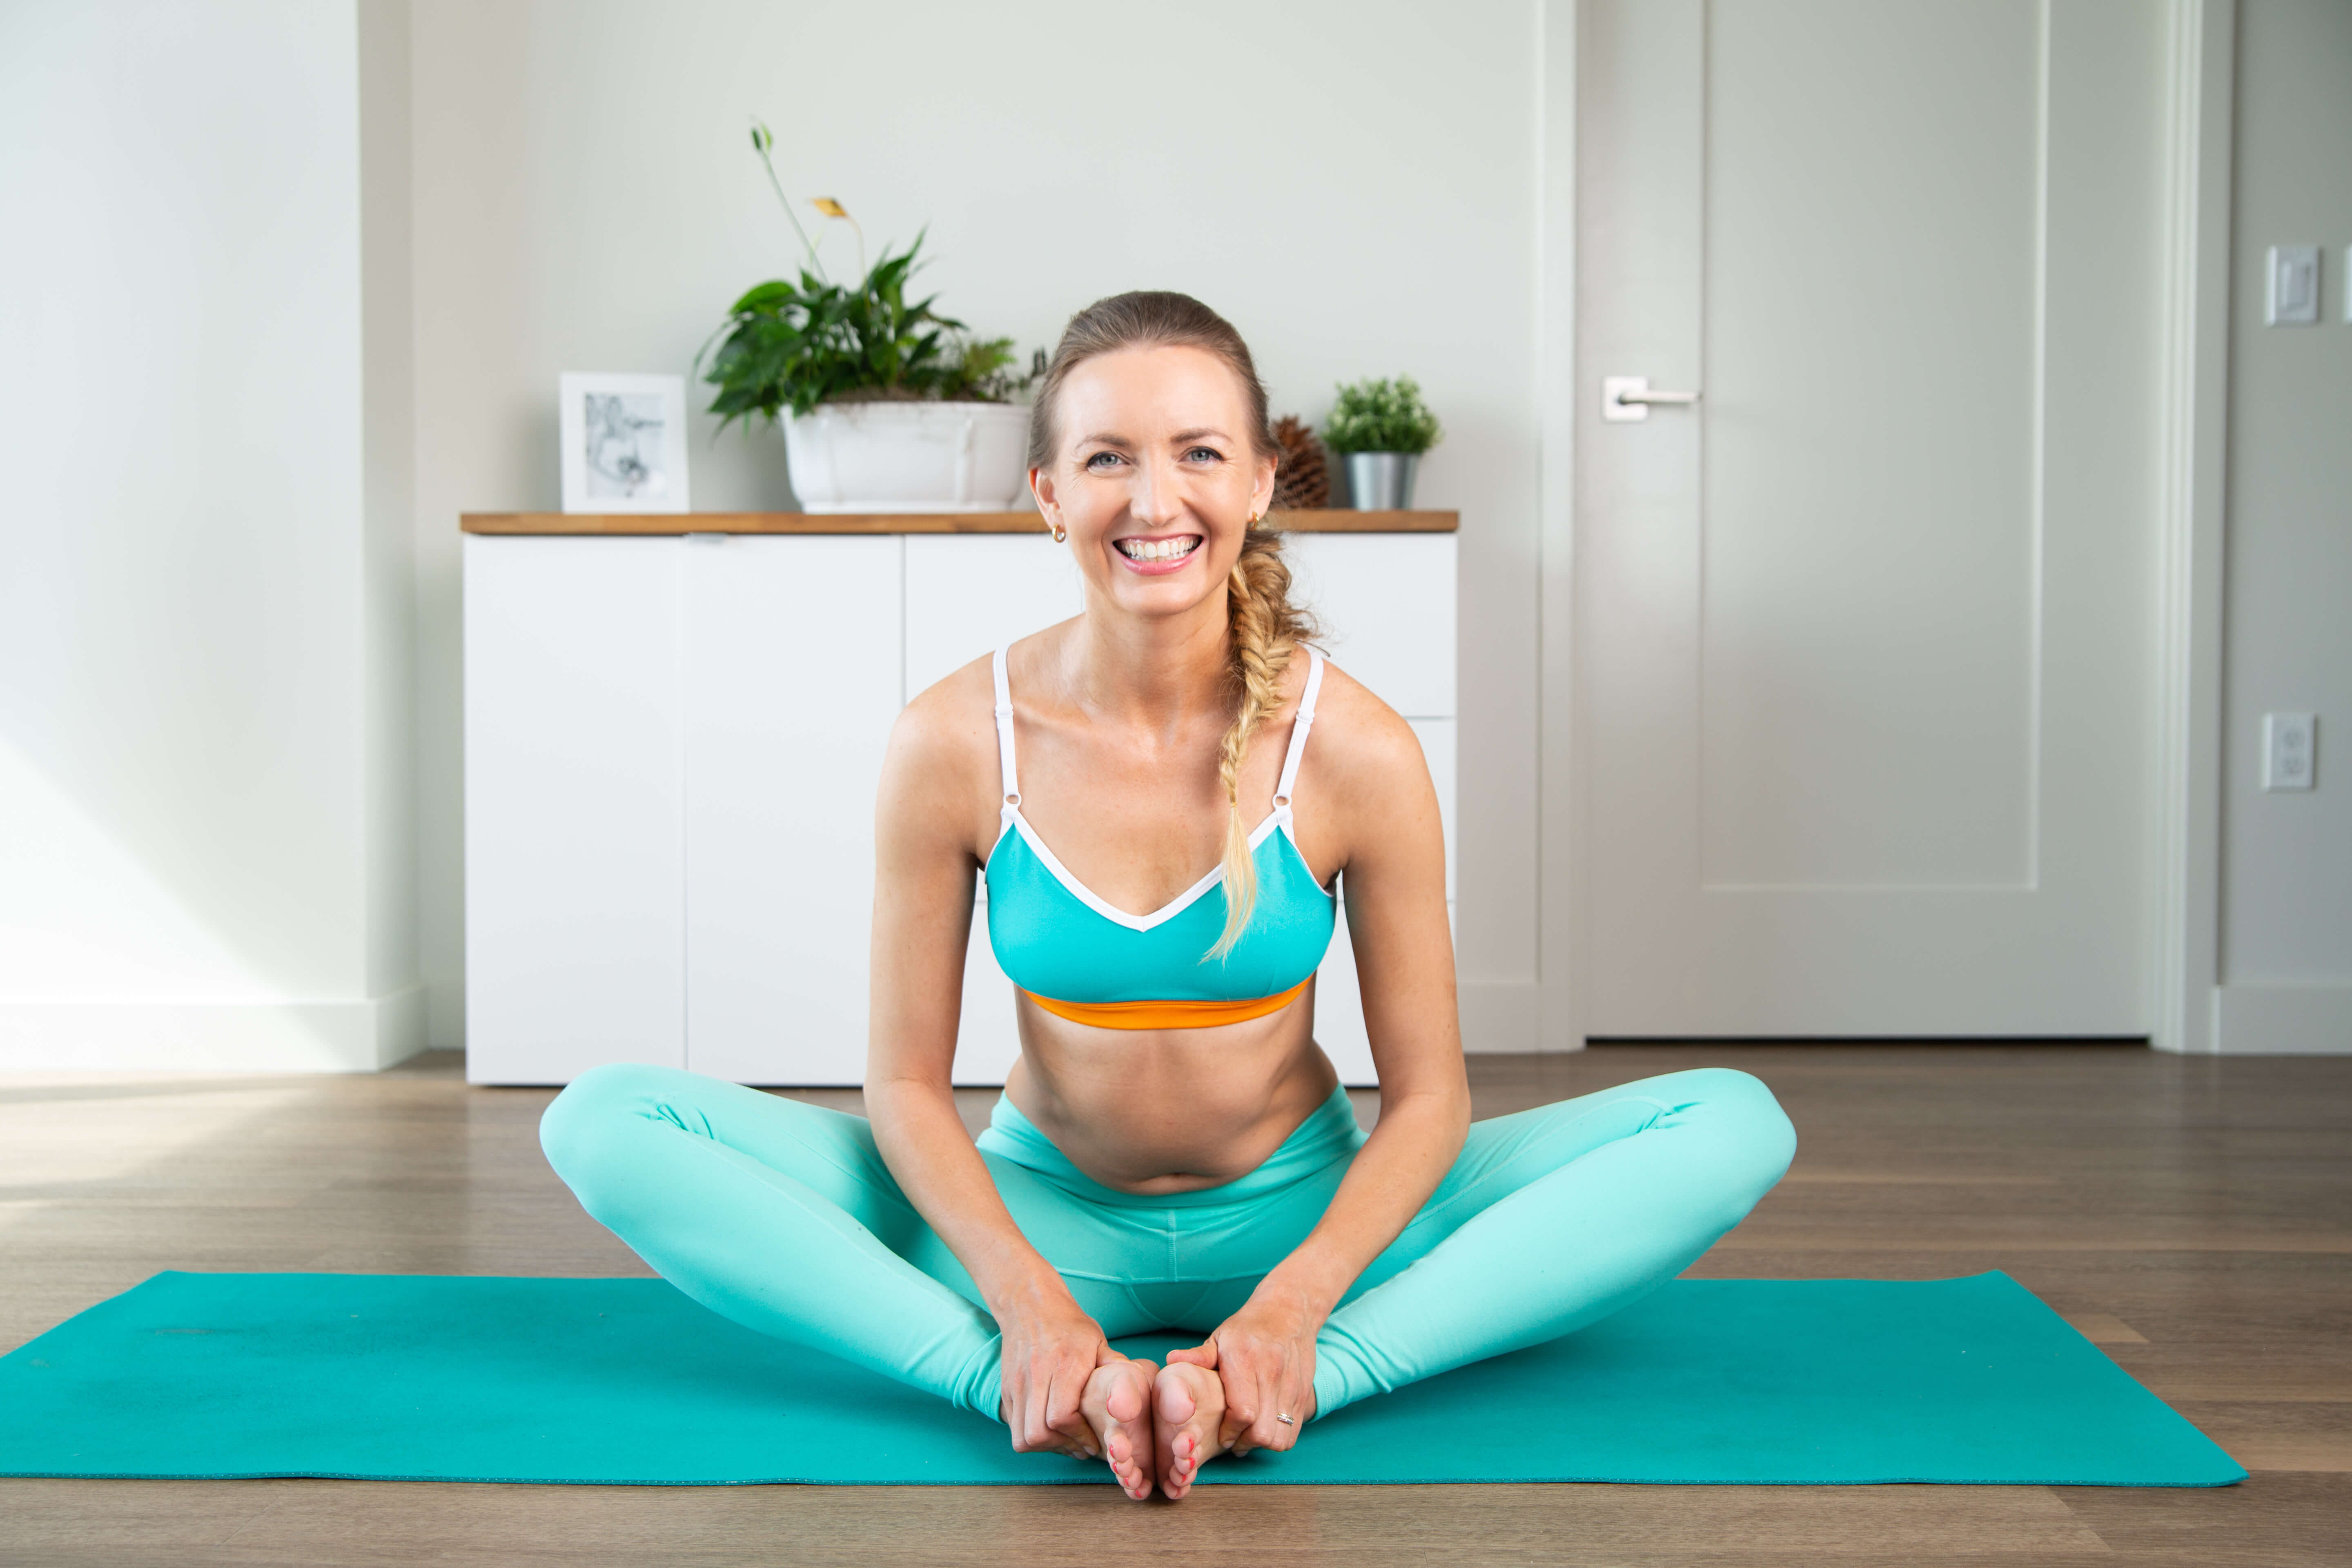
- Step 1: Start by sitting down on the mat.
- Step 2: Bend your knees and bring the soles of your feet together
- Step 3 Allow your knees to open like a book and fall toward the ground as much as your body allows.
- Step 4: Breathe deeply as you sit up tall and lengthen your spine.
- Step 5 Hold this position for 5 slow breaths, then slowly walk your body up to the starting position.
- Step 6: Repeat this 3 – 5 times.
Variations: When you are holding your feet, put the head down and extend the whole lower body with a deep inhalation and raise it above your head.
Benefits: The cobbler’s pose is a gentle pose that helps to relieve tension in your hips and lower back.
9. Half Spinal Twist (Ardha Matsyendrasana)
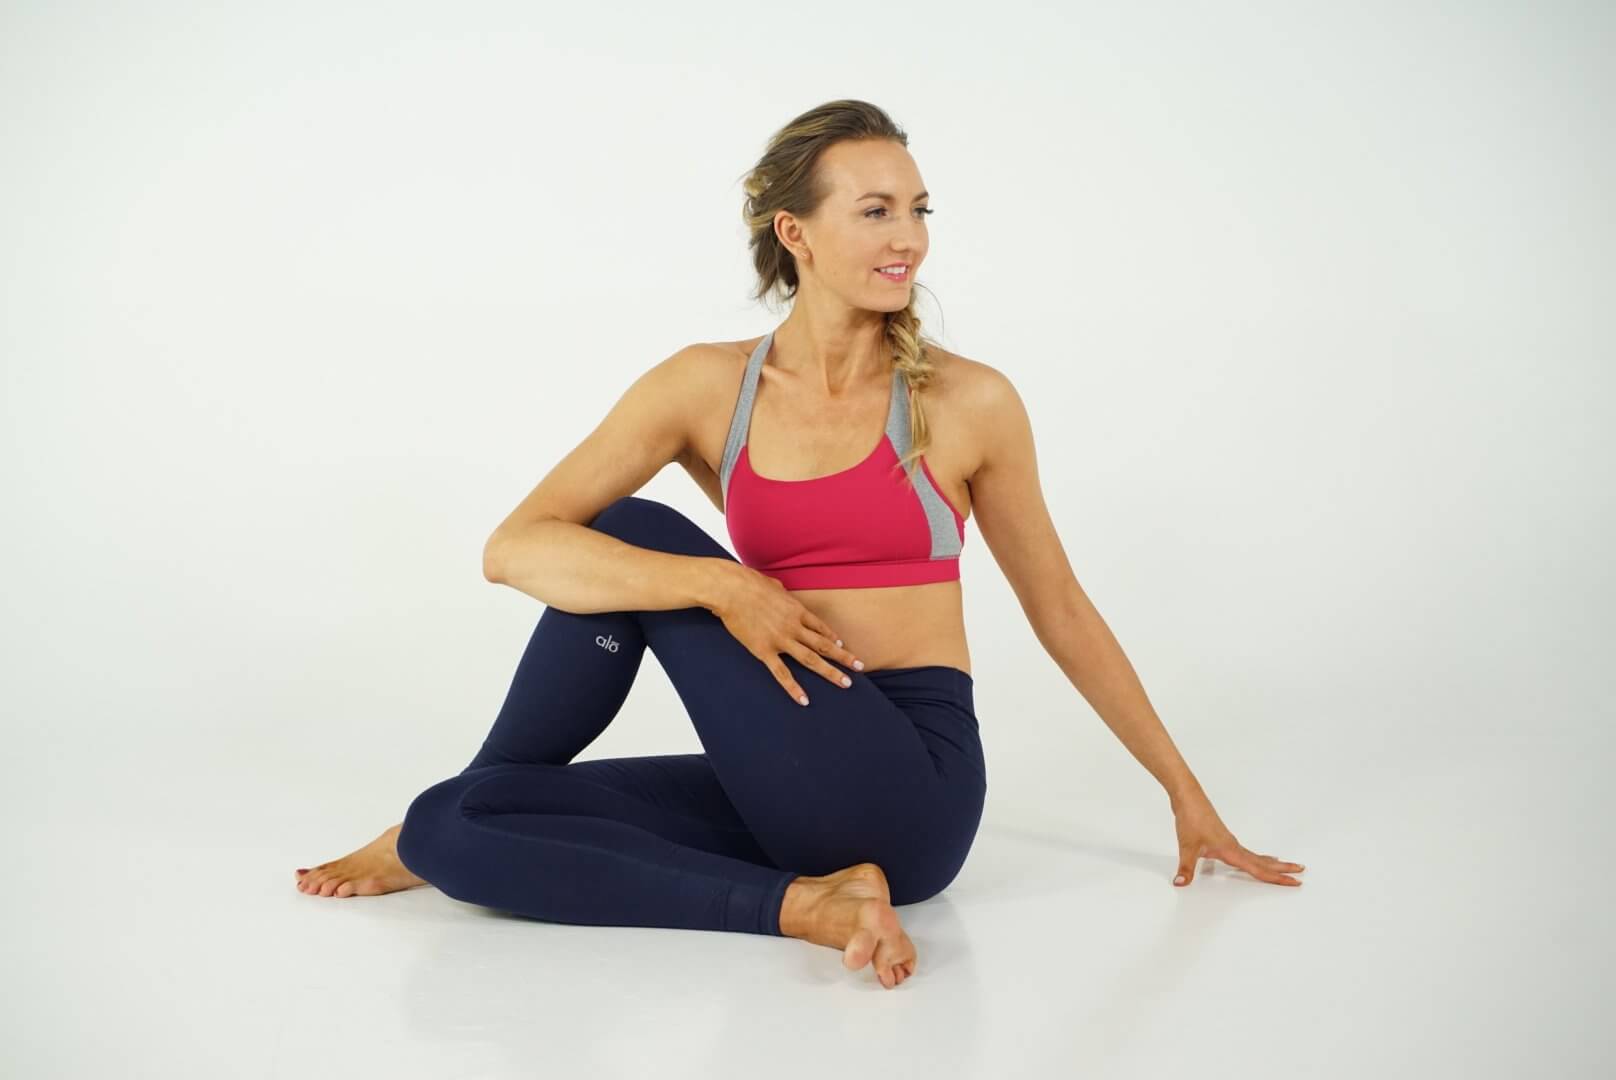
- Step 1: Sit on the corner of a folded blanket with your knees bent and your feet on the floor in front of you.
- Step 2: Take your right foot under your left knee and around to the outside of your left hip. Your right knee should point straight forward.
- Step 3: For the mildest hip stretch, place your left foot on the floor to the inside of your right knee, so that the left foot is roughly in line with your left hip.
- Step 4: Stay in the pose anywhere from 20 seconds to a couple of minutes, then repeat on the other side.
- Step 5: As your piriformis muscle stretches out over time, gradually decrease the height of your blankets until you can sit on the floor.
Variations: Gently draw your left knee across the midline of your body toward the right side of your chest if you do not notice a stretch in your left hip and slightly resist your thigh against the pull of your hands. This action will help preserve the grounding of your sitting bone and increase the piriformis stretch.
Benefits: A simple half spinal twist provides a mild stretch to the piriformis that allows it to release and lengthen. As you reach the full pose, you can gradually increase the intensity.
10. Eye of the Needle Pose (Sucirandhrasana)
- Step 1: Lie on your back with your knees bent and the soles of your feet on the floor. Hug your left knee into your chest.
- Step 2: Cross the left ankle over your body and rest it on the right thigh.
- Step 3: Let the left knee relax away from your torso.
- Step 4: Lift your right foot off the floor and thread your left hand through your legs so your hands meet on the back of your right thigh.
- Step 5: Using your hands, draw your right thigh toward your chest while exhaling.
- Step 6: Keep both feet flexed.
- Step 7: Continue to breathe deeply and relax the left knee to open the hips.
- Step 8: Repeat on the other side.
Variations: If it’s not comfortable to lie down, sit on a chair and rest your right ankle on your left thigh, holding the knee in line with your ankle as much as possible. Keep this Pigeon’s chair for three to five breaths. If you like, you can bend forward to intensify the stretch and repeat with the left leg.
Benefits: This pose stretches the muscles around the hips, the lower back, and the hamstring at the back of the thighs.
Yoga Poses to Avoid with Sciatica
When you have sciatica, there are certain yoga poses that you should avoid, because they can make the symptoms worse.
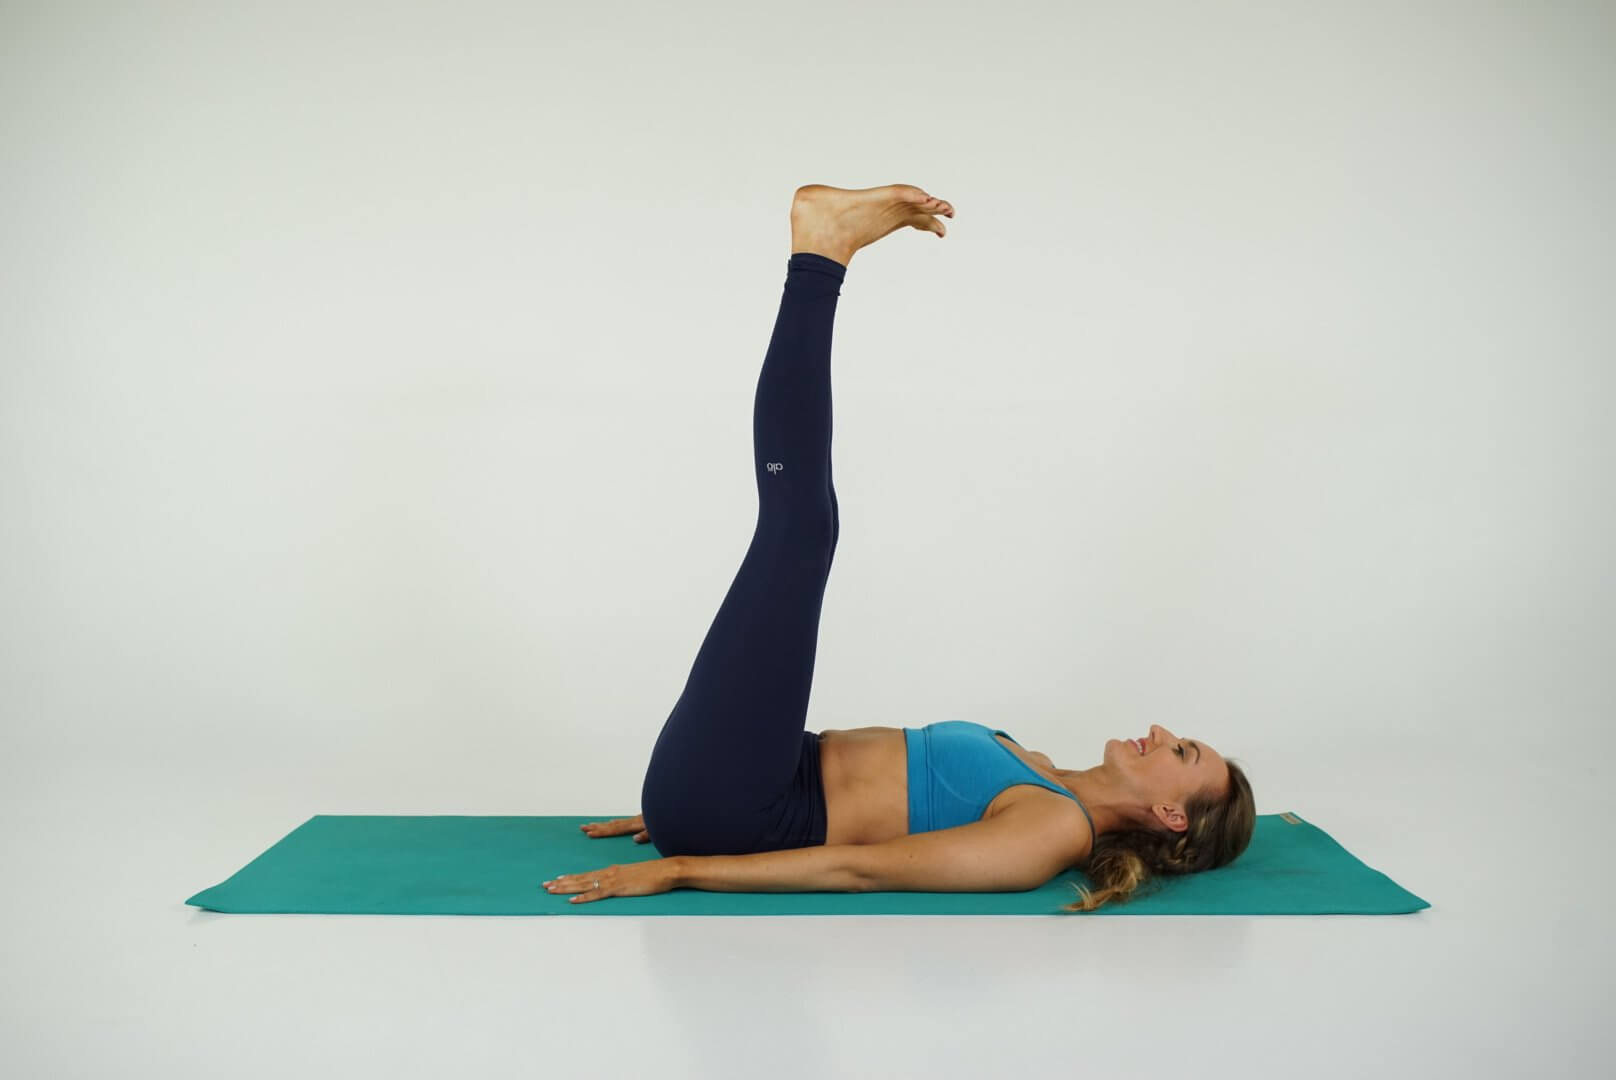
In general, stop any posture of any type that triggers discomfort. Avoid yoga poses that can cause more pressure in the pelvis and lower back (such as Sarvangasana) and sitting and standing forward bends (such as Hastapadasana except Downward-Facing Dog). Don’t try to force yourself into some awkward poses. Listen to your body and honor what you feel.
Next Steps
- If you’re interested in practical kriya yoga as a way to improve your daily life and relationships, check out my Yoga for Self Mastery course.
- Order my Yoga Life book for a practical guide to creating balance in your life through yoga.
- Check out my YouTube channel and find some yoga classes that you can try out for yourself!
Find more yoga sequences by benefit.
YOU MIGHT ALSO LIKE
- How to Teach Somatic Yoga: A Practical Guide for Instructors
- The Best Somatic Exercises for Grief: Find Healing Through Movement
- The Best Somatic Exercises for Anger Management and Emotional Release
- Yoga to Reconnect with Yourself: 5 Essential Practices for Inner Peace
- Yoga for Connection: 10 Poses to Deepen Relationships and Bonding
- Yoga To Connect With Your Body For Mind-Body Harmony
- Yoga to Connect with Feminine Energy: 5 Transformative Practices
- Yoga to Connect with Your Heart: 3 Poses for Emotional Balance
- Myofascial Release Yoga: Unlock Tension and Improve Flexibility
- 6 Hip Openers For Emotional Release
- Office Yoga: 10 Poses You Can Do Right Now
- Ayurveda Food Combining: The Key to Balanced Digestion
- Yoga For Grief: 8 Yoga Poses For Support
- Yoga for Vata Dosha: Practice Poses and Tips
- Yoga for Pitta Dosha: Practice Poses and Tips
Learn how to do 11 of the most popular yoga poses correctly. Free video + PDF download.


