Regularly stretching your muscles and building strength around your joints not only eases aches and pains that come with tight muscles, but it also protects the joints from being damaged. And it seems like more people could use a little bit of yoga to help them with this.
In fact, frequent knee pain is reported to affect roughly 25% of adults. What’s worse, persistent and regular knee pain not only affects mobility but also limits function and affects an individual’s quality of life.
As you can imagine, so many people turn to yoga because it can help them heal their bodies.
It makes sense, too.
While there are many different causes of knee pain, studies have shown that incorporating a regular Yoga practice in our routine can significantly reduce the symptoms of knee pain. In cases of those suffering from arthritis, Yoga has been found to reduce pain and arthritic symptoms, along with increasing holistic well-being, function, strength, flexibility, and mobility.
In this post, I share with you my favorite styles of yoga for knee pain, as well as 7 yoga poses that can help you increase flexibility and strengthen your leg muscles to help reduce knee pain in the future.
Which Types of Yoga Are Best For Knee Pain?
Any type of Yoga which focuses on gentle strengthening, flexibility and mobility is going to be beneficial for those suffering from knee pain. Gentle movement allows us to work on strengthening the muscles surrounding the knees – such as the quadriceps, hamstrings, and calf muscles. Our muscles are important, as they help to protect our joints, in turn aiding to reduce joint or knee pain.
- Hatha Yoga – great for knee pain as the practice allows for gentle strengthening
- Gentle Vinyasa Flow – light vinyasa flows are great for knee pain as they allow for soft mobility
- Restorative Yoga – aids in the soothing of sore, inflamed knees
7 Best Yoga Poses For Knee Pain
Aging, repeated stress and injury to the knee are the most common causes of knee pain. Strained or sprained ligaments, arthritis, tendonitis, or cartilage tears are particularly common issues that occur which can result in an individual experiencing discomfort in the knee.
While in some circumstances it would be best advised to rest until the inflammation of the knee has resided, in the long term, we can also look towards happier knees by utilizing Yoga to strengthen the leg muscles surrounding the knee, improving posture and mobility.
By incorporating a regular Yoga practice into your lifestyle, and focusing on correct alignment, we can seek to improve our overall physical and mental well-being. Yoga aids to remedy postural issues and muscle weaknesses that can contribute to knee pain.
During your Yoga practice be particularly mindful of your alignment in, make sure the breath is deep and freely flowing, and refrain from over pushing the body in Yoga poses.
Here are some Yoga poses which you can incorporate into a regular practice, which can benefit mobility, strength, flexibility, and posture.
1. Warrior 1 – Virabhadrasana 1
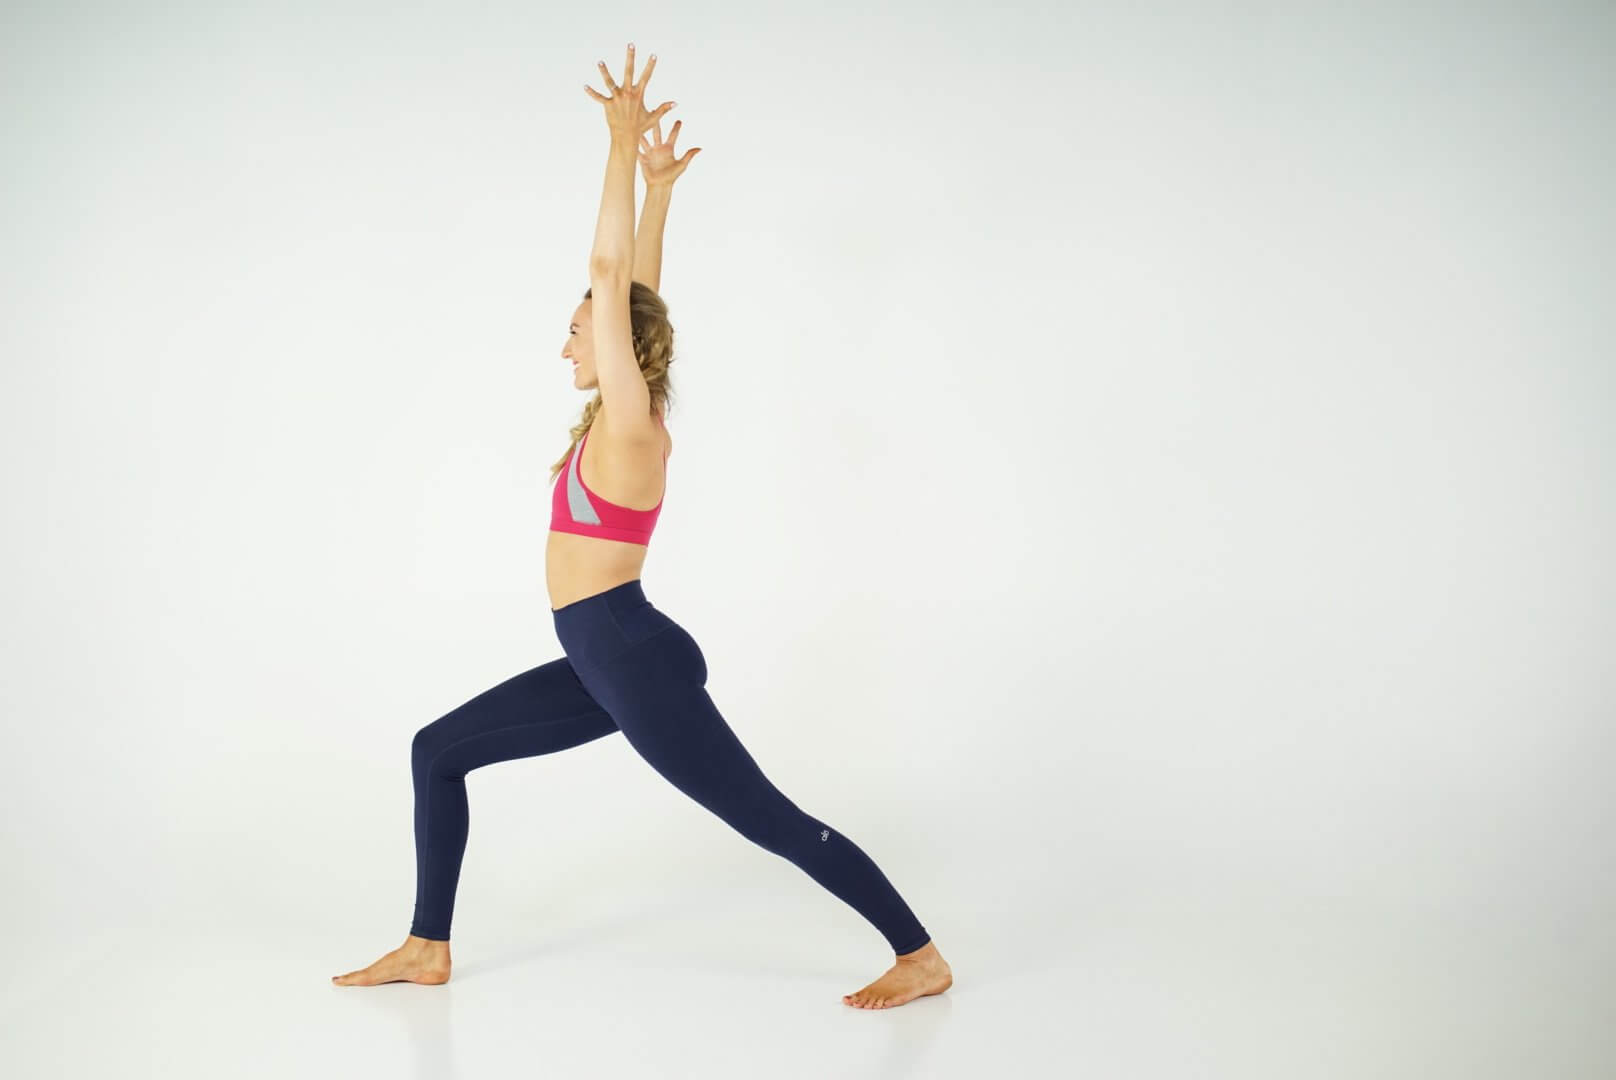
- Step 1: Stand at the front of your Yoga mat, exhale and drop the left leg back. Keep the toes of the right foot pointed forward towards the front of the Yoga mat, turn the left foot outwards slightly, roughly to a 45-degree angle. Keep a little space in between the heels, so they are not inline – this helps to square off the hips. Keep the left leg straight, with a small micro-bend in the left knee.
- Step 2: Bend into the right knee so that the knee is directly over the ankle, and square off the hips so that they are parallel to the short side of the Yoga mat. Draw the right hip backward.
- Step 3: Keep the torso vertical, inhale and raise the arms overhead. Draw the shoulder blades together to open the chest, keep space between the ears and the shoulders. Gaze up toward the thumbs.
- Step 4: Draw the lower belly in towards the spine, and breathe deeply. Keep the breath flowing, and focus on pressing through both feet equally, along with engaging the leg muscles, especially those around the knee. Repeat on the other side by starting with the right leg back first, hold each side for an even amount of time.
Variations: You can keep the palms together or open overhead. The traditional alignment is to have the heels in line, however, it helps women to keep space in between the heels to allow the hips to square.
If this is uncomfortable on the back knee, then try raising up onto the ball of the foot, which could alleviate pain in the knee.
This pose may not be suitable for those with active inflammation in the knee, the knee may need to heal slightly before this asana feels comfortable – tune in and listen to your body. This asana is great for long term strengthening of the muscles protecting the knee joint, but the knee may need rest before you can start to gently perform this posture.
Benefits: Great for strengthening the quadriceps, core, feet and arms. Stretches and lengthens the calves and ankles. By becoming more mindful of our leg and feet position, we can strengthen the muscles which provide safety for the knee.
2. Warrior 2 – Virabhadrasana 2
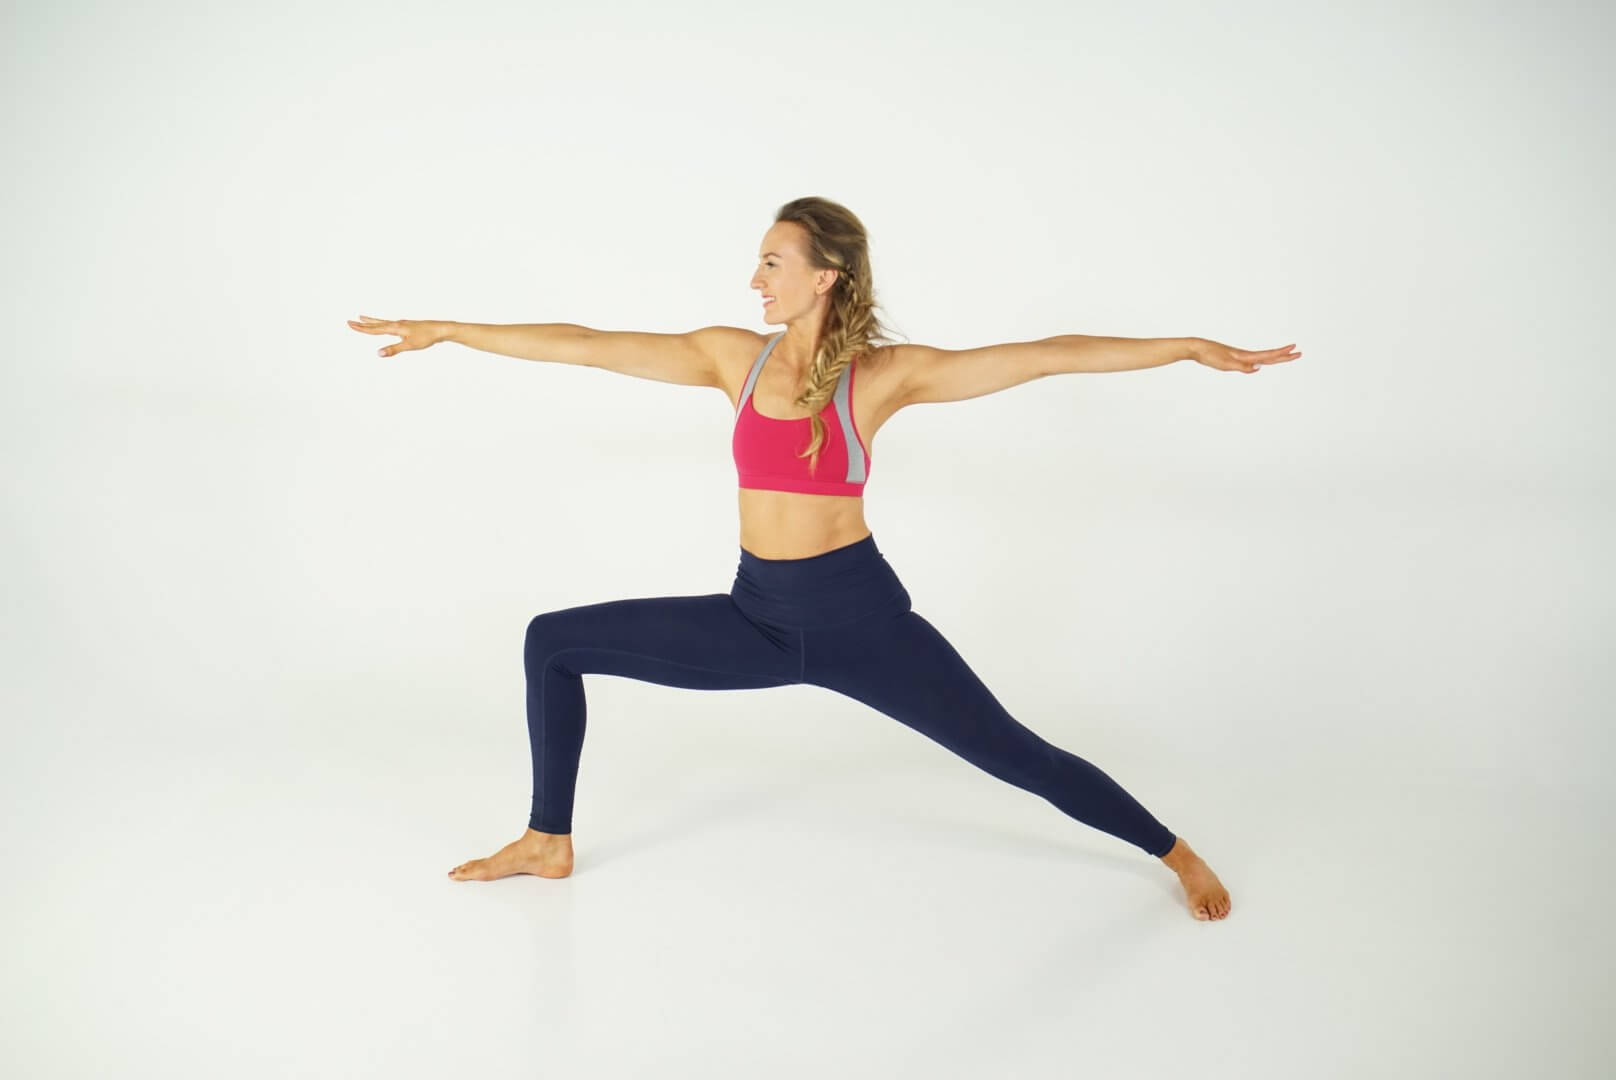
- Step 1: Stand at the front of your Yoga mat, exhale and drop the left foot back. Keep the toes of the right foot pointed forward towards the front of the Yoga mat, turn the left foot outwards slightly, roughly to an 80-degree angle. Align the right heel to the arch of the left foot. Keep the left leg straight, with a small micro-bend in the left knee.
- Step 2: Bend into the front leg, so that the knee is directly over the ankle, and open up the hips so that they are parallel to the long side of the Yoga mat.
- Step 3: Keep the torso vertical, raise and stretch the arms out to the sides, parallel to the ground and the long side of the Yoga mat. Draw the shoulder blades together to open the chest, keep space between the ears and the shoulders. Gaze toward the middle finger of the right hand.
- Step 4: Engage the core, and focus on full breaths. Focus on pressing through both feet equally, along with engaging the leg muscles, especially those around the knee. Draw the inner thighs up and outwards to open up the hips. Repeat on the other side by starting with the right leg back first, hold each side for an even amount of time.
Variations: If looking towards the right-hand feels uncomfortable on the neck, keep the head and torso aligned and look towards the side of the mat to avoid any pain.
Benefits: Much like Virabhadrasana 1, warrior 2 is really good for strengthening the leg muscles and the core. It works on the quadriceps, core, feet, shoulders and opens the hips. Warrior 2 stretches and lengthens the calves and ankle muscles. By pressing through both feet simultaneously and working on the leg muscles, we can balance and strengthen the muscles which provide smooth movement for the knee joint.
3. Chair Pose – Utkatasana
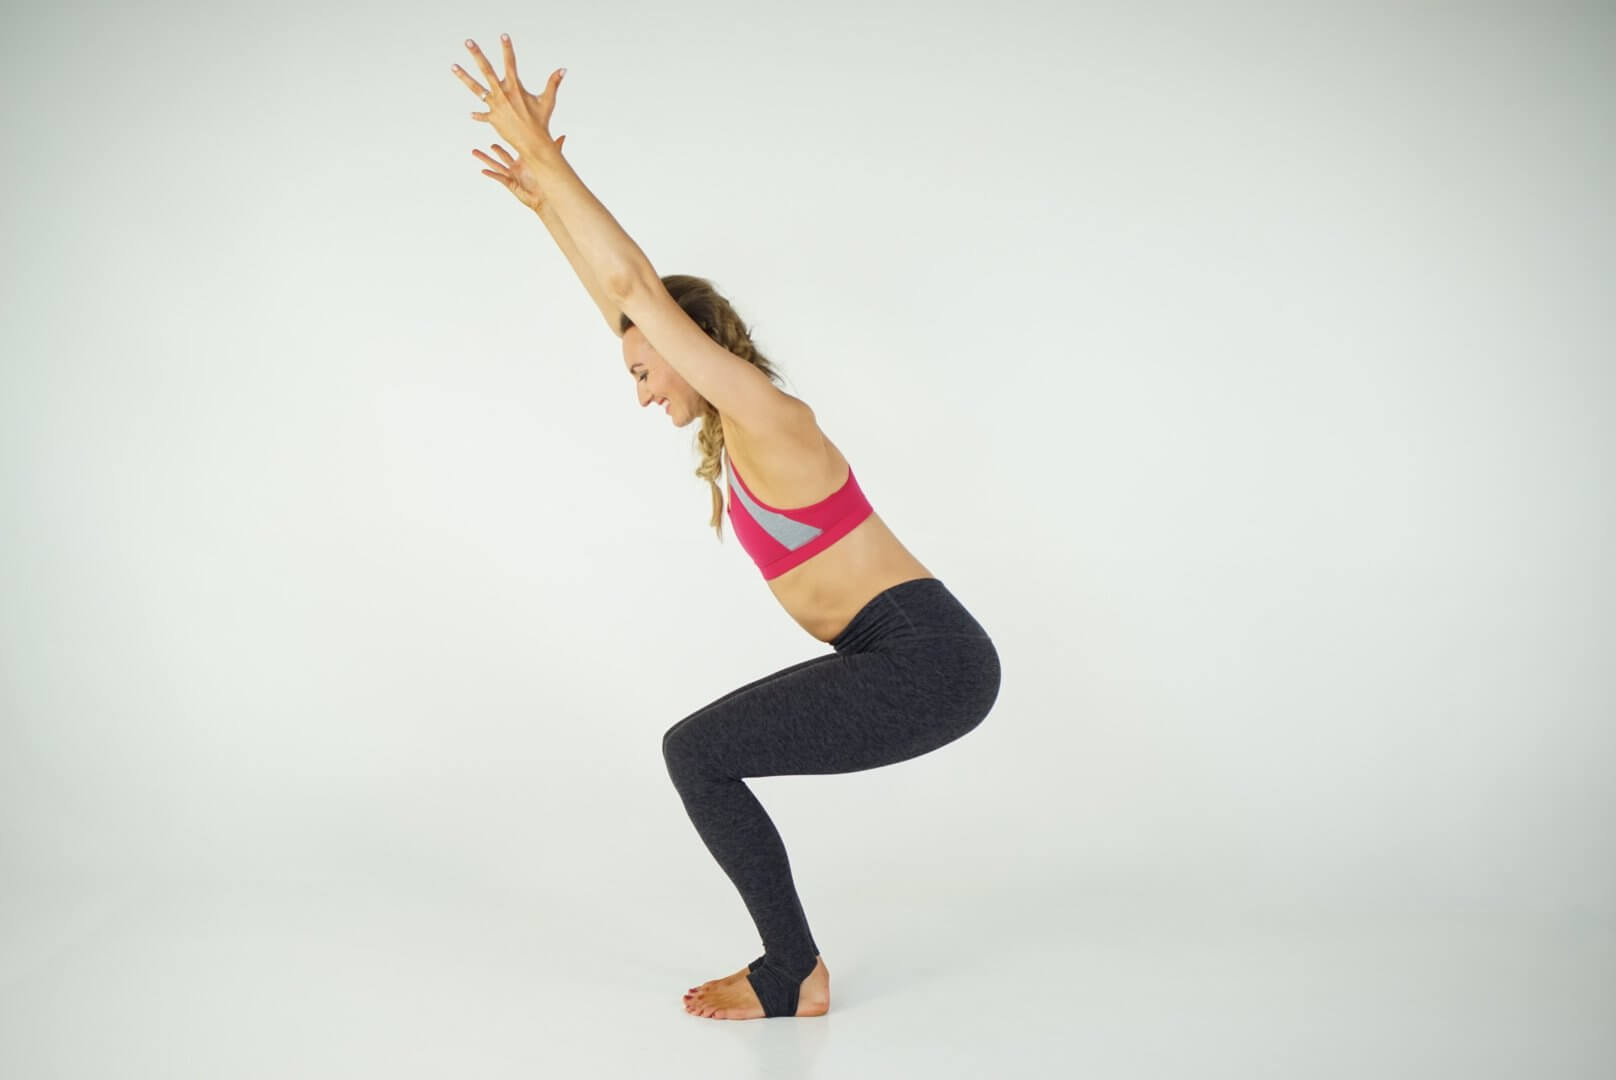
- Step 1: Stand on the Yoga mat in tadasana (mountain pose). Position the feet parallel at either hips distance apart, or slightly closer together depending on what feels better.
- Step 2: Exhale and simultaneously bend into the knees, and sweep the arms up overhead. Reach diagonally up and forward with the arms, and down and back with the glutes.
- Step 3: Check your alignment. The glutes are projected backward, and the knees project forwards over the feet. Make sure you can still see the toes. Tuck the tailbone so that the spine is straight, long and lengthened. Draw the lower belly in towards the spine to engage the core.
- Step 4: Focus on deep, nourishing breaths. Press equally through the base of the toes, and the heels so that you can feel the weight distributed evenly throughout the feet. Engage the quadriceps to protect the knees.
Variations: Try to bring the thighs parallel to the ground, or you can lessen the bend in the knees if the pose is feeling rather strong to maintain, or if you feel any pain.
Benefits: Utkatasana is great to work on the core, balance, and strengthens the quadriceps whilst also working on the flexibility of the ankles.
4. Bridge Pose – Setu Bandhasana
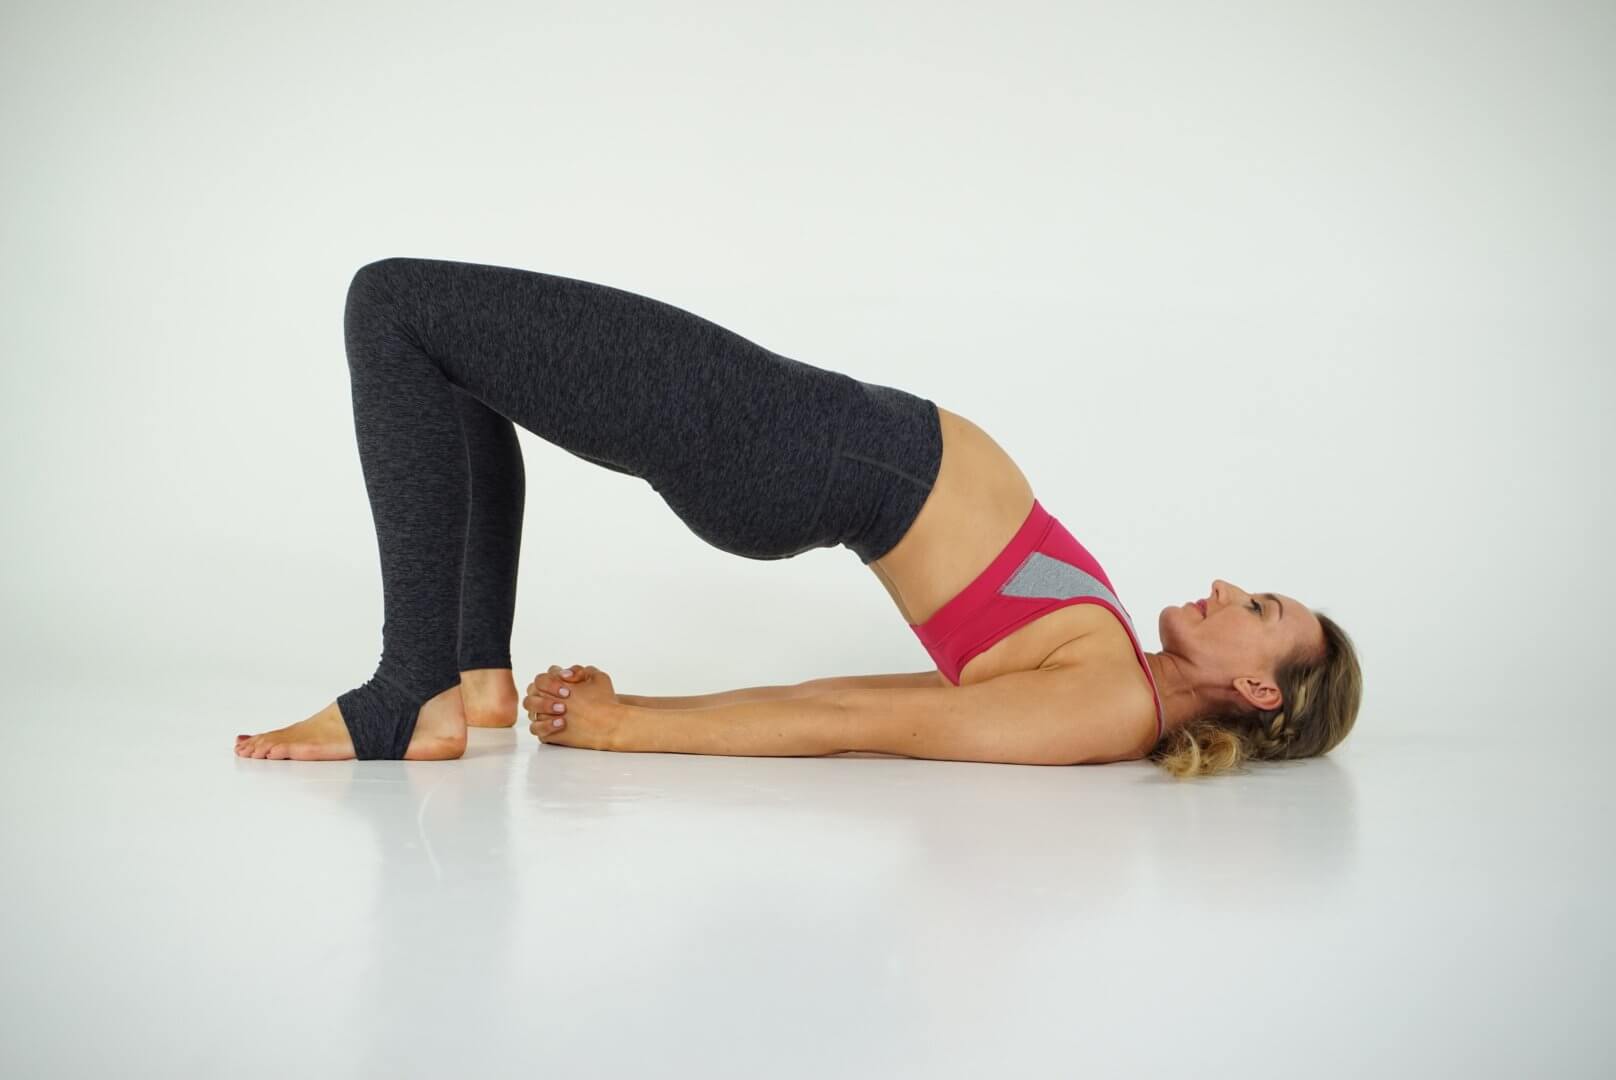
- Step 1: Lie on your back on your yoga mat. Bend the knees, bring the feet towards the glutes, parallel and hips distance apart.
- Step 2: Keep the arms on either side of the torso, and press the palms into the mat. Inhale and lift the spine upwards, using the stability of the feet, hands and shoulders.
- Step 3: Engage the quadriceps, and keep the legs parallel to each other. Lift the glutes until the quadriceps are almost parallel to the floor. Lift the back and hips as far as is comfortable, until the chin meets the chest, draw the shoulder blades together to open the frontline of the body.
- Step 4: Focus on deepening the breath, along with keeping the weight evenly distributed throughout the feet. Once in the posture do not turn the head side to side, to protect the neck.
Variation: If you feel this is uncomfortable on the neck, you can lay on a folded blanket – keep the top of the blanket in line with the shoulders so that the neck is free from compression. To deepen the bridge pose you can clasp the hands behind the back, which helps to open the chest further.
Benefits: Bridge pose is great for spinal mobility, balance and strengthening the legs and shoulders.
5. Mountain Pose – Tadasana
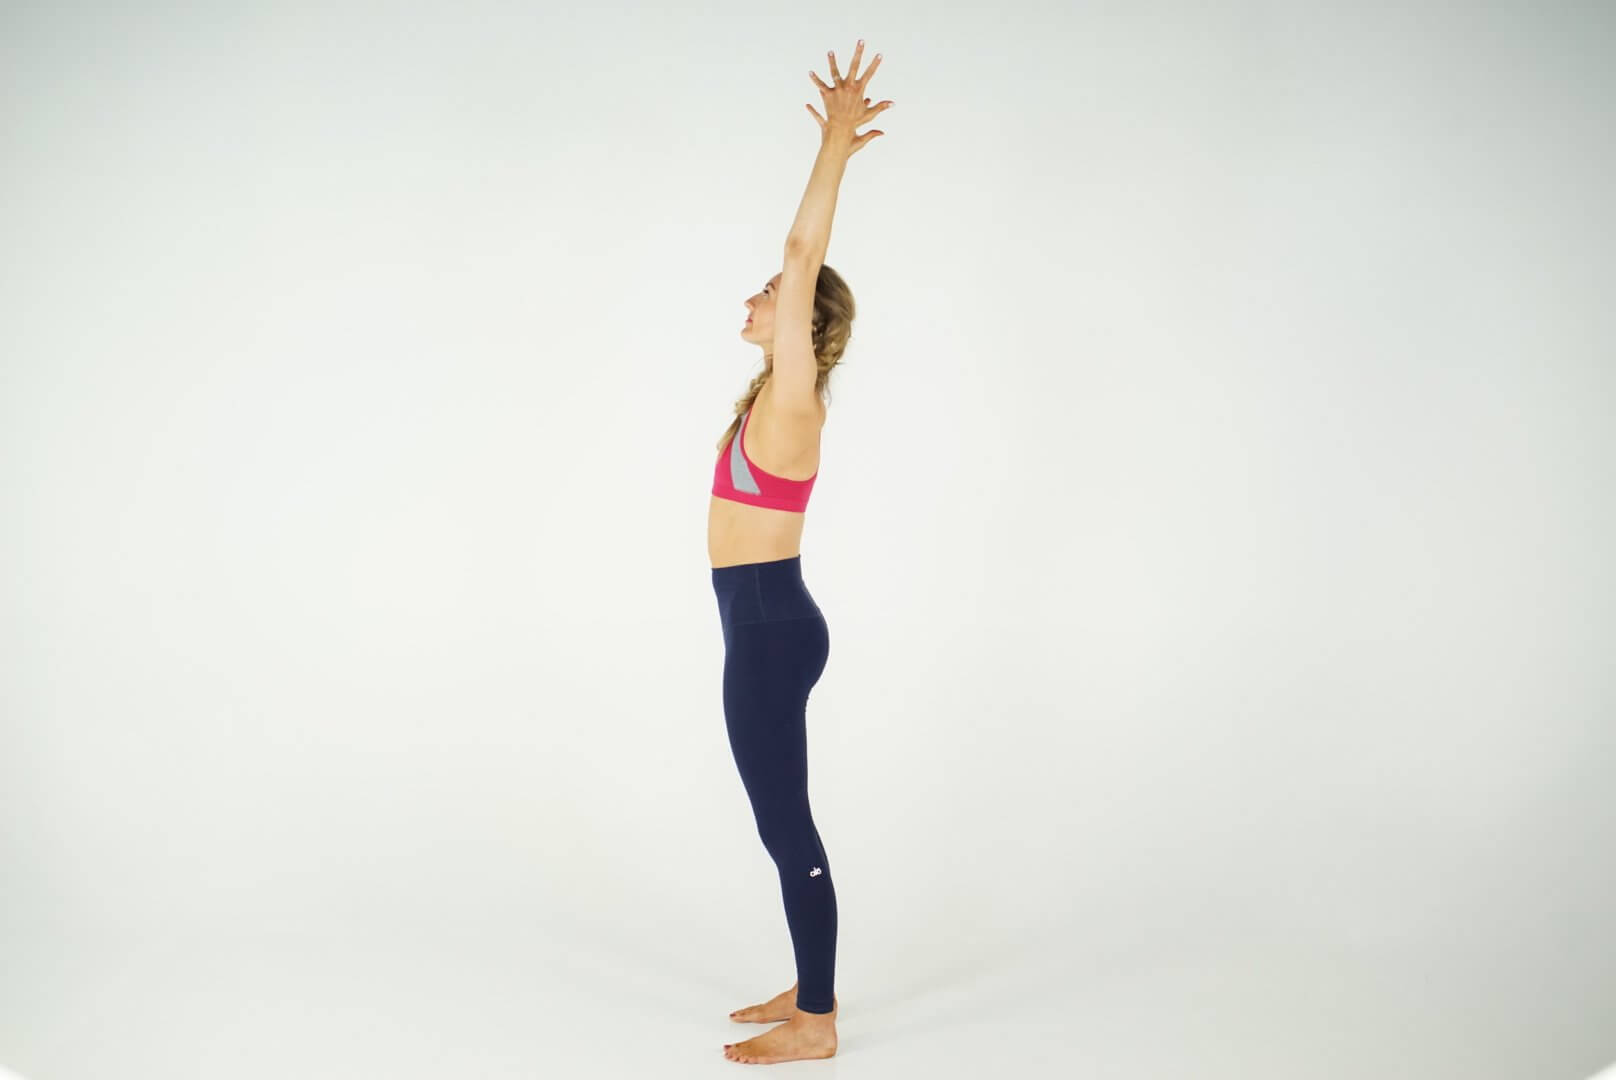
- Step 1: Stand on the mat, feet parallel and hips distance apart.
- Step 2: Micro-bend the knees lightly, tuck the tailbone, draw the lower abdomen in towards the spine and open the chest by drawing the shoulder blades together.
- Step 3: Inhale and lift the arms overhead with the hands parallel. Relax the shoulders to create space between the ears and the shoulders. Gaze upwards straight in between the hands
- Step 4: Focus on full, deep breaths and lengthening the spine. Press firmly through the feet, draw the kneecaps upwards and engage the quadriceps. Hold the pose for approximately 1 minute.
Variations: You can also keep the hands on either side of the body with the palms facing forward.
Benefits: This is a beautiful pose that gently works on strengthening the leg muscles, which is perfect if there is a high level of aggravation, pain or inflammation in the knee joints.
6. Extended Side Angle – Utthita Parsvakonasa
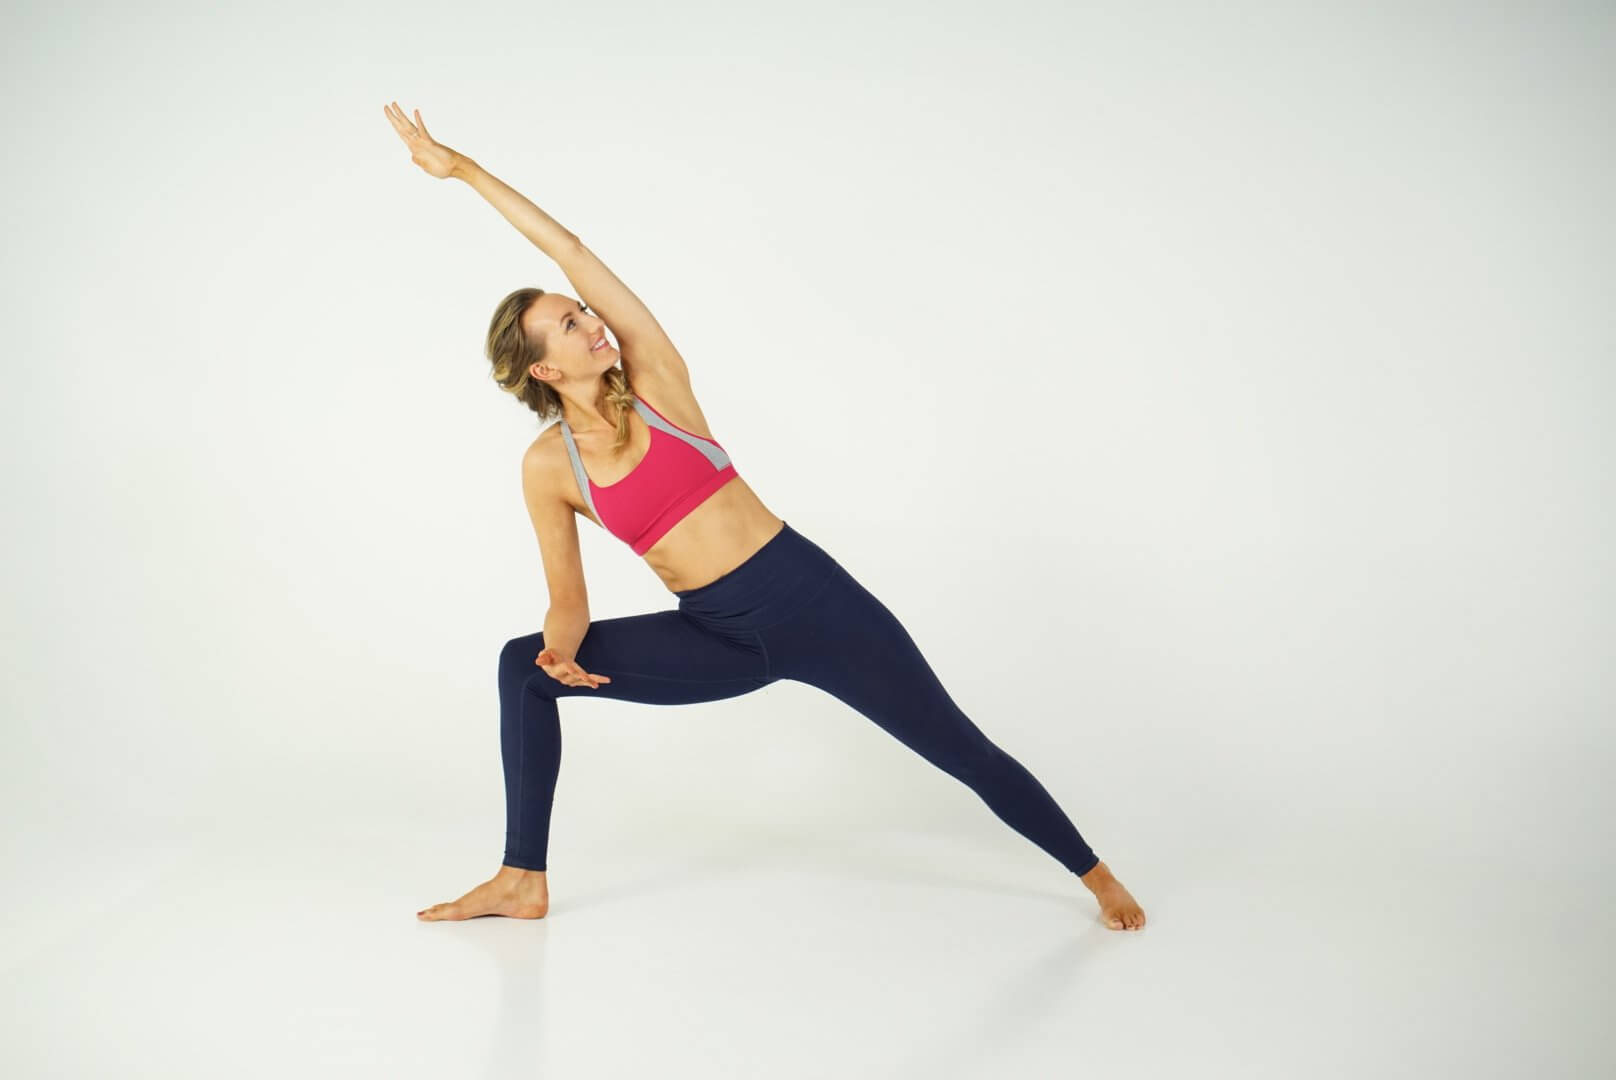
- Step 1: Stand at the front of your Yoga mat, exhale and drop the left leg back. Keep the toes of the right foot pointed towards the front of the Yoga mat, turn the left foot outwards slightly, roughly to an 80-degree angle. Align the right heel to the arch of the left foot. Keep a small micro-bend in the left knee.
- Step 2: Bend into the right knee so that the knee is directly over the ankle, and open up the hips so that they are parallel to the long side of the Yoga mat.
- Step 3: With an exhale rest the right arm gently on the right thigh and sweep the left arm up and stretch it over the body, so that the left side of the body creates a diagonal line. Draw the shoulder blades together to open the chest, keep space between the ears and the shoulders. Gaze upwards toward the left hand.
- Step 4: Engage the core, and focus on full deep breaths. Press firmly through the left foot, and the right foot. Engage the quadriceps, and make sure you are not over applying pressure to the right thigh by fully activating the core. Repeat on both sides.
Variation: To deepen the stretch of the posture you can put the right hand on the outside of the right foot on the floor, or place the hand on a block. If looking up at the left-hand triggers any pain in the neck, you can look forwards to avoid aggravating the neck.
Benefits: This asana is really great for strengthening the body, and works on balance. Creating this diagonal line throughout the side of the body and extending up through the arm, and downwards through the foot – strengthens the obliques and the entire leg.
7. Goddess Pose – Utkata Konasana
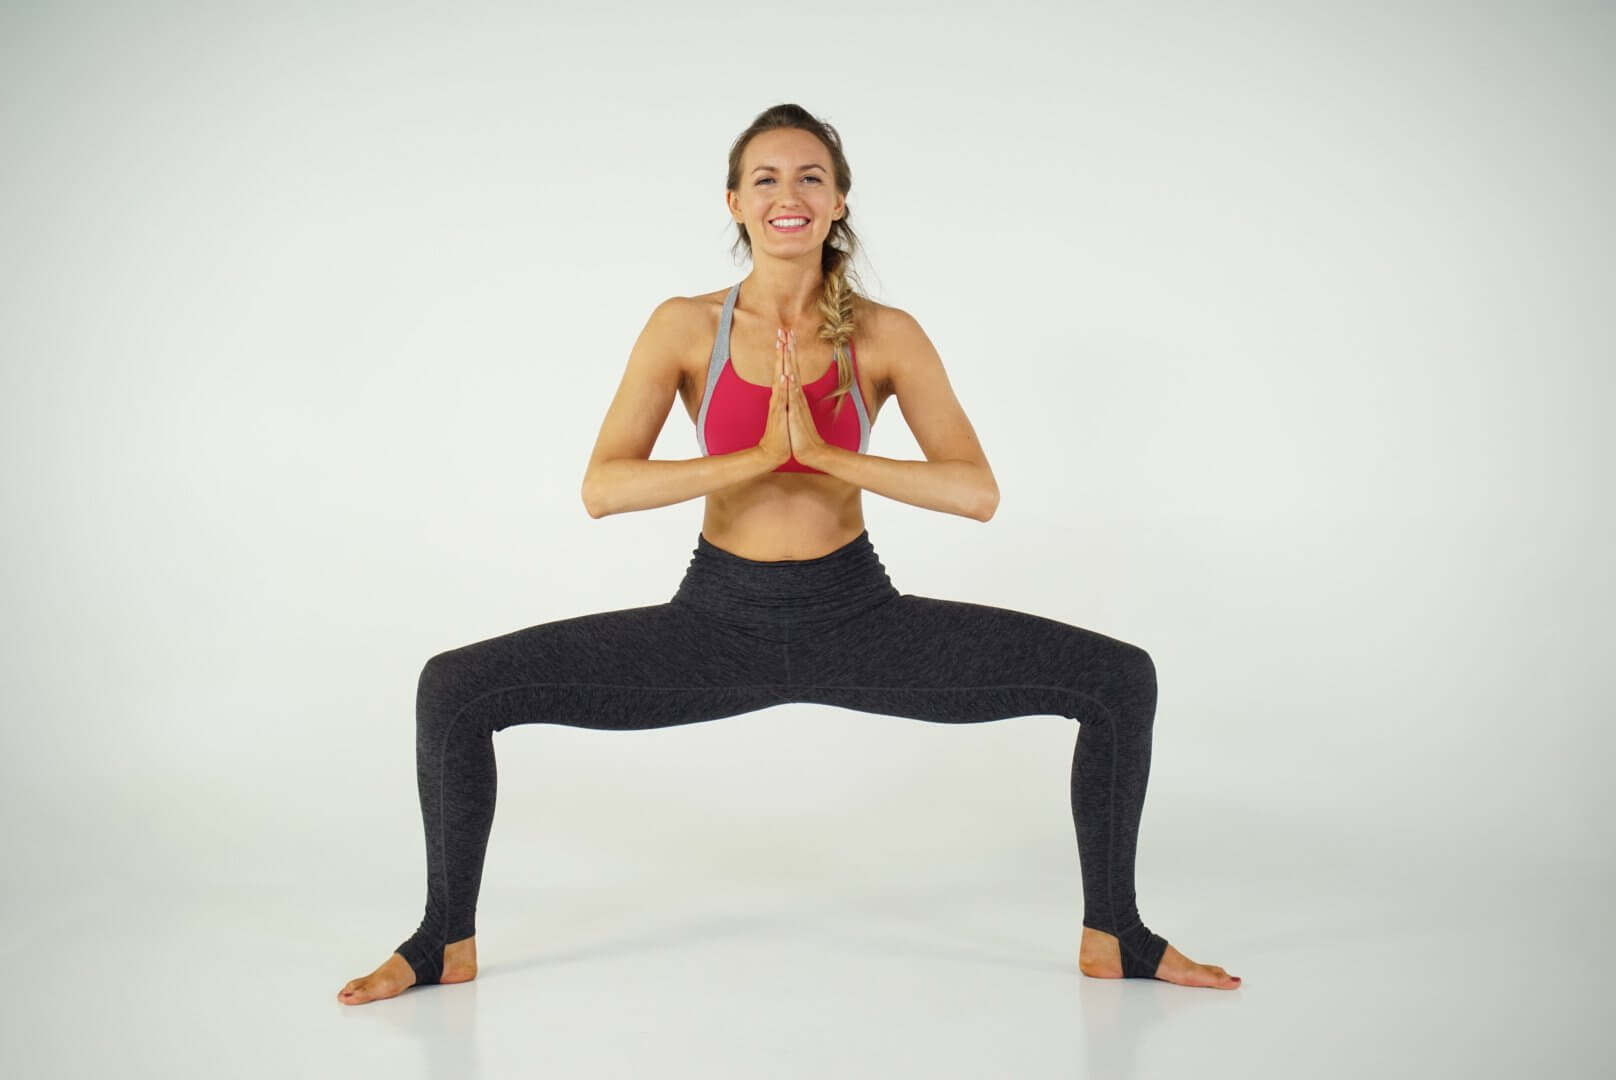
- Step 1: Stand on the mat with the legs about 4 feet apart. Turn both feet outwards to roughly 45 degrees.
- Step 2: Exhale and bend into the knees, and aim to get the knees directly over the ankles. Bend into the knees until the thighs are roughly parallel to the floor.
- Step 3: Bring the palms together at the heart center, and draw the shoulder blades together to open the chest. Draw the inner thighs up, and outwards to prevent the legs from falling inwards.
- Step 4: Tuck the tailbone, elongate the back and draw the lower belly in towards the spine.
- Step 5: Focus on fully using the lungs, with deep extended breaths. Engage the inner thighs and outer thighs to draw the hips open, and keep the back straight. Hold the pose for as long as is comfortable.
Variations: Due to hip compression you may experience pain in the hip when you try to bring the knees over the ankles. In this case, it is fine for the knees to project over the ankle but focus on fully engaging the thighs to protect the knees.
Benefits: Strengthens the body through balance, provides an opening stretch for the hips and work on the inner and outer thigh which is great to protect the knee.
Sources
YOU MIGHT ALSO LIKE
- What is Kriya Yoga? The Philosophy and Practice
- Uddiyana Bandha: Tapping Into Your Deep Core
- 4 Reasons Hasta Bandha Is Essential To Your Yoga Practice
- Vitarka Mudra: What It Is and How Do You Use It?
- Shakti Mudra: What It Is and How Do You Do It?
- Garuda Mudra: What It Is and How Do You Use It?
- Kali Mudra: What It Is and How Do You Do It?
- Shunya Mudra: What It Is and How Do You Do It?
- Varuna Mudra: What It Is and How Do You Use It?
- Vayu Mudra: What It Is and How Do You Use It?
- Samana Vayu: The Energy of Balance & How to Access It
- Apana Vayu: The Energy of Release & Surrender
- Udana Vayu: The Ascending Wind
- Prana Vayu: The Breath of Vitality
- Vyana Vayu: The Energetic Secret to Flow
Learn how to do 11 of the most popular yoga poses correctly. Free video + PDF download.


