(Virabhadrasana I): Techniques, Benefits, Variations
Warrior 1 Pose Prep & Practice
1
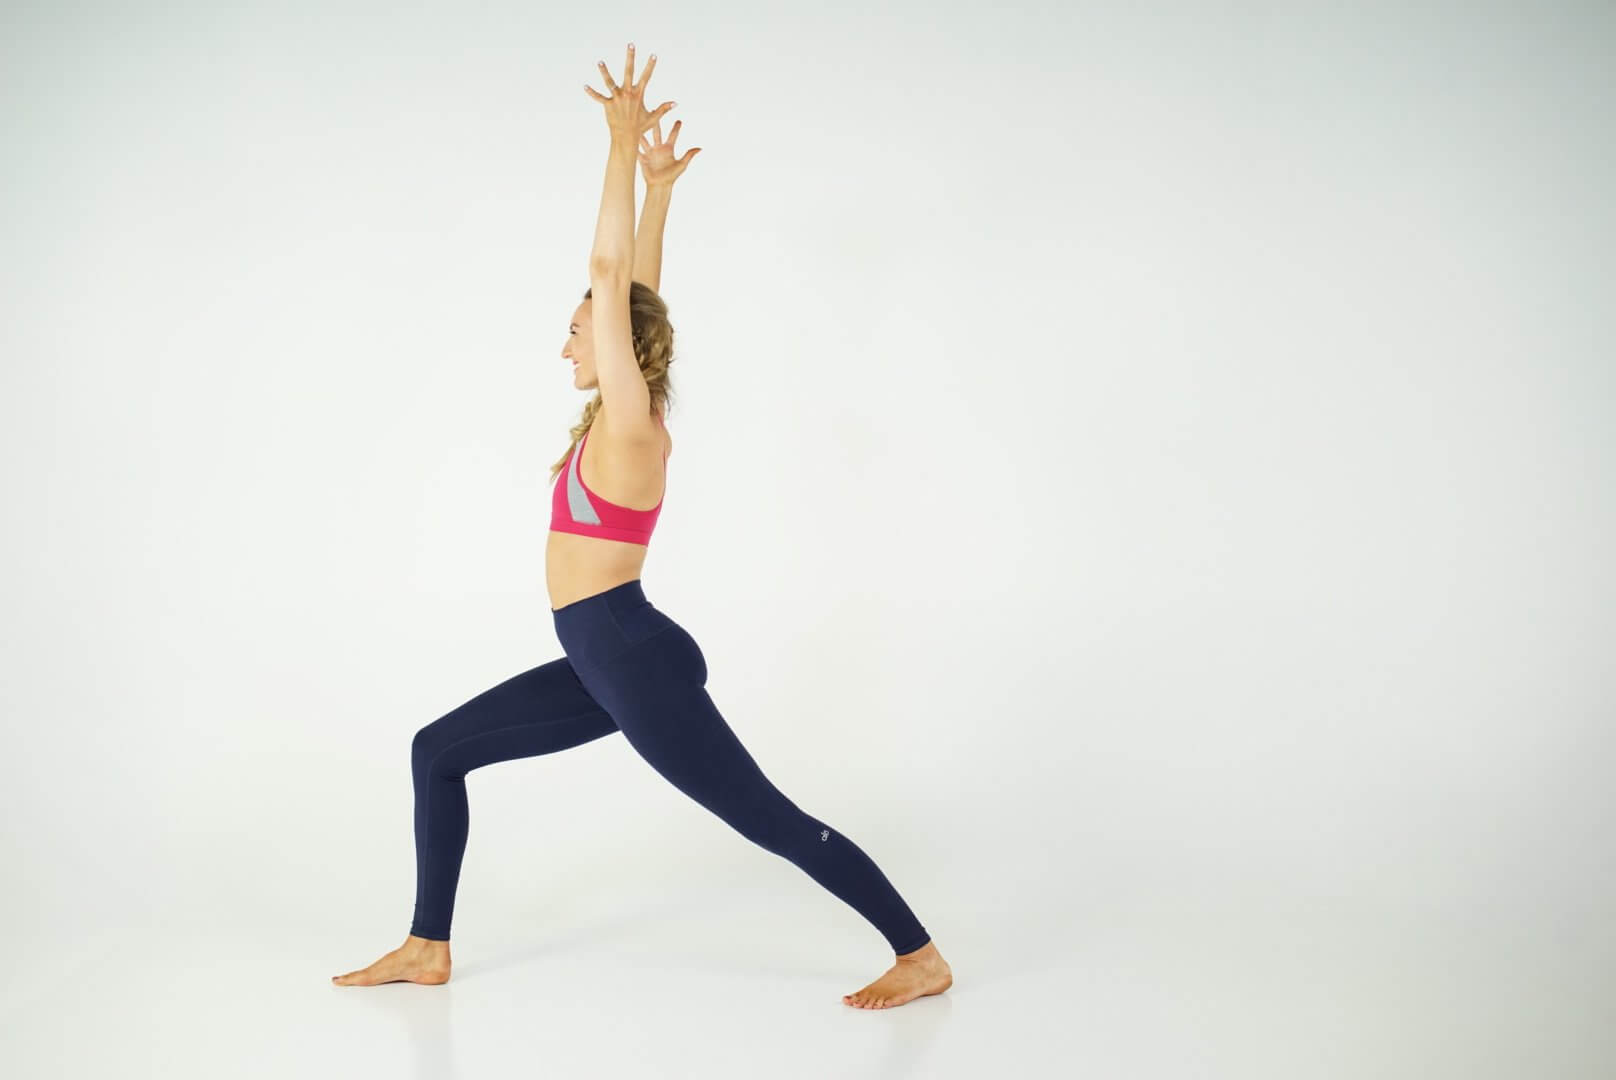
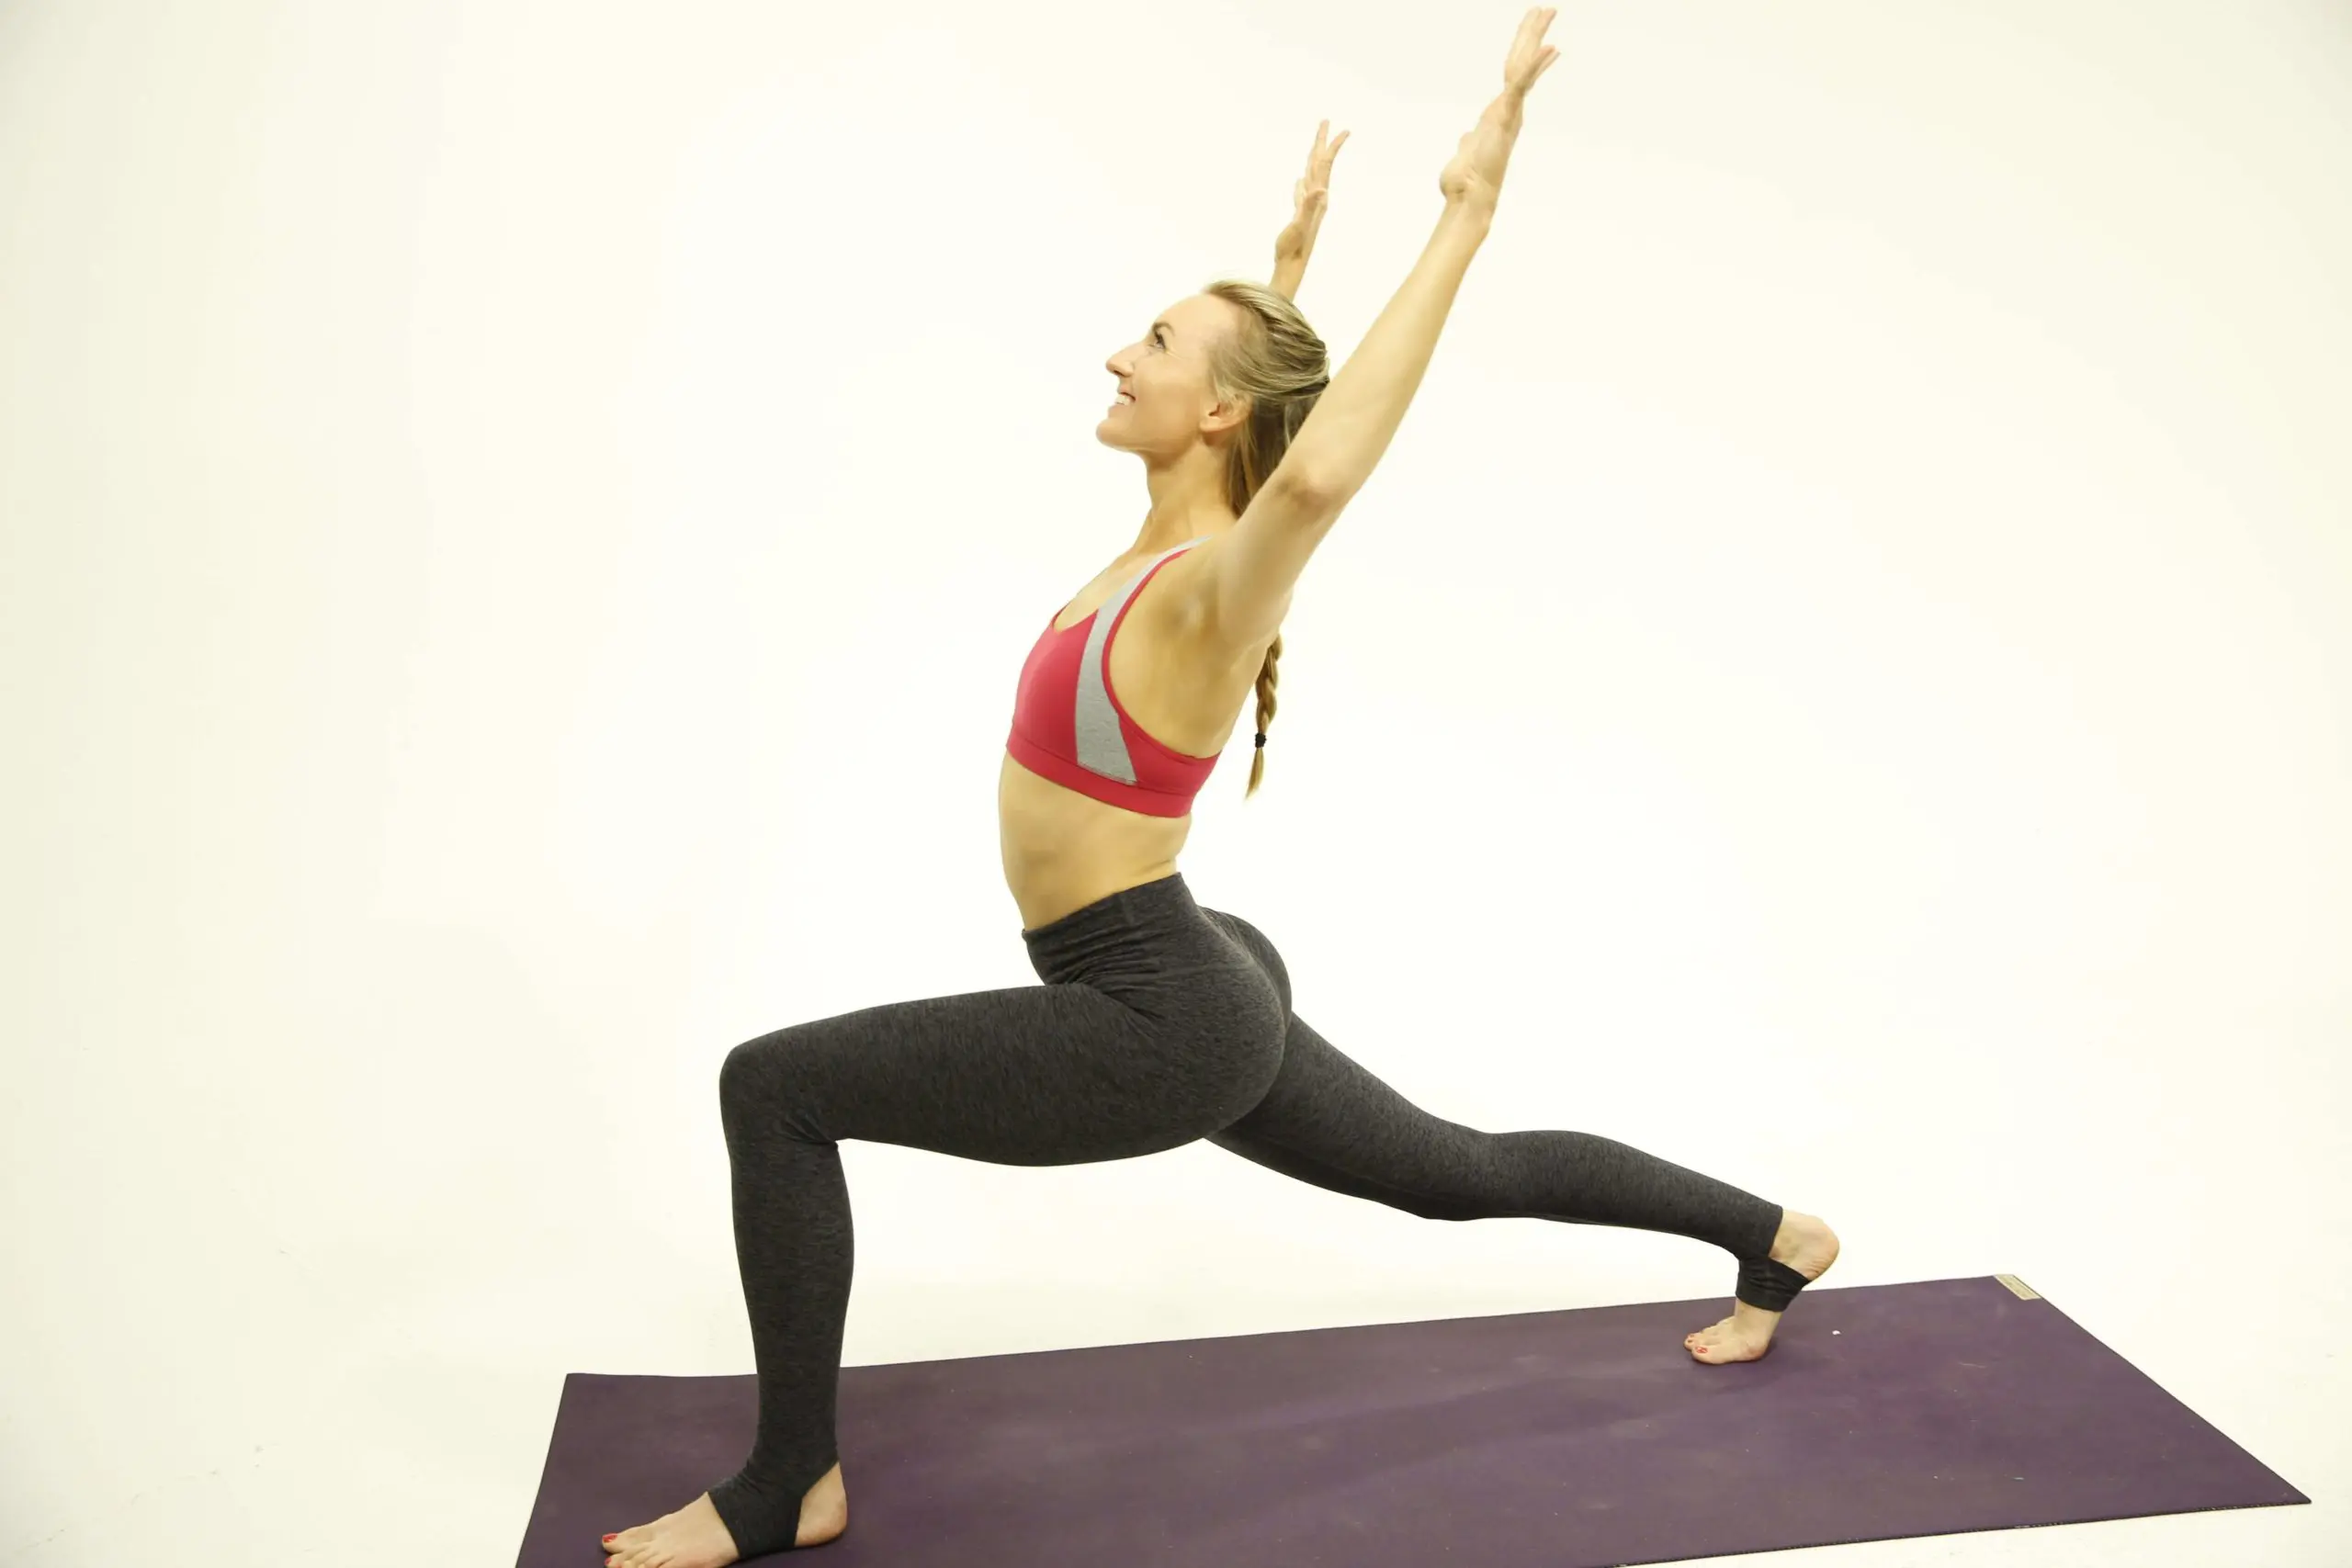
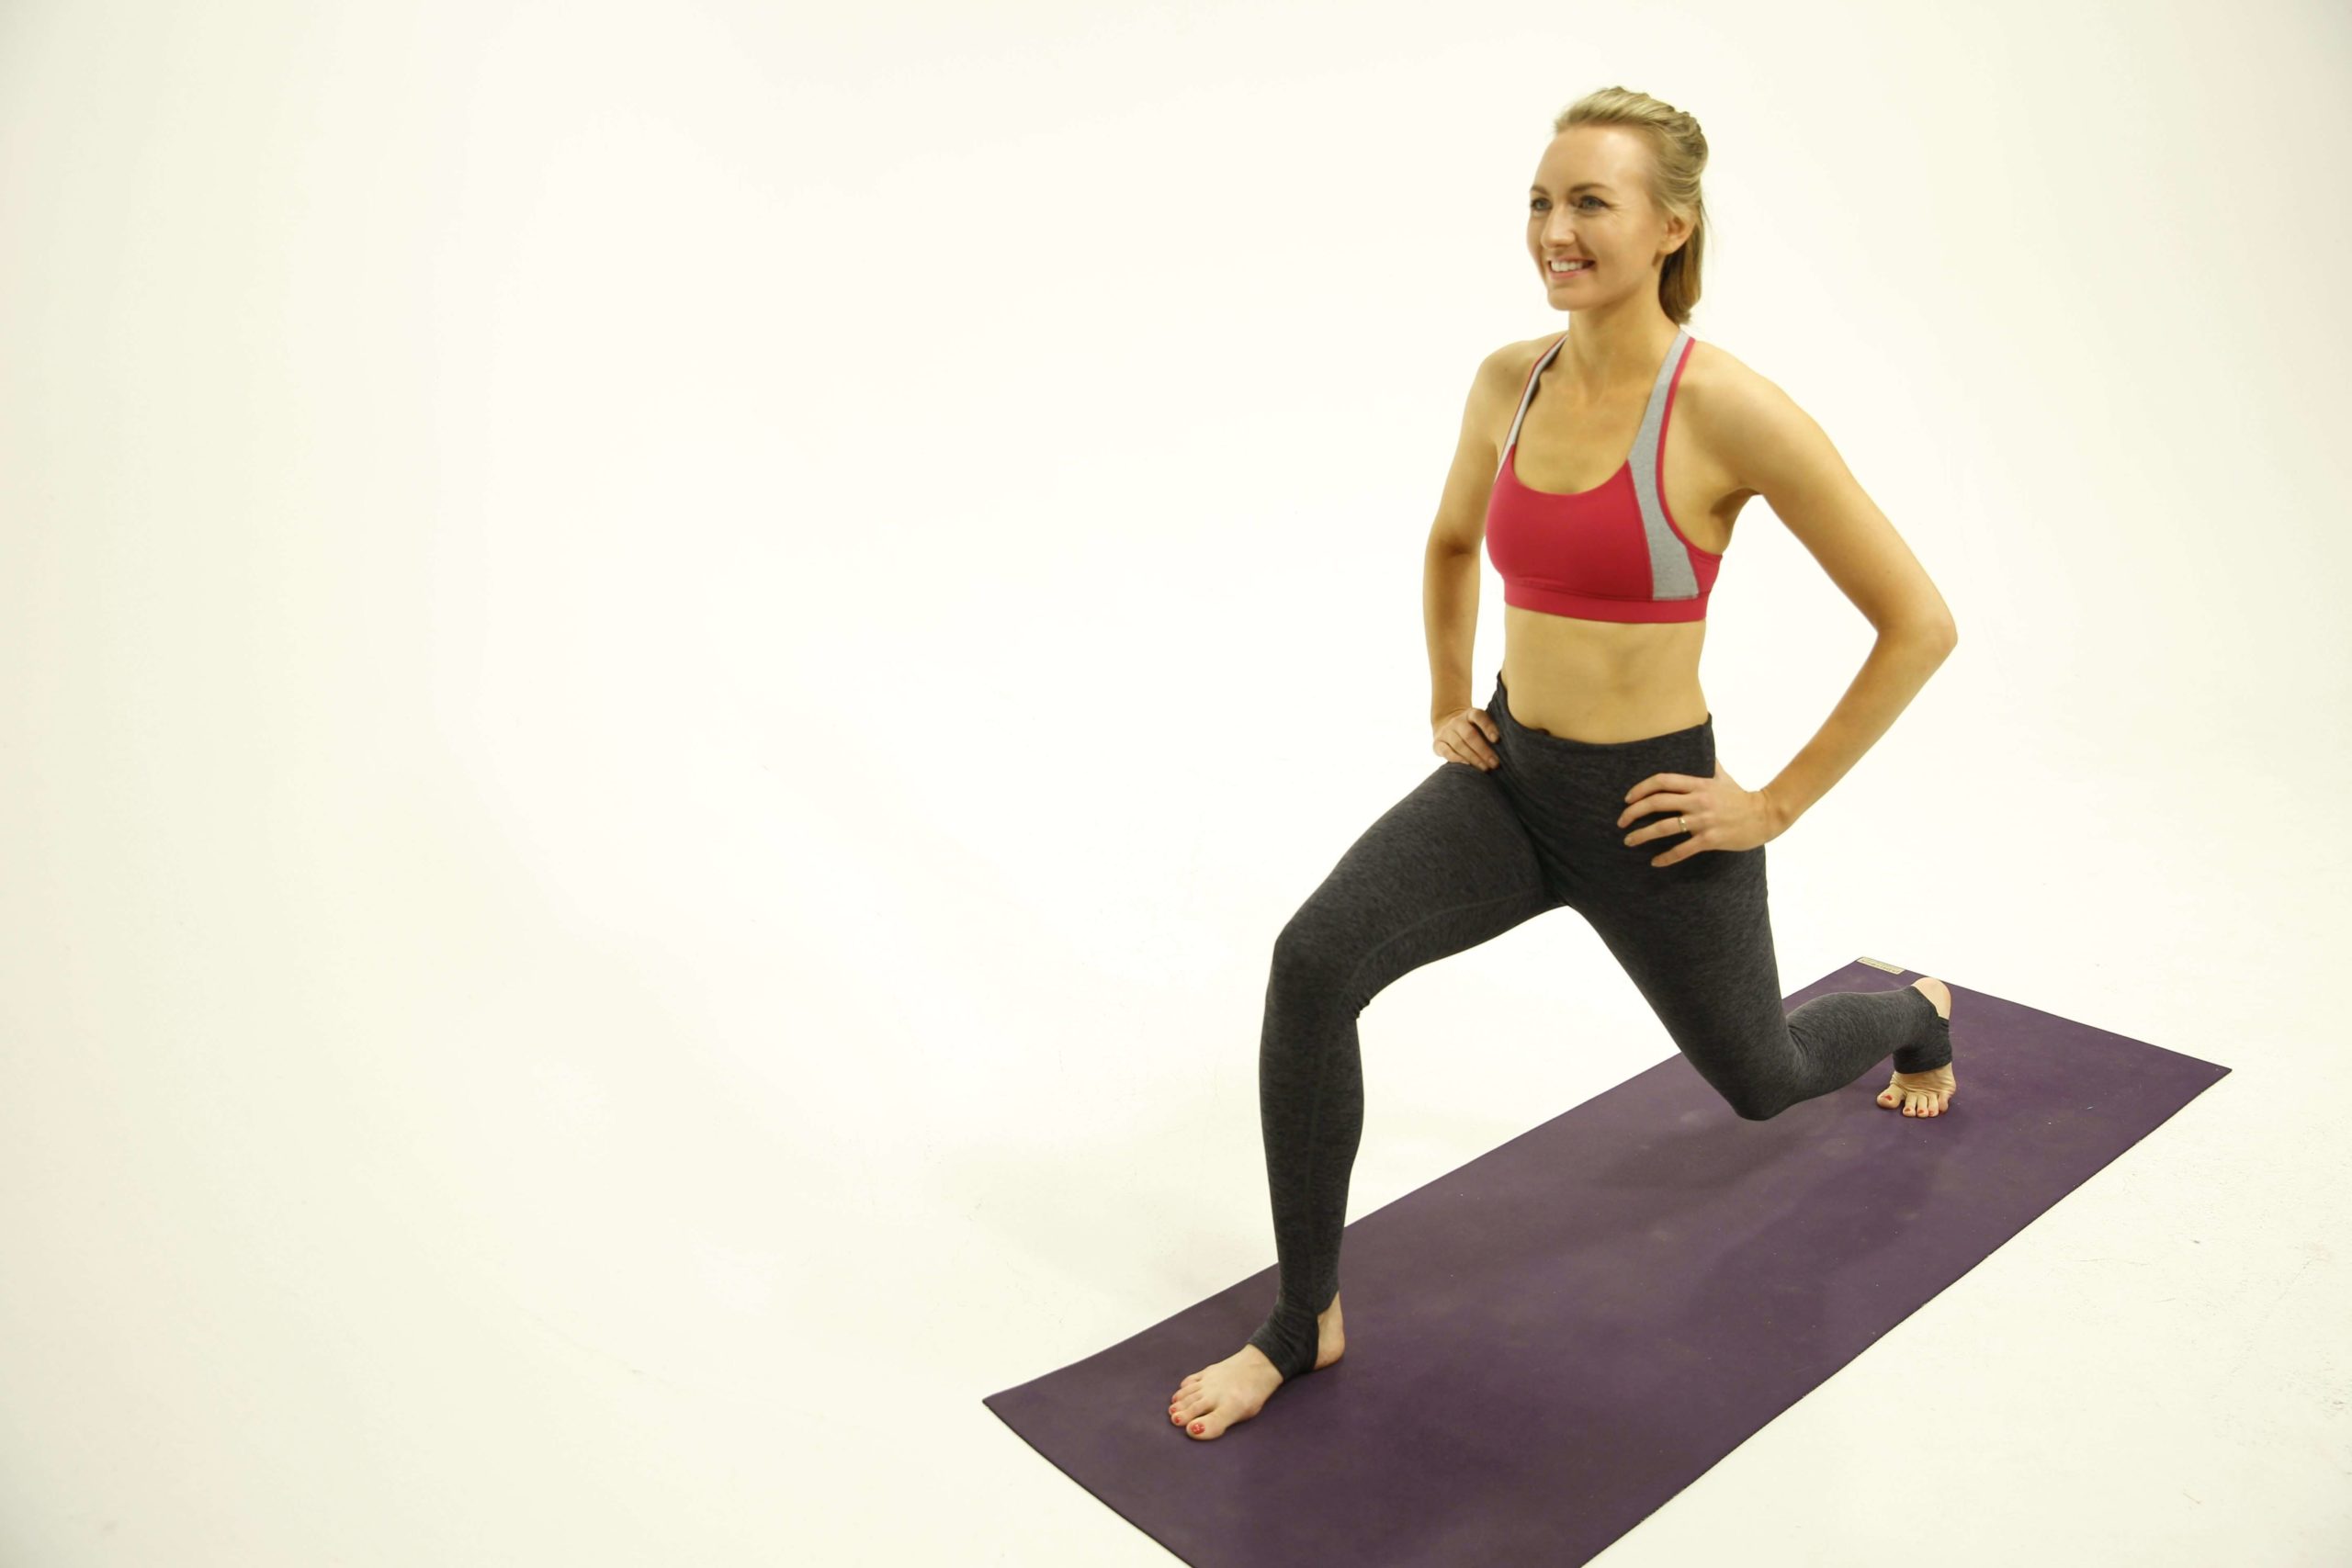
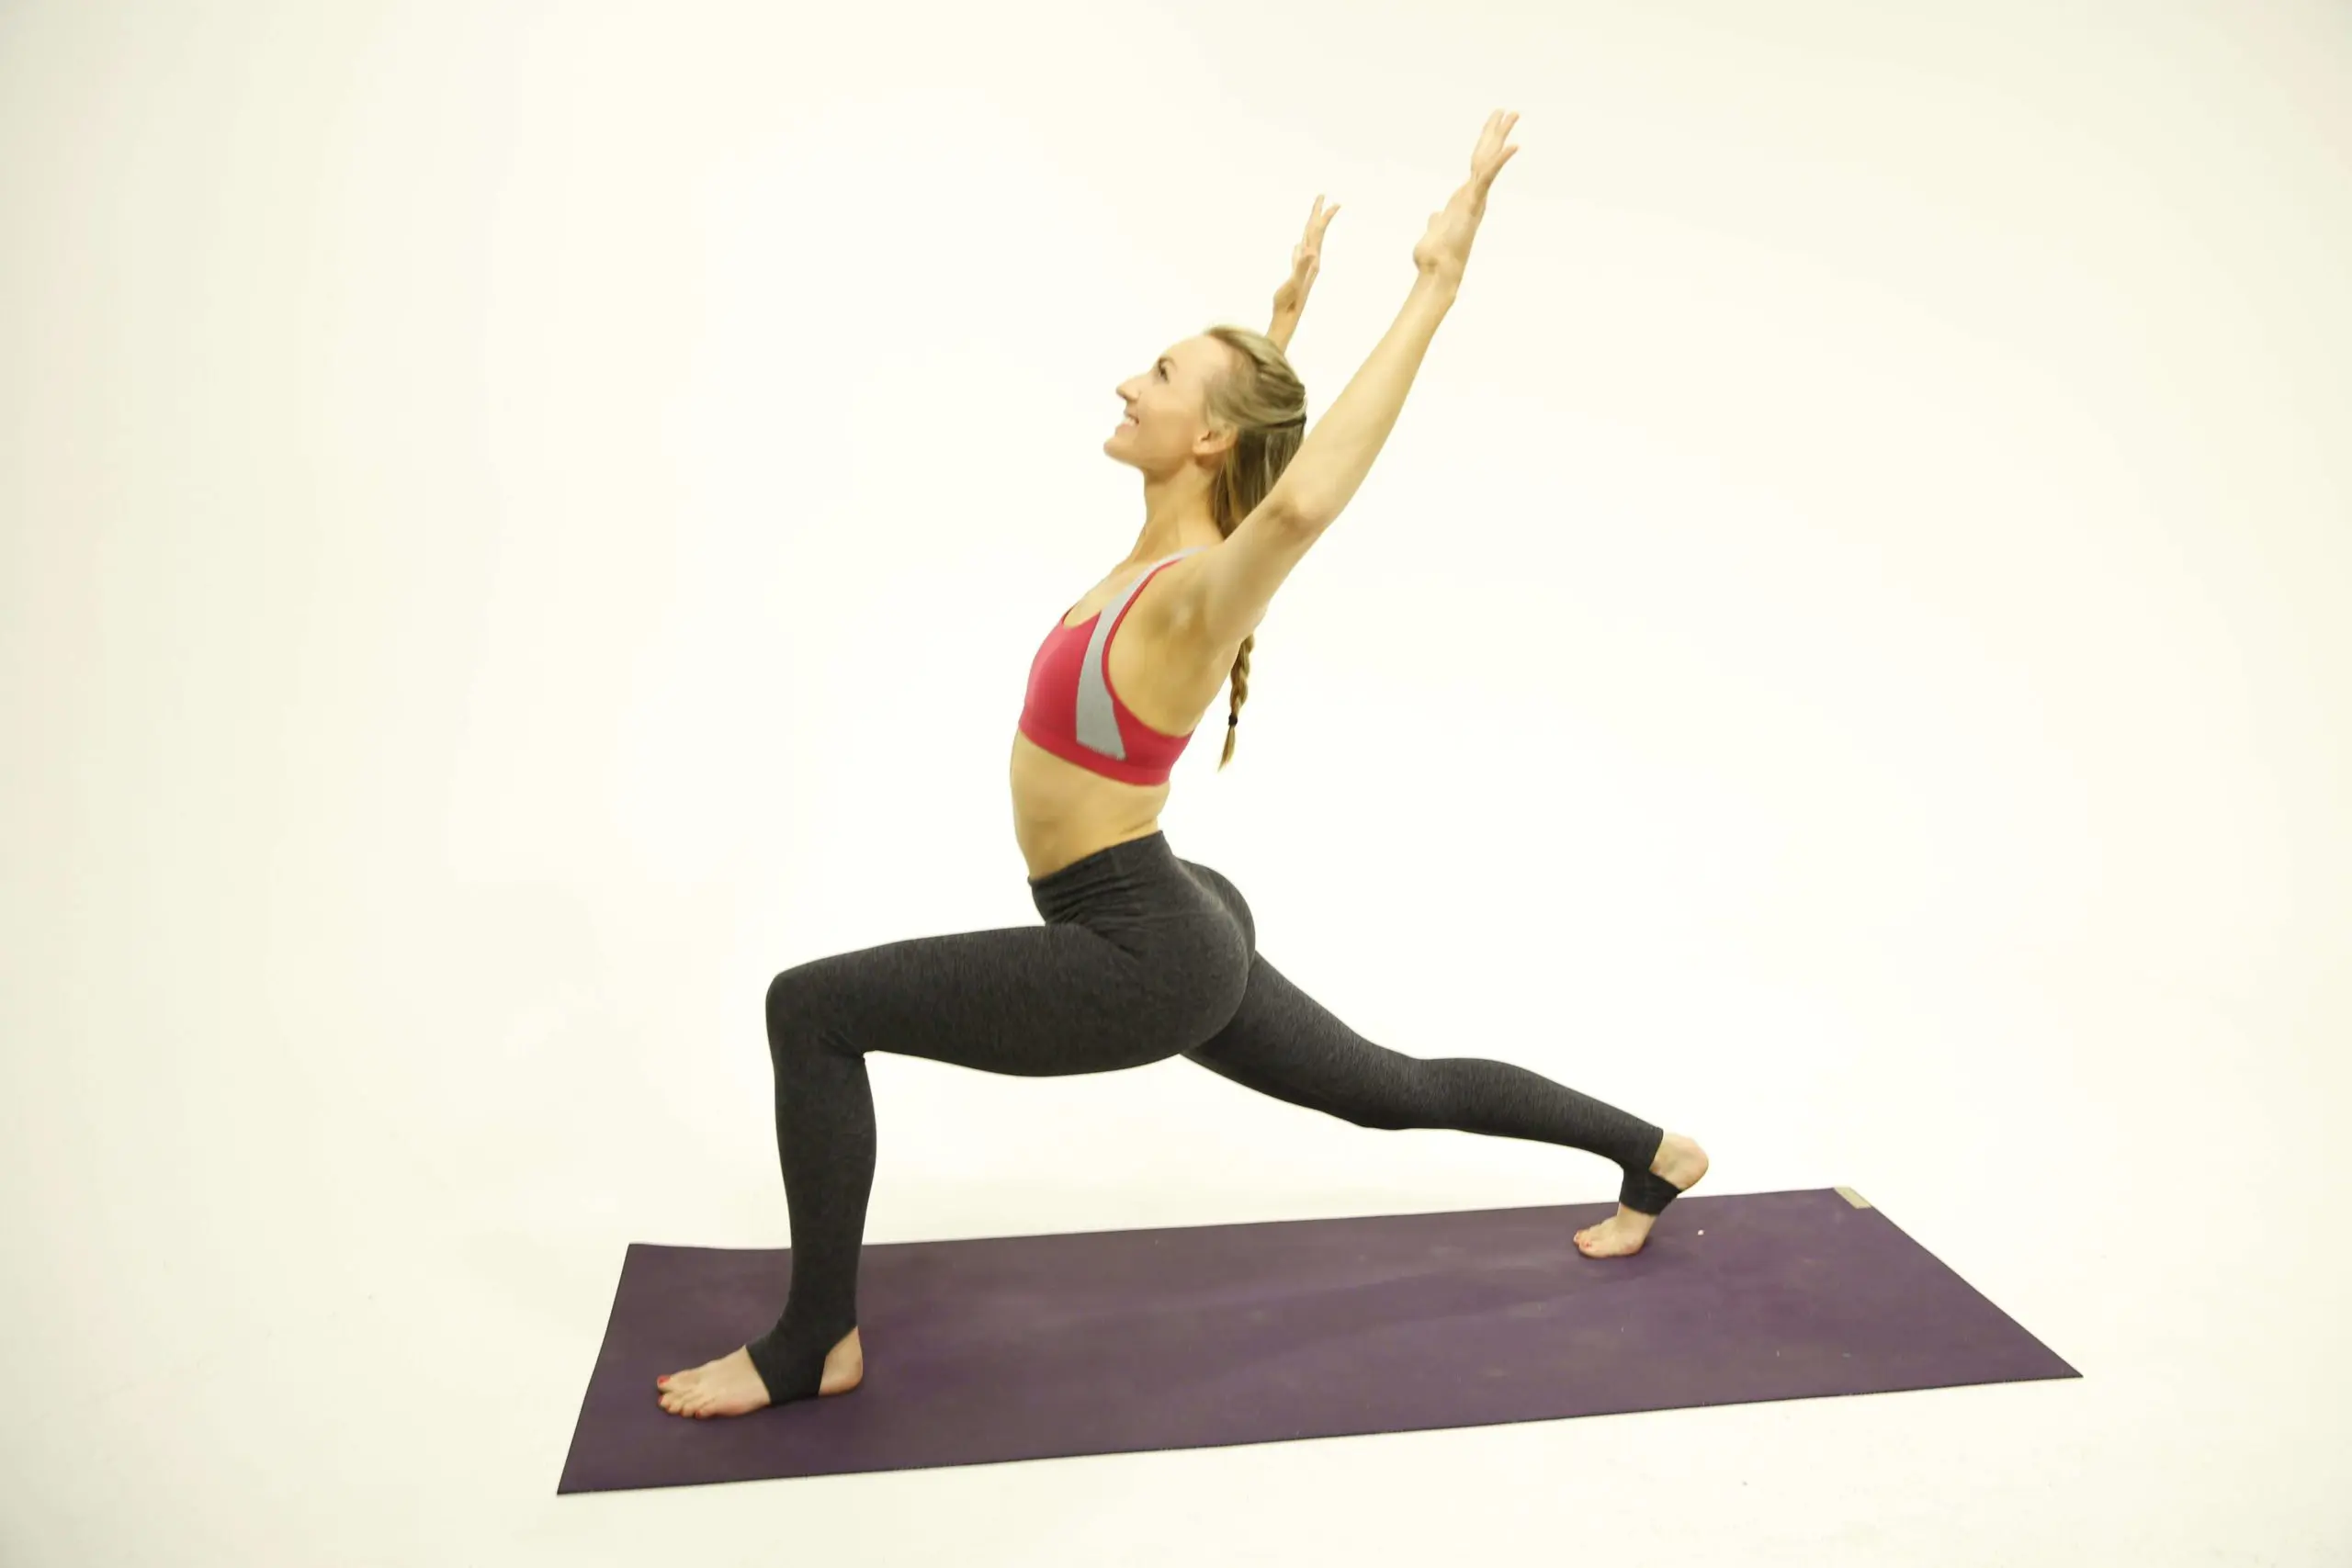
Beginning in Mountain pose (Tadasana) at the top of mat.
2
On an exhalation, step back with the left foot, hands come to hips.
3
Right toes (front foot) pointed toward top of mat, left foot (back foot) toes turned out slightly to the left.
4
Lengthen left (back) thigh, engaging muscles and anchoring through heel.
5
Bend right (front) knee, stacking knee over ankle.
6
Working to square hips directly forward and side to side. Low abs firm in and up, knitting front ribs, lengthening sides of waist.
7
Shoulders stacked over hips, inhale arms up over head. Spread fingers, energizing hands and arms.
8
Breath is steady, legs, abdominals and arms energized and engaged, soften tops of shoulders away from ears.
9
To come out of the pose, use the abdominal muscles to mindfully step back to Mountain (Tadasana) at top of mat, prepare for second side.
Variations/Modifications
- Shorten or widen stance
- Front knee behind ankle instead of stacked
- Goalpost arms or hands on hips (arm or shoulder injury)
- Alana (High Lunge) if heel cannot stay on floor
- Practice with back heel at wall (balance issues)
Physical, Mental and Emotional Benefits
- Improves core strength and balance
- Strengthens back muscles, arms and shoulders
- Develops concentration and grounding
- Stretches hip flexors, calves and achilles tendons
- Strengthens muscles of the ankle, knee and hip
Contraindications
- Hip or Knee Injuries (Flexion)
- Difficulty Standing
- Shoulder Injury (see modifications)
- Balance Issues (see modifications)
- Injured Calf or Achilles Tendon
Thoughtful Sequencing
Mountain (Tadasana), Inhale arms up, Exhale step right leg back to Warrior I (Virabhadrasana I), Pyramid (Parsvottanasana), Warrior I (Virabhadrasana I) to Warrior III (Virabhadrasana III), Warrior I (Virabhadrasana I) to Mountain (Tadasana). Repeat other side.
Try Warrior 1 Pose On The Blog
A Few Notes
As common as Warrior 1 is, it is actually one of the more difficult yoga poses for many to get into. Of all of the warrior poses, it requires a tremendous amount of strength and flexibility to get the back foot into the right position while also maintaining the hips squared forward. If this posture is too difficult for you, there are a few modifications that you can do. High lunge is the easiest modification, which turns the back foot so that it is facing forward and the heel is lifted off of the ground. Another option is to widen your stance so that your feet are spread apart as wide as the mat.
If you choose to incorporate this posture into your yoga flow sequences, then press the outer edge of your back foot into the ground as you face your torso toward the front of the mat. Lift your chest and use your lower back muscles to maintain a straight spine. Keep the back leg straight, if possible, and lift your arms above your head. For an even more intense workout, you can press your palms together overhead.
What is the difference between Warrior 1 and 2?
The main difference between these two warrior poses is how the back foot is planted and where the hips face. In warrior 1 pose, the entire body faces forward while the back foot presses firmly into the ground. In warrior 2 pose, the hips open to the side of the mat and the arms open wide into a T-shape, with the front arm reaching towards the front of the mat and the back arm reaching towards the back. They are both core standing yoga poses that are used in many yoga flow sequences.
What are the benefits of warrior 1?
Warrior 1 pose increases both strength and flexibility in the entire body. It also improves concentration as it takes a lot of focus to check in with the body on proper alignment. For many, and especially in traditional Tantra yoga, this posture is a form of meditation where we learn to immerse ourselves in the present moment as we focus on proper alignment of the feet, legs, hips, shoulders, and arms.
Why is Warrior 1 so hard?
For many, this pose is extremely difficult for a few reasons. The most common reason is that the practitioner lacks the strength and flexibility needed to get the back foot flat onto the ground while also keeping the upper torso and chest facing forward. Another reason why this pose is so difficult is that our bodies are all made differently. Our hip sockets, hip flexors, and leg muscles are all unique to our bodies. For some, the hip sockets simply cannot open in the way that this pose requires. For others, the muscles and tendons in the lower leg are not flexible enough to get into this posture. With practice, you can learn how to get into this posture more easily, though it is simply unachievable for some.
Want more yoga pose tutorials? See more in my Yoga Pose Directory.

Learn how to do 11 of the most popular yoga poses correctly. Free video + PDF download.


