You can run, you can hide, but you can’t escape your EMOTIONS!!
Seriously though, I hate to break it to you, but no matter how much you try to bury them, your feelings are extremely powerful and subconsciously running your life. I mean, think about it, you’re having a great morning and then someone cuts you off in traffic. This triggers fear, anger, frustration and the tone of the rest of your day can be ruined. It wasn’t the act of the other person in traffic that ruined your day, it was the emotional pain response that YOU had to that action that ruined your day. And I’ll bet you felt it through your entire body, it got your adrenaline pumping right?
Girl! This is why your yoga needs to be a regular practice!!!!
Emotional Release and Yoga….How?
People who have endured traumatic experiences often have dysregulated nervous systems. Causing them to be mostly in their sympathetic system (stress response) with higher cortisol levels. We know yoga shifts you into your parasympathetic system (rest and digest) and allows your body to better be able to release toxic emotions and process anything troubling that may arise.
Note: Even subconscious emotions can take on a physical form and have physical symptoms Like how you hang your head when you feel ashamed, or you open your chest and throw up your arms when you feel happy or excited. Your emotions have certain physical correlations. Therefore just changing your posture can help release negative emotions.
Science is also discovering that practicing yoga reduces stress, lowers anxiety, and helps with depression so much that it is being included as complementary work to psychotherapy.
The Uplifted Perspective
The emotional body and the physical body are conjoined twins: deeply connected. Emotional blockages, or having really strong emotions, create physical sensations, like chest tightness, lightheadedness, or upset stomach/watery bowels. Sometimes even intense emotional trauma can be tied to physical trauma (like surgery, car accident, or assault) and will cause scar tissue to build and hold on in the body. A bracing pattern forms to protect you. It’s a safety net really. Because your body is so beautifully made that it creates bracing patterns like this because it thinks it’s protecting you (see the Fascia module in my 200-Hour Yoga Teacher Training for more info on this).
But this is only a short term solution. The goal in Uplifted Yoga is to return your body to homeostasis. To a pain free active lifestyle. To do this, you need not only physical release, but emotional release as well. It’s a symbiotic relationship. One informs the other. Doing the physical is a good start, but practicing while consciously conjuring certain emotions will help you gain exponential benefits. It supercharges your practice.
Let’s put it this way…do you have a constant feeling of shame or embarrassment? I bet you have a lot of neck and upper back pain too? Because the physical posture associated with shame is to hang your head. If you are constantly in that posture your neck and upper back are really going to ache. You can do the physical work to correct the muscles and posture but without creating that emotional release from shame, you’ll just hang your head again, staying in the pain of your bracing pattern.
I know, releasing emotions can be tricky business. Especially when we live in a world where having an emotional response, or having big feelings, is considered inappropriate. Trust your yoga practice and yoga poses to put you in a safe space for release. Add some relaxing music to further release tension. Make sound and amplify your breath. Your mat is a place for you to feel safe.
Not sure where to begin? Get started with this yoga class: Somatic Yoga Therapy For Emotional Release.
Movements I love to sequence in a class for emotional release:
- Yoga poses that invite in a sense of release and surrender (child’s pose, wide leg forward fold with your hamstrings against the wall, savasana)
- Hip openers(bound angle, pigeon)
- Heart openers(camel, cow, taking cactus arms)
- Shoulder openers(thread the needle, eagle arms)
- Constructive rest (feet as wide as the mat, knees in to touch)
- Punching or throwing motions (many Kundalini Kriyas have these movements. Learn more about them in Kundalini Demystified)
- Swinging motions (“Breath of Joy” or drop swings)
- Cannon Breath (strong exhale out the mouth), Breath of Fire, or Three Part Breath (Krama Breath)
- Auditory sound — sound is perhaps THE BEST WAY to release emotions
Top Yoga Poses for Emotional Release
1. Child’s Pose (Balasana)
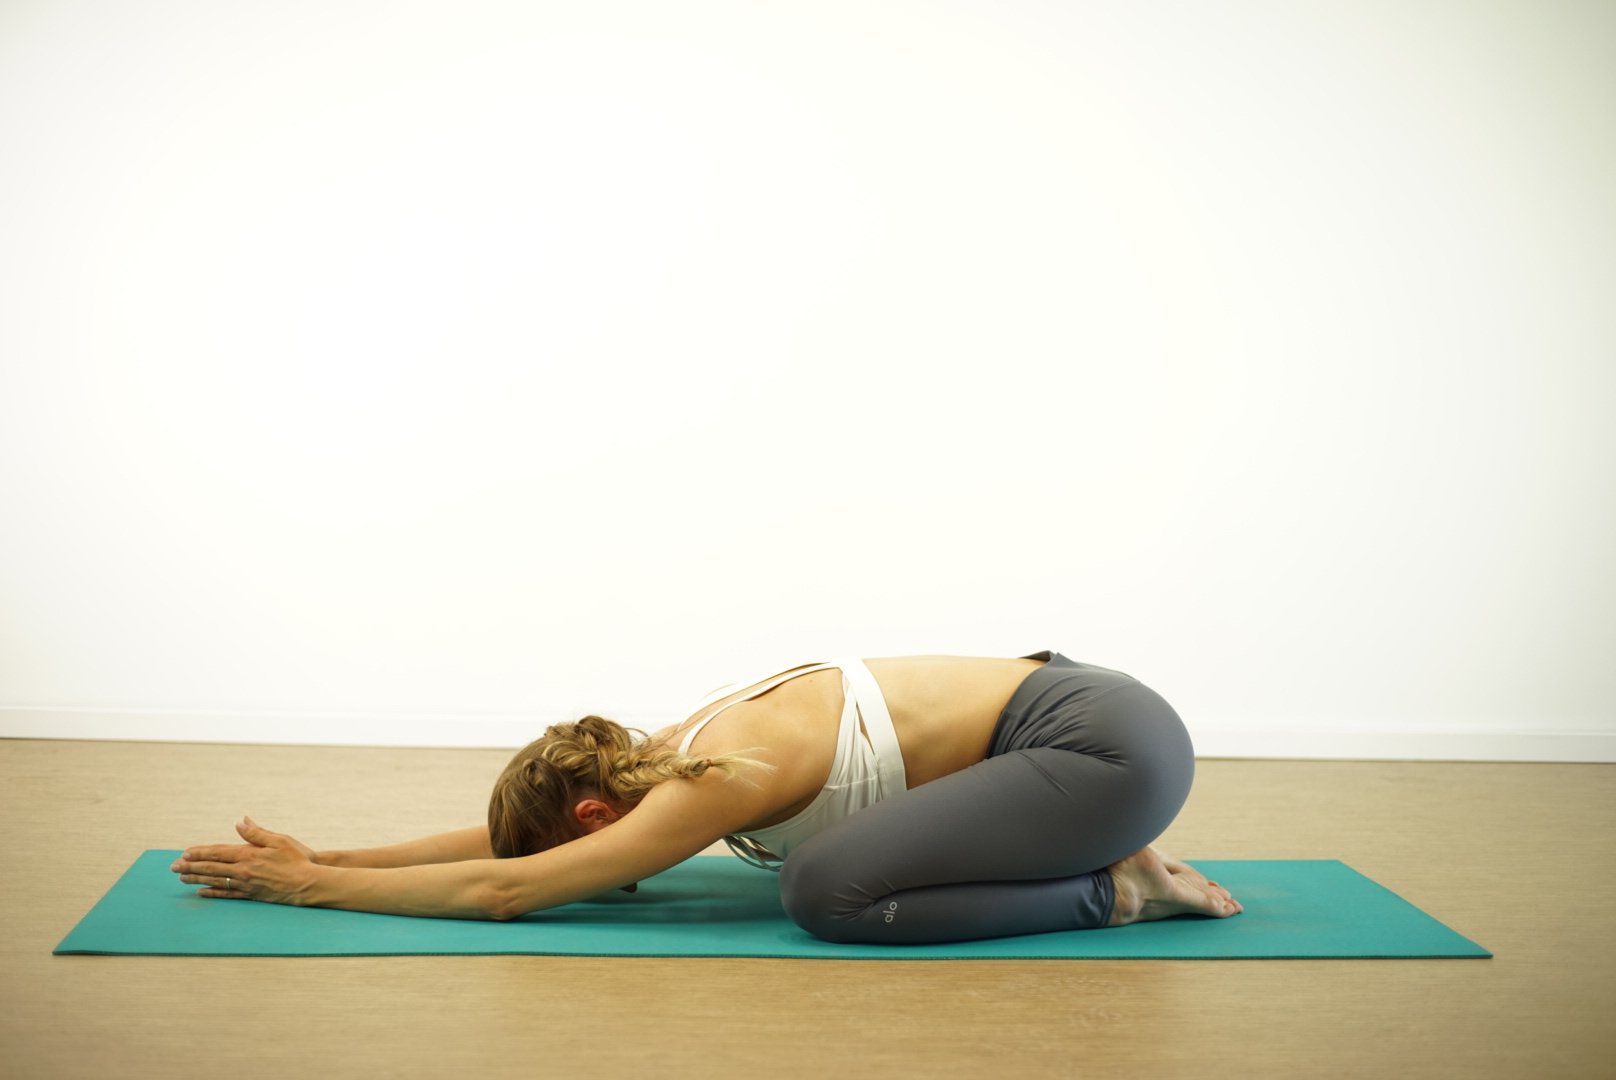
- Step 1: Begin on hands and knees, take your hips back to your heels. Knees can be touching or as wide as the mat.
- Step 2: Rest the forehead to the mat, close your eyes.
- Step 3: Soften the upper body and extend the arms in front of you.
- Step 4: Simply inhale rise back to all fours to come out of the pose.
Variations: Hug a bolster to make this more restorative. Another great variation is to place a block under the seat between the heels or under the forehead. You can play with the position of your arms too!
Benefits: Balasana opens the back body and releases the glutes and hips. This pose brings focus inward, cooling the body and soothing the nervous system.
Pro Tips for Yoga Teachers:
- Make a flow transitioning between child’s and table top yoga poses. Use big releasing breaths, then find stillness. Add sounds like “mmmm” “aaaa” and encourage people to moan.
- This pose increases mindfulness(Learn more about mindfulness in this blog post) so bring focus to the themes of the class in this pose. If you are doing yoga for emotional blockages or to release trauma this would be a good point to add in affirmations like, “I survived, I am strong”.
2. Downward Facing Dog (Adho Mukha Svanasana)
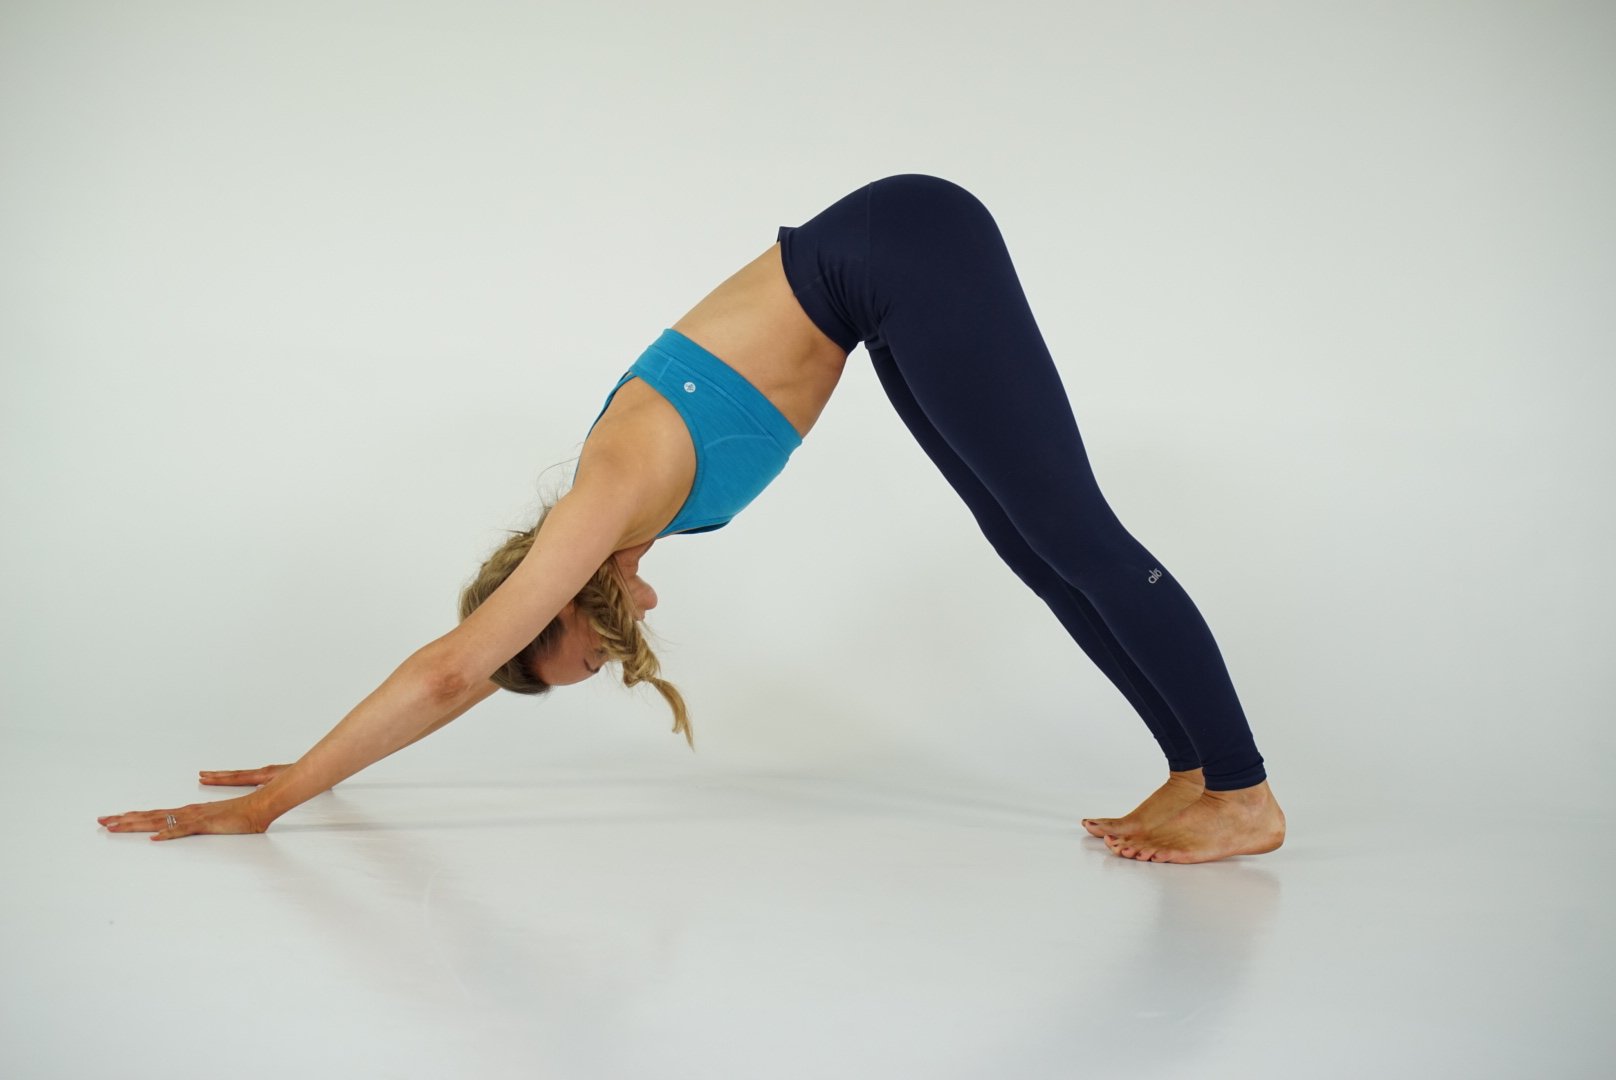
- Step 1: Start on all fours, curl the toes under, press the hands into the mat, send the hips up and back.
- Step 2: Feet hip width apart or wider, toes spread forward and heels yearn towards the mat (bend the knees generously if you need in order to keep a long straight spine)
- Step 3: Pushing through the hands, arches of palms lift, upper arms externally rotate, the head falls in line between the arms. Press the chest towards the thighs.
- Step 4: To come out of the pose simply look forward, walk the feet to the hands, sweeping the arms up as you inhale and letting the arms come to your sides on the exhale.
Variations: Bend the knees deeply or take feet as wide as mat to make this more like a resting pose. Place wedges under hands to elevate wrists or place hands on blocks to modify for any wrist issues. A great alternative yoga pose to this is puppy pose(Uttana Shishosana).
Benefits: Downdog works both the upper and lower halves of the body by asking for muscular engagement through both. It stretches the backside of the body and creates space between vertebrae. A mild inversion, it increases blood flow and lowers blood pressure. It triggers the parasympathetic (rest and digest) nervous system leading to calm in the body and mind. The perfect opportunity to process emotions.
Pro Tips for Yoga Teachers:
- Make students feel extremely powerful and strong by flowing back and forth between the yoga poses downdog and plank for several rounds of breath before moving on.
- Downdog is great to add to a morning class, not only to do a physical “check in,” but a mental one as well. Let students be here for a moment and check in with their mental state at the start of class, and then again toward the end of class. Ask them if they notice that they feel different. Perhaps less tension?
3. Pigeon Pose (Eka Pada Rajakapotasana)
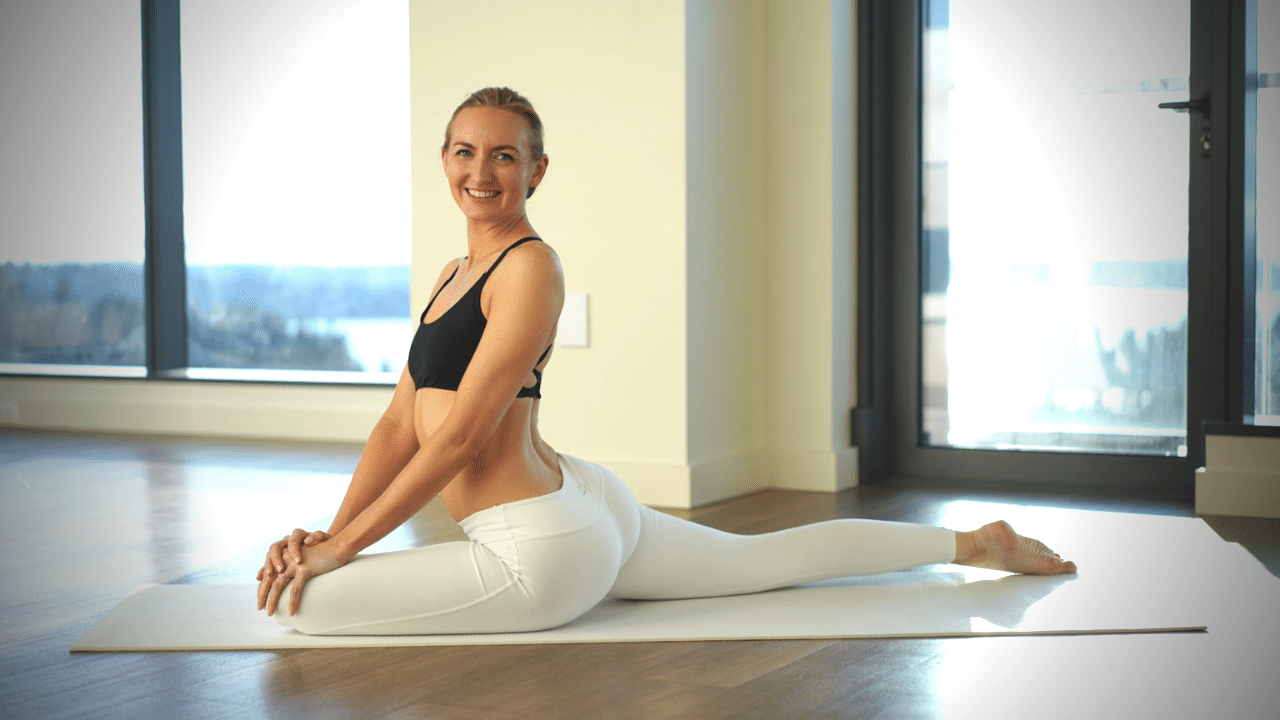
- Step 1: From an all fours position(hands and knees), carry your right leg to the front of the mat. Place the shin to the mat across the front of your body. Note: The shin does not need to be a perfect right angle or parallel to the mat. Play with the placement, bring it closer or further away from your body, flex and relax the foot, to see what feels best in YOUR OWN body.
- Step 2: Send the back leg out in a straight line behind you; make sure it stays in line with the hip.
- Step 3: Square the hips to make sure your weight is evenly distributed. Inhale lengthen through the spine and exhale as you bend forward over the front leg. Great opportunity for a few moments of deep breathes here.
- Step 4: Inhale as you press through the hands to rise and gently roll onto the right hip to bring the left leg back around to meet the right and end in an easy seat.
- Step 5: Repeat on the other side.
Variations: Use a yoga block or bolster under the front side of your body if going to the floor feels uncomfortable. Place a folded blanket under the front thigh if there is a lot of space between the hip and the floor. If this version doesn’t work for you at all then try the ankle to knee version on your back.
Benefits: Pigeon pose provides a deep physical stretch through the lower half of your body. When you do pigeon you stretch through all the major muscles of the hips and upper legs.
Pigeon is also nice for balancing the second chakra. When the second chakra is balanced you can embrace change more readily and accept the fluidity of life. As the ultimate juggler of life, you already know things change at the drop of a hat. Don’t you want to be able to flow through those changes with ease?
Pro Tips for Yoga Teachers:
- Mindfully flow in pigeon, transitioning the upper body, inhale, engage the abdominals, shoulders move down in space and the crown of head reaches tall to the ceiling, exhale and fold the body forward over the front leg. Do several times before finding stillness.
- Journal in pigeon! Yep, that’s what I said. It’s not uncommon to have an emotional release in pigeon, so get some props if need be and journal after a minute or two in the pose to see what comes up, process, and release it.
- Remind everyone they can always switch to Ankle to Knee on their back for a stretch with the same benefits.
4. Bound Angle (Baddha Konasana)
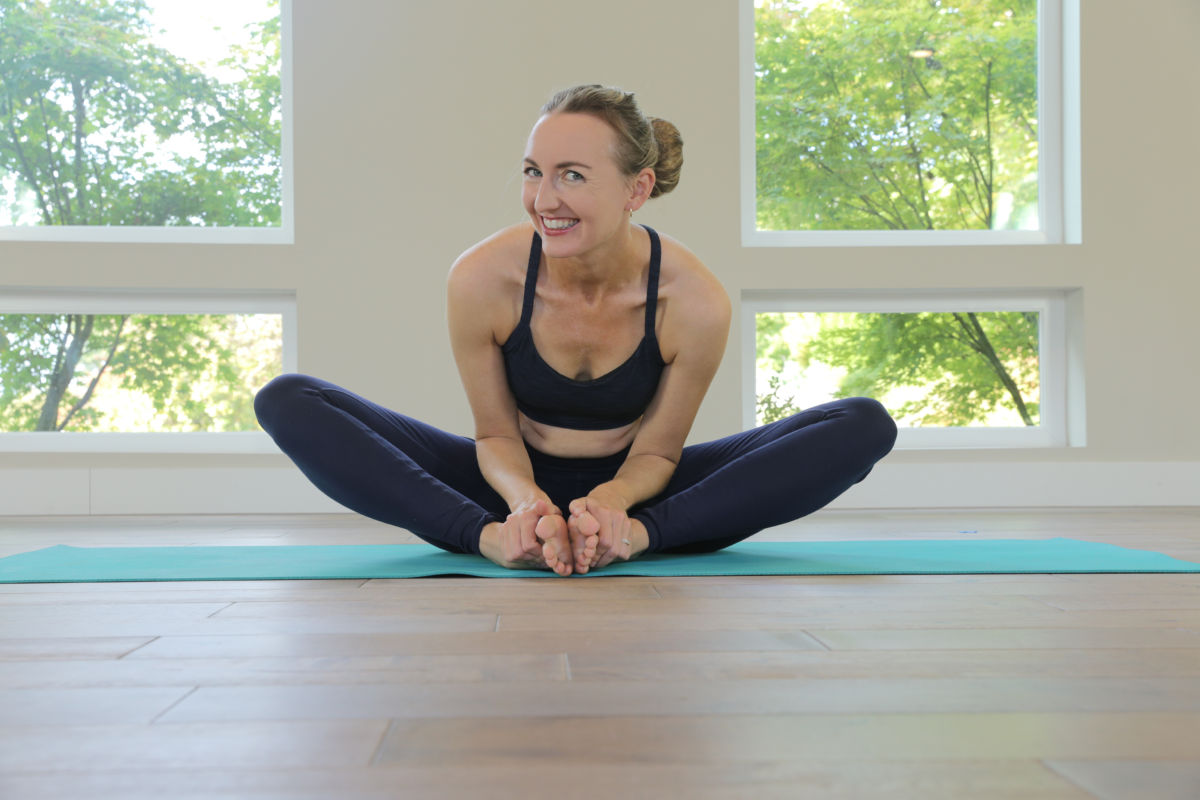
- Step 1: From Dandasana, legs extended: bring the soles of your feet to touch and create a diamond shape.
- Step 2: Root the sits bones down, hold the soles of the feet as you inhale, get tall.
- Step 3: Exhale as you fold forward over the legs, keep the spine long. Hold for several breaths and round: rest.
- Step 4: Breathe in as you slowly rise up to sit tall. Take the legs back out in front of you.
Variations: Knees up high? Place blocks or blankets underneath them. Make this more restorative by reclining back on a bolster or some cushions.
Benefits: This hip opener relieves cramps and low back pain and tension in the hips in addition to stimulating the gut to help when you feel bloated. It is also a nice moment of surrender, perfect to release emotions. One of my favorite poses!
Pro Tips for Yoga Teachers:
- While seated, take the hands behind you, shoulders move down and back to open the chest and take a gentle backbend in this position to invite loving energy in before you fold over and release what is no longer serving you.
- Have students place a block under their forehead, bring forearms to the floor on either side with the palms facing up. Make this a full gesture of surrender and release.
5. Camel Pose (Ustrasana)
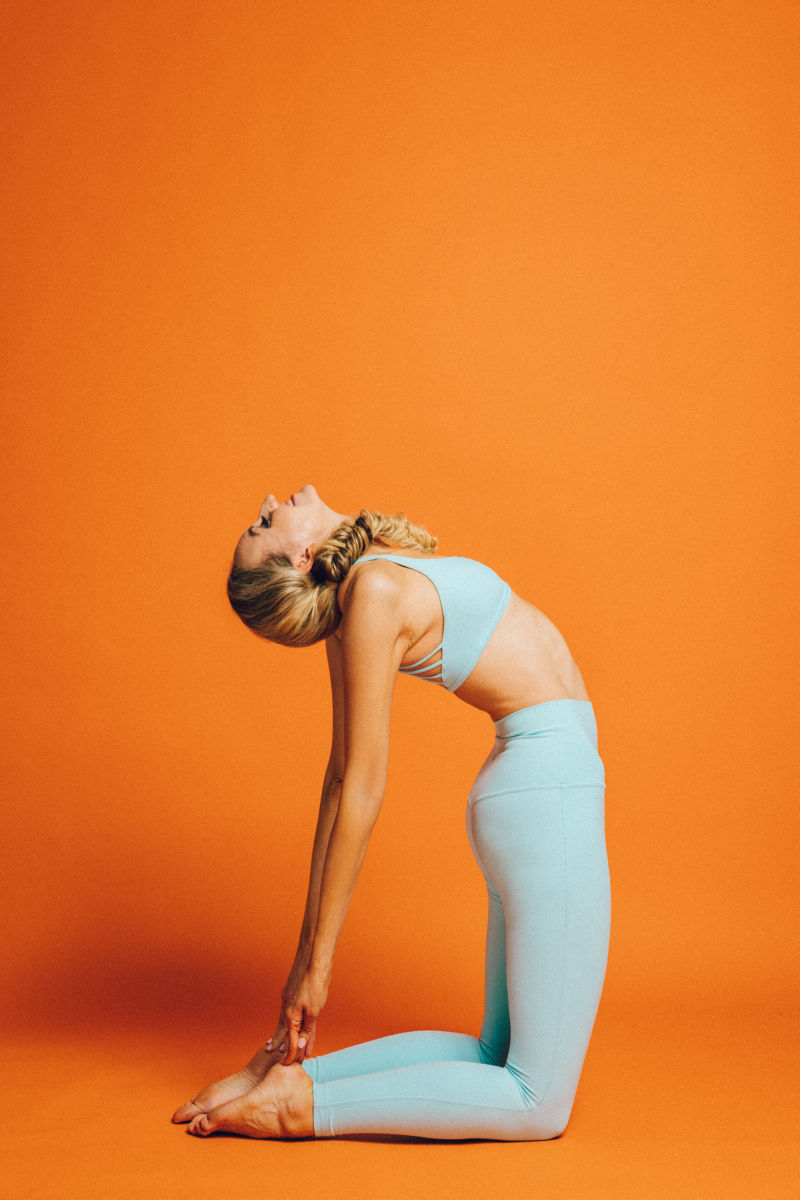
- Step 1: Kneel, but keep your hips elevated instead of sitting back on the feet.
- Step 2: Make sure your knees, hips and shoulders are stacked. If you’re not sure, make sure that your right knee is directly below the right hip and that your left knee is directly below your left hip. Keep your spine erect.
- Step 3: Bring your hands to the lower back with your fingertips pointing downward and your palms pressed into your back.
- Step 4: Push your hips and upper body forward and simultaneously lift your heart toward the sky
- Step 5: As you lean back, you have an option to relax your neck and to grab your heels with your palms. If this is uncomfortable to you, keep your chin tucked so that your neck is in line with your spine.
Variations: Put blocks behind you to grab instead of your feet. You can always lean all the way back and bring your hand to the mat behind you instead. Or, don’t even reach back at all. Just remain in your kneeling position leaning back slightly to engage those core muscles.
Benefits: Camel Pose is a deep heart opener that will release blockages in your Heart Chakra. It also stretches the entire front body, including your chest, hip flexors and throat as well as your thighs and ankles. At the same time, it strengthens the back muscles and helps to improve bad posture.
Pro Tips for Yoga Teachers:
- Add a beautiful mild spinal twist to this posture: You can reach your left arm back and grab your left foot and bring your right hand to the sky while you gently look over your left shoulder
- Make this your peak pose and build to it throughout your flow by beginning with more gentle heart openers(cow, cobra, updog).
6. Forward Bend with Undulations (Uttanasana)
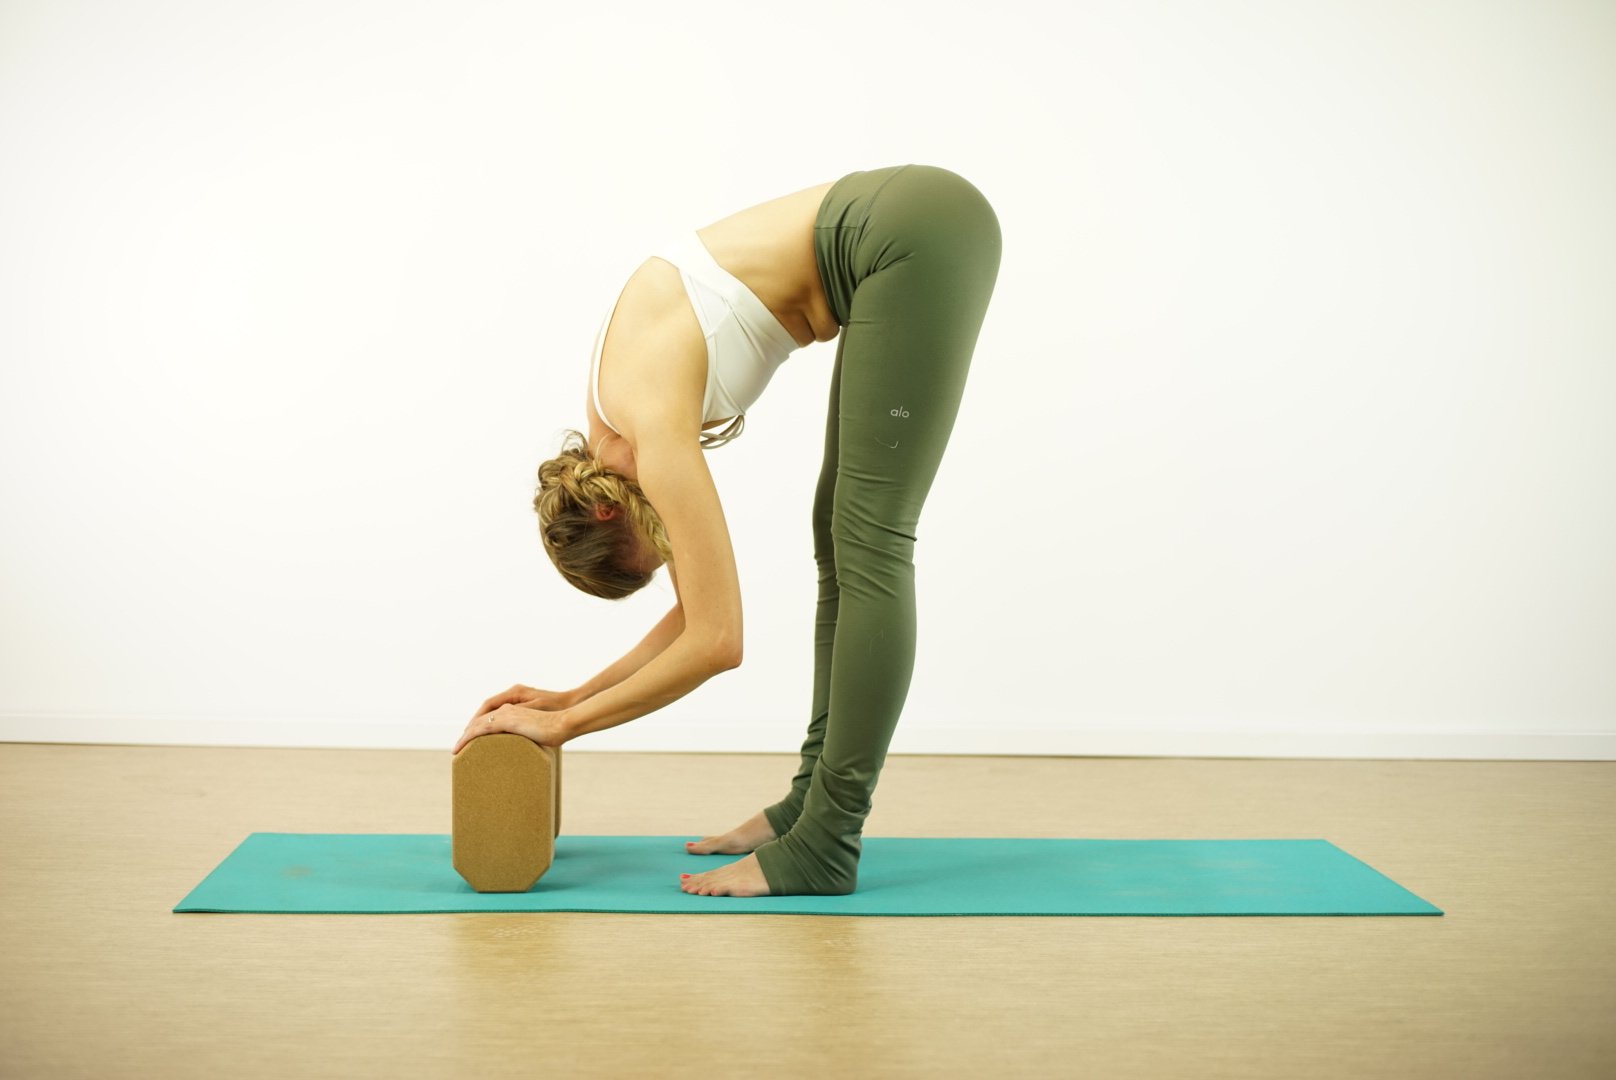
- Step 1:From a standing position, feet hip width apart. Inhale as the arms sweep up overhead.
- Step 2: Exhale, with a slight bend in the knees, hinge forward at the hips letting the arms float down to the floor, torso folds.
- Step 3: Let gravity have your head but not your shoulders. Stay here for several breaths.
Add in undulations: Slowly roll up one vertebrae at a time, round through the low back, mid back, then upper back. Head is the last thing to come up. Take the feet out a bit wider. Present the heart to the ceiling and roll the chest forward and lead with it as you fold back down in a fluid motion. Roll back up and repeat for several rounds. NOTE: Use the hands to support you by keeping them on the thighs or tops of knees.
Step 4: To come out, inhale, bend the knees and sweep the arms up to standing. Exhale as the arms return down to your sides.
Variations: You don’t have to have straight legs in a forward fold! Bend the knees deeply or take the feet wider. Place the hands on blocks, clasp opposite elbows to hang, or use a chair or table to assist you by placing the hands on one and only coming halfway down.
Benefits: This is an inversion, increases blood circulation, lowers blood pressure, helps to ease headaches and pain in the backside of the body. This pose also puts gentle pressure on the gut and massages the digestive organs and brings focus inward. Another of my favorite poses.
Pro Tips for Yoga Teachers:
- During spinal roll ups let students do a big loud releasing breath as they come back down to encourage that emotional release and give extra love to the spine.
- Add in some spinal twists here: Bend the left knee generously, left hand to mat, as you inhale bringing the right arm up and open up the right side. This will invite more clarity and aid in emotional release.
7. Legs Up the Wall (Viparita Karani)
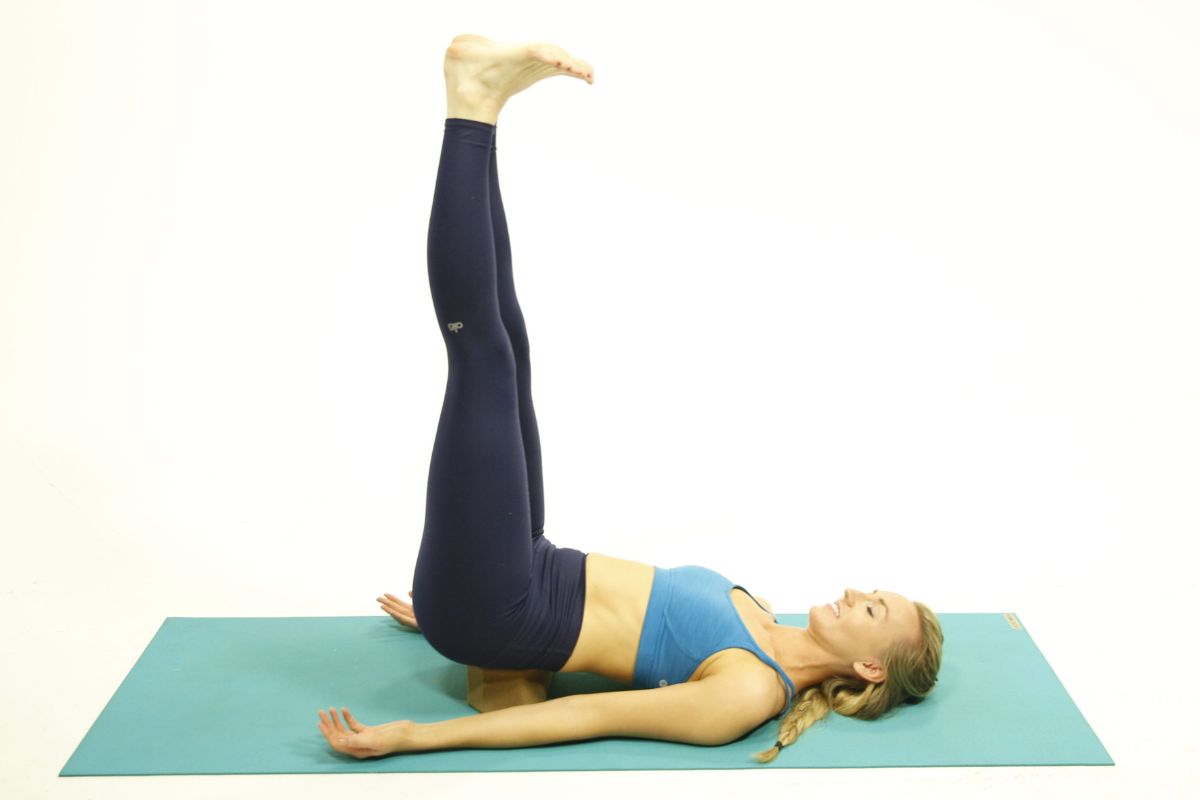
- Step 1: From the ground, bring the base of your seat to a wall.
- Step 2: Carefully lay the body back on your yoga mat and extend the legs up against the wall towards the ceiling. Breathe deeply.
- Step 3: Slowly bring your legs down from the wall, roll to the side and push yourself back to a seated position.
Variations: You can do this pose in bed against your headboard or even against the back of your couch while watching TV!
Benefits: Legs up the wall affects the nervous system and can instantly calm you, reduce stress and anxiety, and improve mood. It also helps to increase blood flow and circulation.
Pro Tips for Yoga Teachers:
- Be active before settling into this position to get the wiggles out. Place feet on the wall and do some pelvic tilts to release any last bits of energy.
- Add a calming pranayama technique to this pose to make it even more calming and delightful. You can read about a few pranayama breathing techniques I love for more ideas.
8. Krama Pranayama (3 part breath)
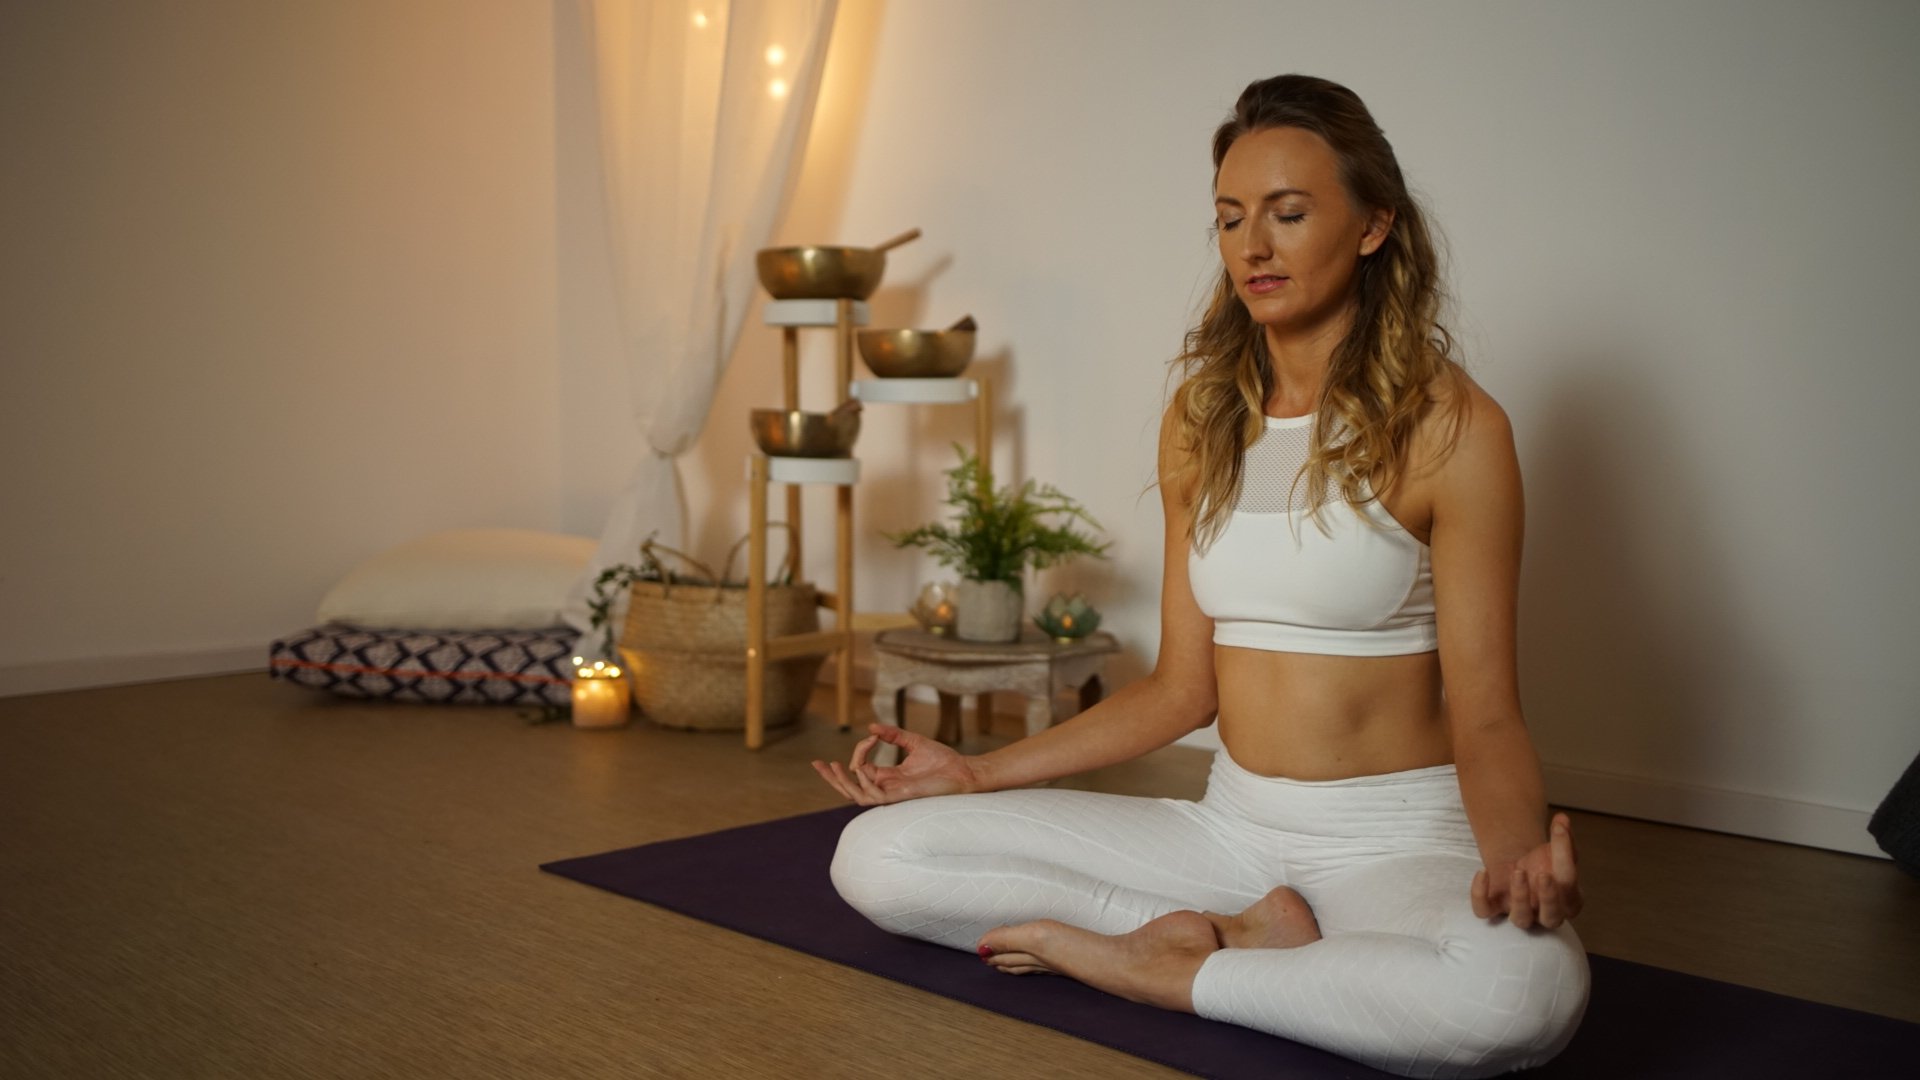
- Step 1: Either sit or lie down and start by breathing into the belly, watch it expand with the breath.
- Step 2: When the belly is full, draw in more breath expanding into the rib cage. Then, sip in just a little more air and let it fill the upper chest
- Step 3: Exhale, start from the upper chest and release the breath allowing the heart center to sink back down.
- Step 4: Then, release the breath from the rib cage. Finally, let the air go from the belly and draw the navel back towards the spine.
Variations: Use your hands as a guide. Place a hand on your torso and another on your chest to feel the exhale externally as you get used to how it feels internally.
Benefits: The three part breath, or full complete breath, improves lung function and reduces stress and anxiety. It calms the nervous system and releases tension and blocked channels allowing energy to flow through more freely.
Pro Tips for Yoga Teachers:
- Create synchronicity in your flow by beginning with a 3 part breath and ending with a 3 part breath in savasana.
- You can literally add this pranayama technique to any part of your flow. Pause students in a low lunge position, place their hands on their torso and heart and take a moment with this breath. It brings their awareness back to the present moment and is a great check in for their body.
When you release emotions it can be uncomfortable. But doing yoga poses and your practice regularly teaches you to find comfort in discomfort and how to regulate yourself in those times.
Like I’m always telling you, your practice is there to nurture you and lead you to becoming your highest self. If you need a little extra guidance with this Yoga For Self Mastery is a great place to start.
You’ve got this!
Next Steps
- If you’re interested in practical kriya yoga as a way to improve your daily life and relationships, check out my Yoga for Self Mastery course.
- Order my Yoga Life book for a practical guide to creating balance in your life through yoga.
- Check out my YouTube channel and find some yoga classes that you can try out for yourself!
Experience My Somatic Yoga Workshop (usually $67) FREE!👇
Find more yoga sequences by benefit.
YOU MIGHT ALSO LIKE
- How to Teach Somatic Yoga: A Practical Guide for Instructors
- The Best Somatic Exercises for Grief: Find Healing Through Movement
- The Best Somatic Exercises for Anger Management and Emotional Release
- Yoga to Reconnect with Yourself: 5 Essential Practices for Inner Peace
- Yoga for Connection: 10 Poses to Deepen Relationships and Bonding
- Yoga To Connect With Your Body For Mind-Body Harmony
- Yoga to Connect with Feminine Energy: 5 Transformative Practices
- Yoga to Connect with Your Heart: 3 Poses for Emotional Balance
- Myofascial Release Yoga: Unlock Tension and Improve Flexibility
- 6 Hip Openers For Emotional Release
- Office Yoga: 10 Poses You Can Do Right Now
- Ayurveda Food Combining: The Key to Balanced Digestion
- Yoga For Grief: 8 Yoga Poses For Support
- Yoga for Vata Dosha: Practice Poses and Tips
- Yoga for Pitta Dosha: Practice Poses and Tips
Learn how to do 11 of the most popular yoga poses correctly. Free video + PDF download.


