This year has been wild for many reasons, including the COVID pandemic. To make matters worse, all of this self-isolation time has forced many of us to work from home, which often means work-from-the-couch.
And this can be absolutely AWFUL when it comes to back, neck, and spine flexibility.
The tight, stiff hunched-over muscles that we acquire can lead to serious shoulder pain.
(Un)surprisingly, shoulder pain is a fairly common occurrence in our society. In fact, it is the third most common reason why people seek musculoskeletal advice from their primary care doctors.
Even if you aren’t working from home now, there are certain occupations that are at higher risk for shoulder, neck, and back injuries. Heavy lifting combined with repetitive motion puts people at a higher risk to develop shoulder pain.
Whether you’re adjusting to the living room workspace that 2020 brought us or you’ve been aching at your day-to-day duties since time immemorial, these 7 yoga postures will help you manage your shoulder pain.
What causes shoulder pain?
To understand what causes shoulder pain, it’s important to understand how the shoulder works.
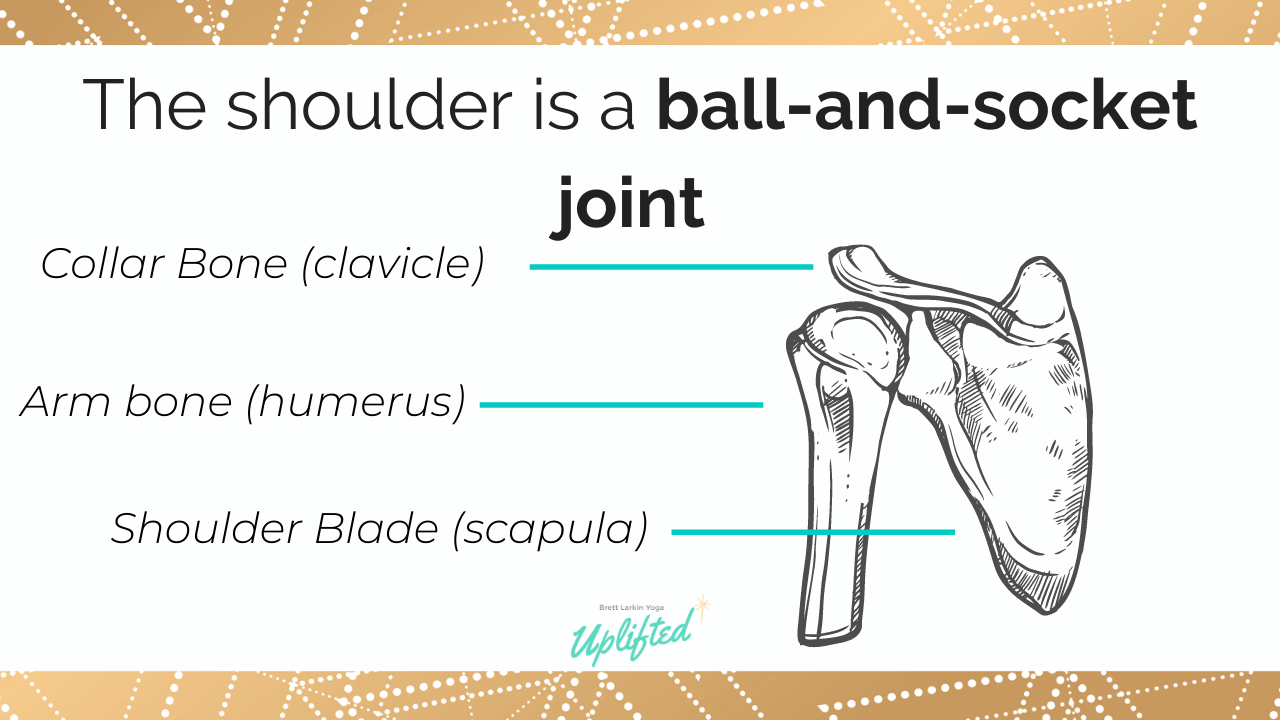
The shoulder is a ball-and-socket joint where several different bones meet, yet have space to rotate within the socket. Your arm bone (the humerus), collar bone (the clavicle), and the shoulder blade (the scapula) come together in a remarkable way that allows you to have a wide range of motion without damaging the bones and ligaments in your arm. In fact, it is the most mobile joint in the entire body!

In between these bones is soft cushioning, or cartilage. And holding it all together is the rotator cuff, which is made up of tendons that work like strong rubber bands that give you the flexibility to move your arm in many different directions.
There are many different causes of shoulder pain, including arthritis, torn rotator cuff, dislocated shoulder, a pinched nerve, a spinal cord injury, and more. For those injury-related pains, it’s best to consult with a medical professional on ways to alleviate pain.
Shoulder pain is also caused, however, by tight muscles, repetitive movements, and overuse. For these causes, yoga can be a tremendous tool in relieving shoulder pain.
When muscles aren’t used as they were intended to be used, they become tight and stiff. They pull on other parts of the body, which often causes aches and pains. Yoga can help stretch the muscles and strengthen the back so that your body has the support and flexibility it needs to go through your daily tasks.
Which type of yoga is best for shoulder pain?
The best type of Yoga for shoulder pain is the type that improves overall postural alignment and strengthens and lengthens the muscles in the neck and shoulder area. Yoga poses that soothe the body, while also preventing any extra inflammation or strain, are beneficial for the neck, shoulders, and back.
- Hatha Yoga – a great balance of strength with gentle stretching which is perfect for inflamed shoulders.
- Restorative Yin Yoga – good to relieve the pain or inflammation experienced with shoulder pain, due to the focus on relaxation and the release of tension.
- Vinyasa Flow – Slow and gentle vinyasa flow can be great for shoulder pain, to increase mobility and postural alignment
7 Best Yoga Poses For Shoulder Pain
1. Standing Forward Fold – Paschimottanasana
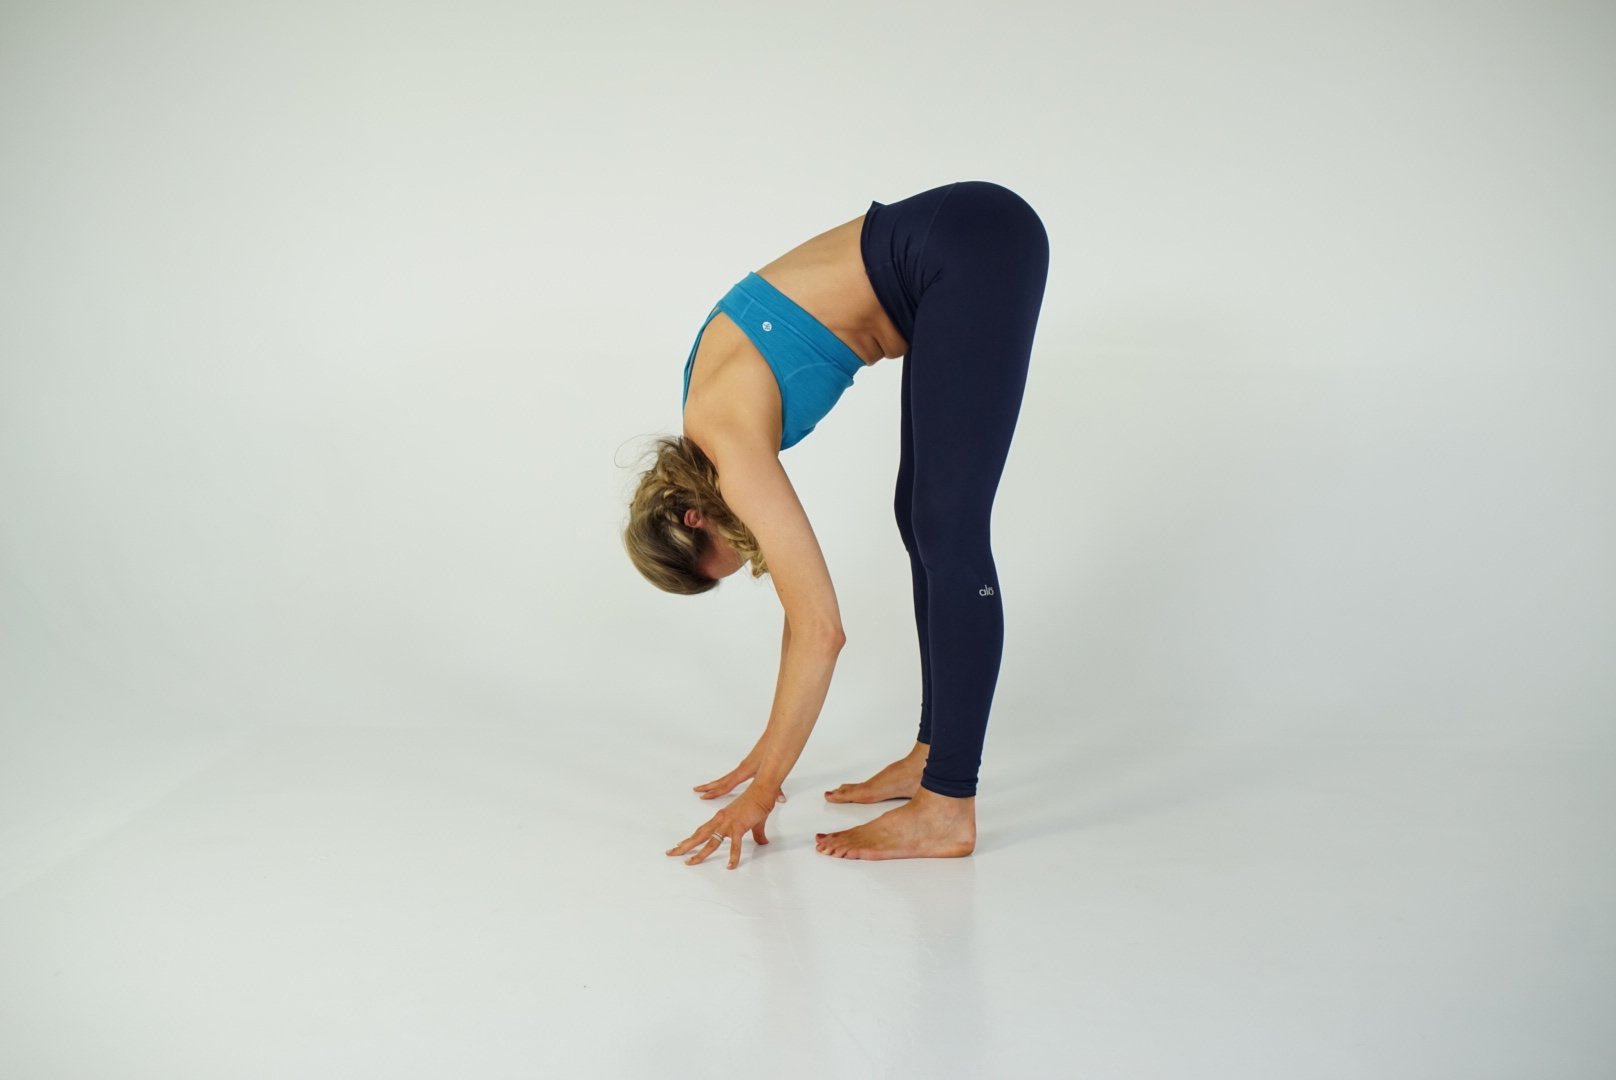
- Step 1 – Stand feet hip-width apart at the front of the Yoga mat, exhale, and bend forward.
- Step 2 – Keep the spine and back long as you lower the upper body, and stretch towards the thighs.
- Step 3 – Keep a slight bend in the knees, and relax the head, neck, shoulders, and arms.
- Step 4 – Allow the arms to relax, and place the hands on the shins, feet, or floor.
- Step 5 – Keep the chest open. Take deep breaths, hold the pose, and allow gravity to stretch you deeper into the posture.
Variations – You can take a strap under the feet to draw you deeper into the asana, or you can wrap the fingers around the big toe.
Benefits – Paschimottanasana is great for lengthening the spine, and creating space in the upper back. Keeping space in the chest strengthens the muscles of the back which can help with alignment. Allow the deep breaths to deepen the forward fold, and stretch the calves and hamstrings.
2. Downward Dog – Adho Mukha Svanasana
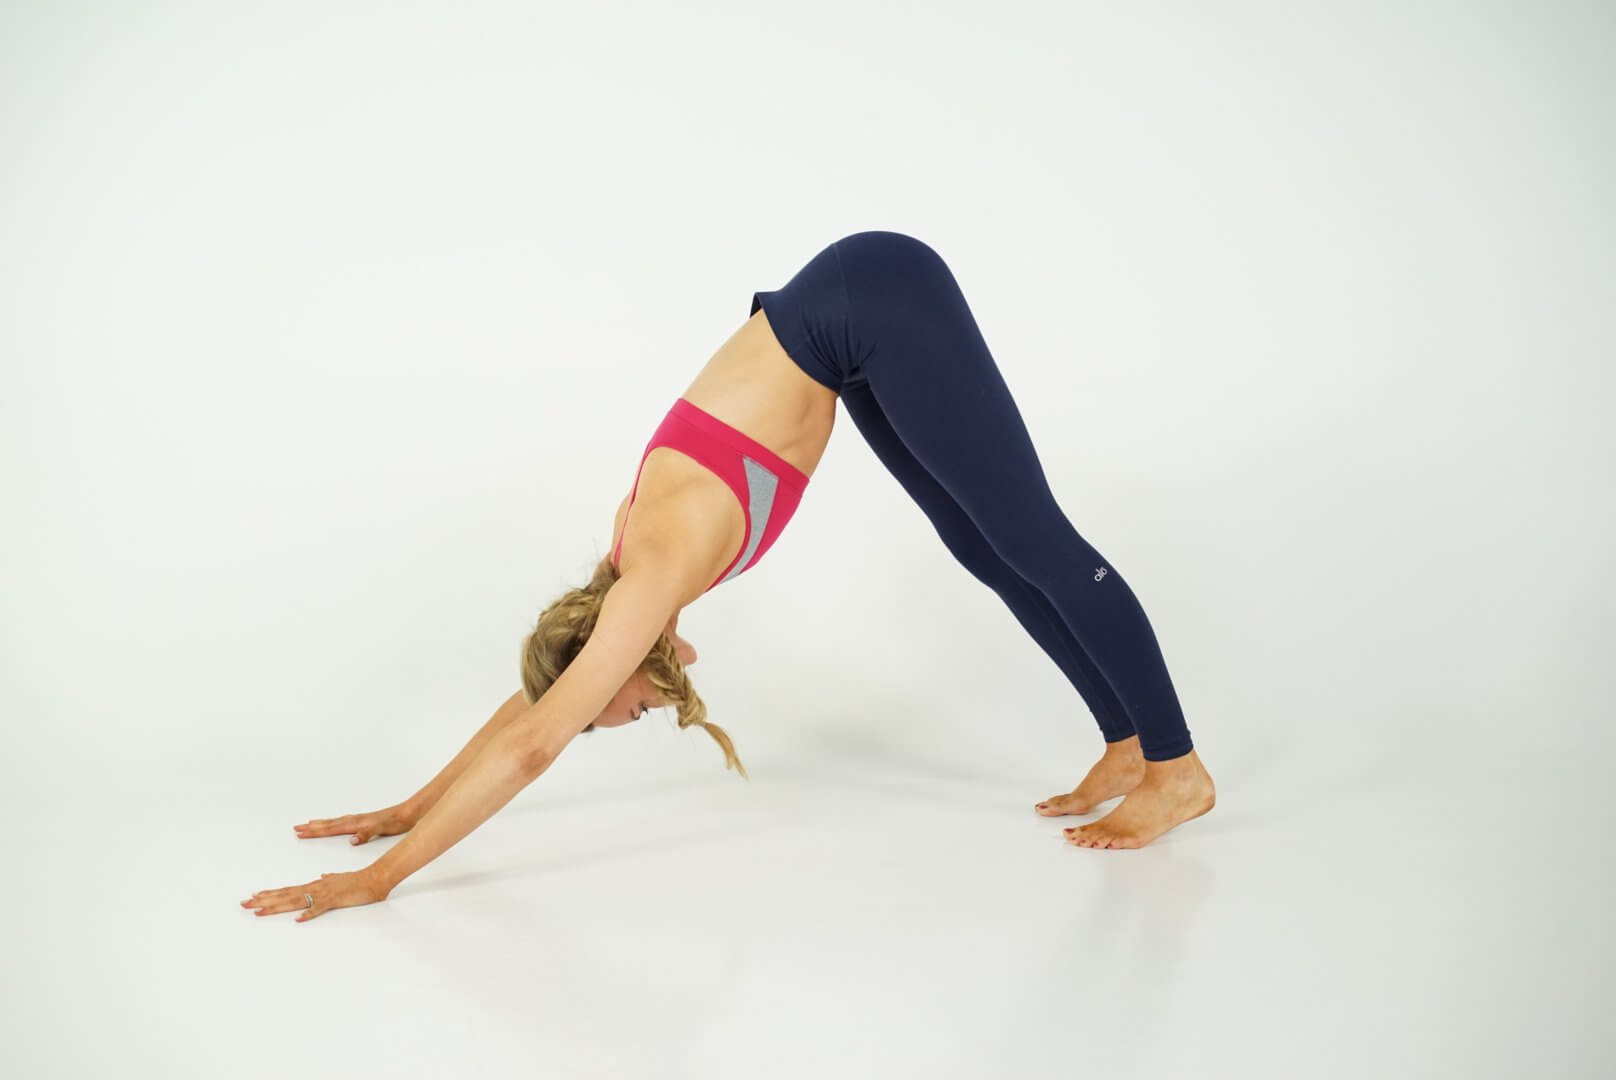
- Step 1 – Start on the hands and knees on the Yoga mat, with the fingers pointing forwards. Exhale, tuck the toes, and draw the hips up towards the ceiling.
- Step 2 – Stretch equally through the arms, hands, and feet. Palms are fully grounded and the fingers are spread. Micro-bend the elbows. Lower the heels towards the Yoga mat.
- Step 3 – Hold the pose, extend the spine and keep the back straight, and take deep breaths. Keep the shoulders away from the ears, and create space in the chest by drawing the shoulder blades together, relax the head and neck.
Variations: If the heels do not reach the Yoga mat, keep the knees bent to help elongate the spine.
Benefits: Downward Dog pose stretches out the spine and the upper back, which may help to relieve tension and pain in the shoulders. Even though downward dog is a great strengthening posture, you are able to relax the head and neck, which helps to soothe any discomfort in the shoulders.
3. Seated Spinal Twist – Ardha Matsyendrasana
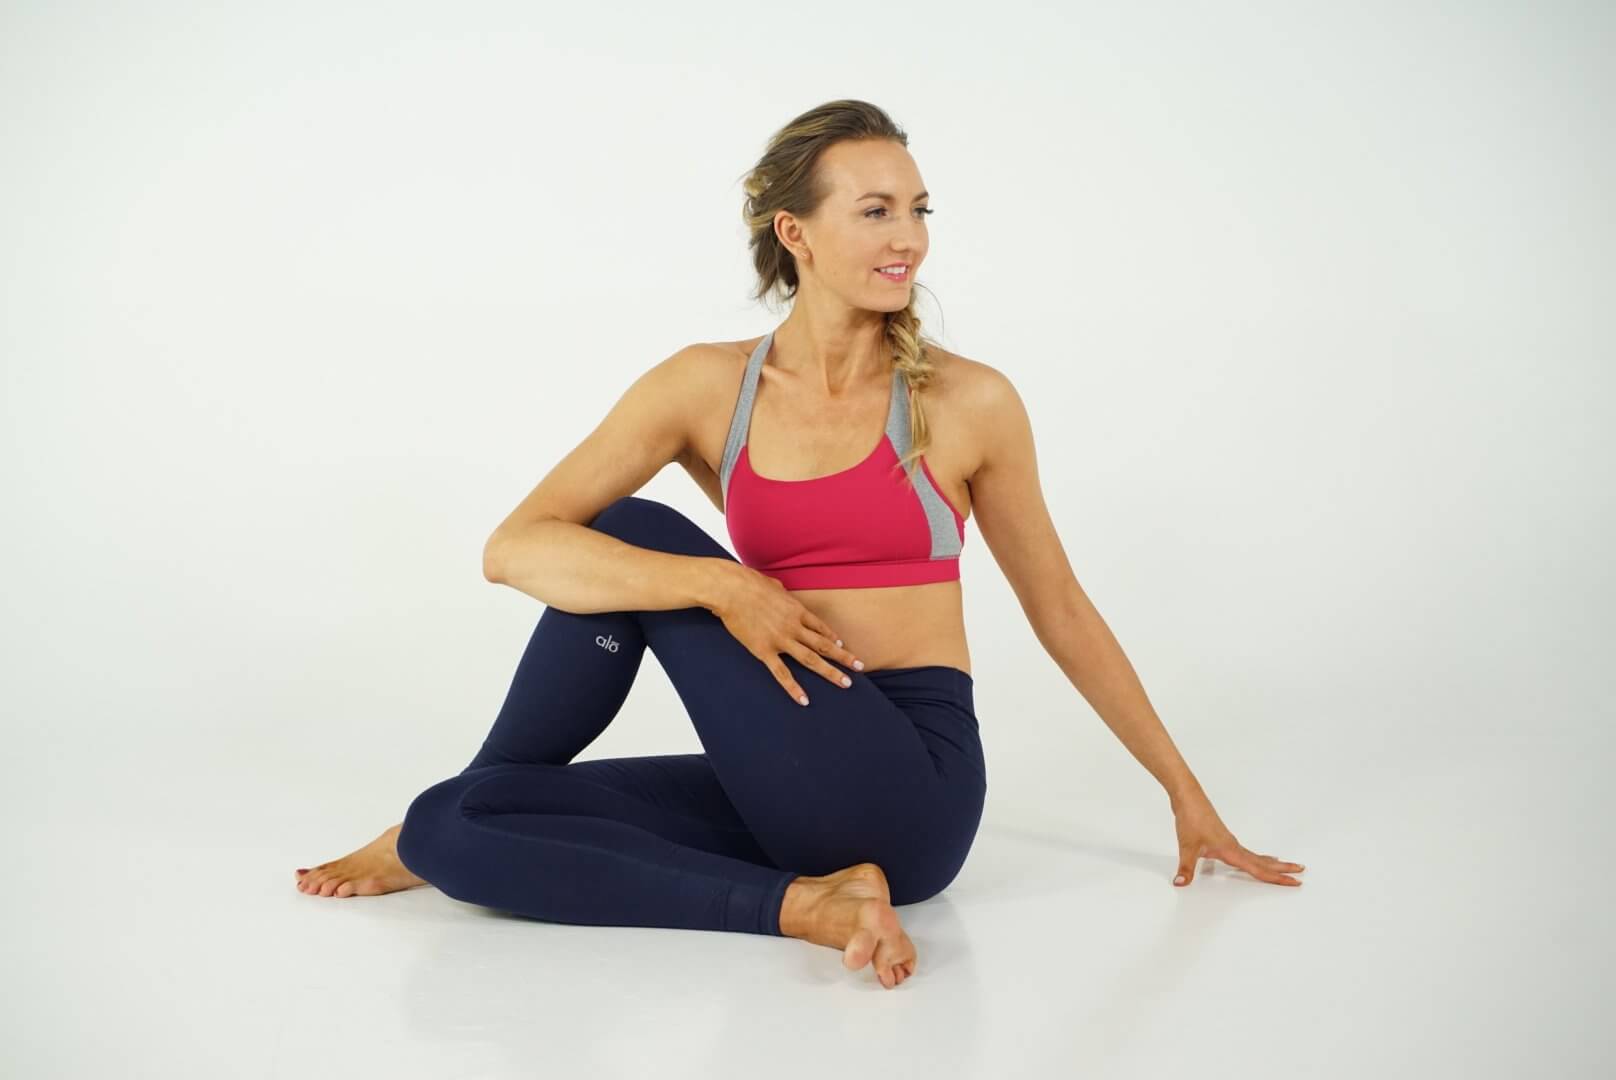
- Step 1 – Start seated on the Yoga mat with both legs in front of you. Bend the left leg, and draw the left foot to the right hip.
- Step 2 – Bend the right leg, and place the right foot on the outside of the left knee. Place the right hand just behind the tailbone.
- Step 3 – Inhale, and stretch up through the crown of the head to stretch upwards through the back, open the chest. With the exhale slowly twist the upper body towards the right leg. Hug the right knee with the left arm.
- Step 4 – Focus on long breaths, and bring the right ear towards the right shoulder. Look over the right shoulder. Hold for as long as is comfortable, and repeat the Yoga pose on either side.
Variations: Keep the left leg extended rather than bent if there is a pain in the knees. If the stretch feels uncomfortable, lessen the twist.
Benefits: Great for the spine, by increasing flexibility, and mobility. A gentle Yoga pose that lengthens and creates space in the back and stretches the neck, which may help to release pain or stored postural tension.
4. Reclined Spinal Twist – Supta Matsyendrasana
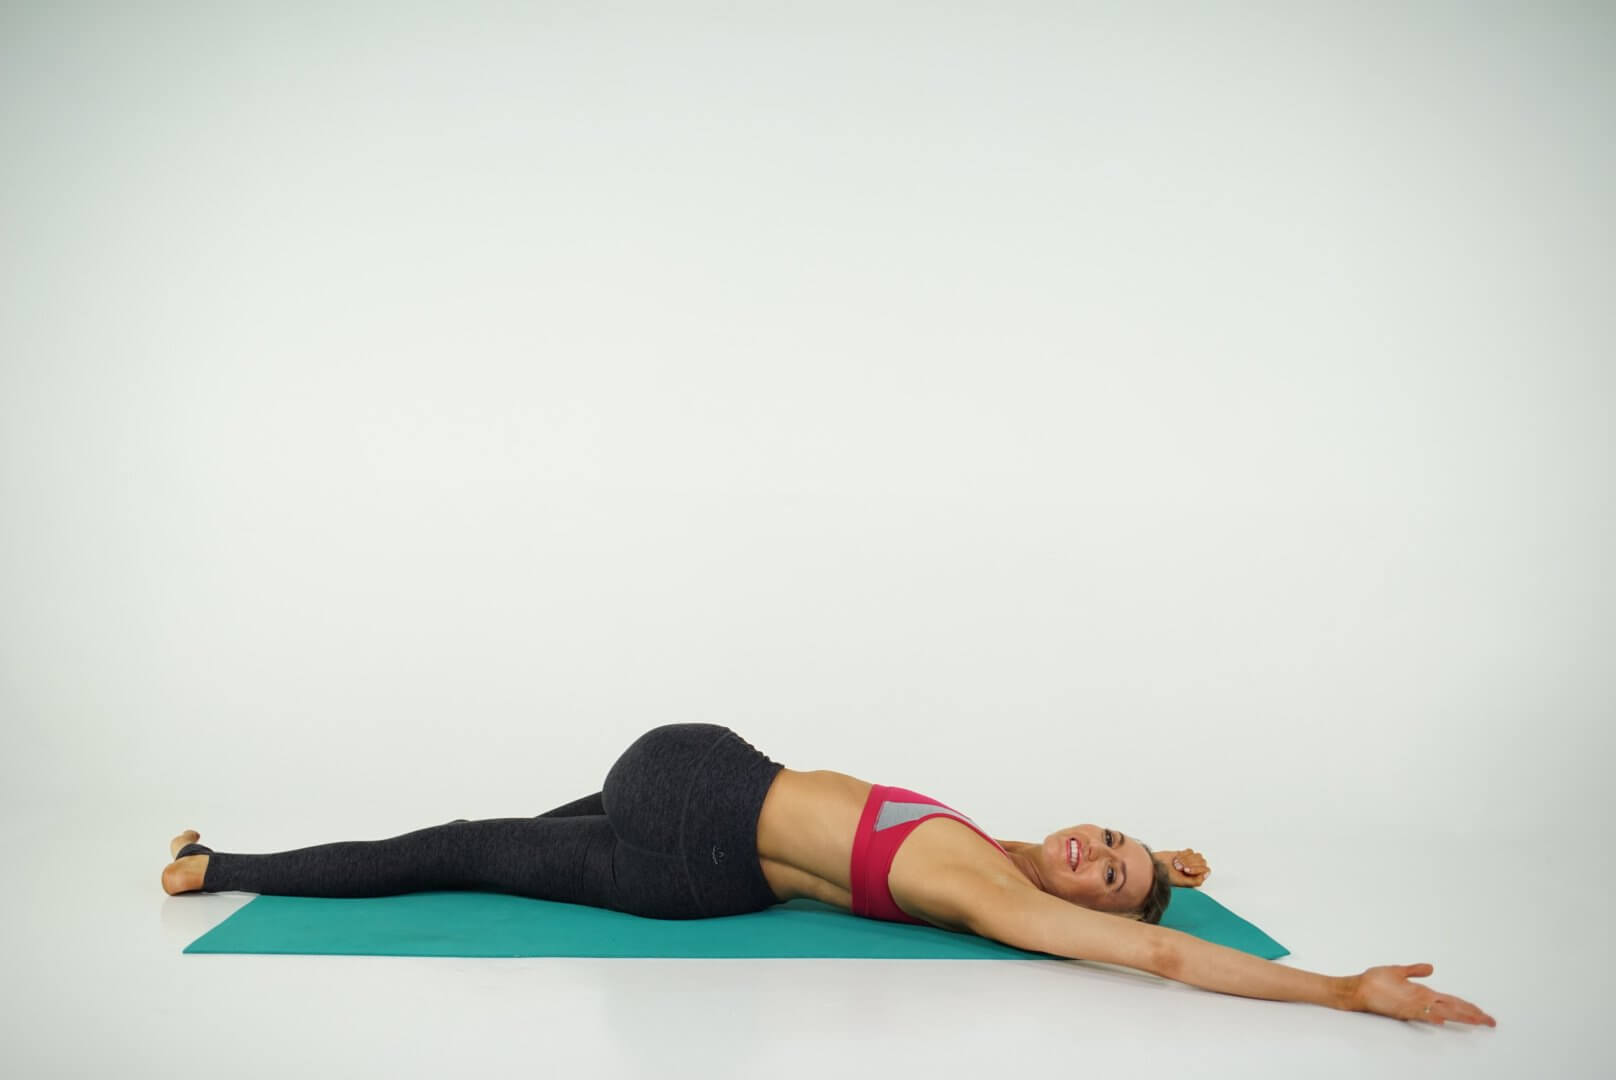
- Step 1 – Lay flat on the Yoga mat. Draw the left knee in towards the upper body.
- Step 2 – Keep the arms extended on either side of the body in a T position, palms facing down.
- Step 3 – Inhale and open the chest, exhale and slowly bring the left knee across the right thigh and towards the floor.
- Step 4 – Keep the shoulders, and both arms grounded into the Yoga mat, and feel length through the spine. Look over the left shoulder.
- Step 5 – Keep the breath long, and slow. Fully relax into the Yoga pose, and allow gravity to stretch the neck and shoulder.
- Step 6 – Allow yourself to feel centered and grounded. Hold for as long as is comfortable, and repeat the pose on either side.
Variations: Keep a cushion underneath the left knee if there is space between the Yoga mat and the knee. If you feel the left shoulder or left arm lifting from the mat, release the twist a little, and place a cushion under the left knee.
Benefits: The reclined spinal twist is a fully restorative posture which allows gravity to gently mobilize the spine and lengthen the back muscles. You are able to fully relax the body, which may help to soothe inflammation or pain in the neck, shoulders, and shoulder blades.
5. Child’s Pose – Balasana
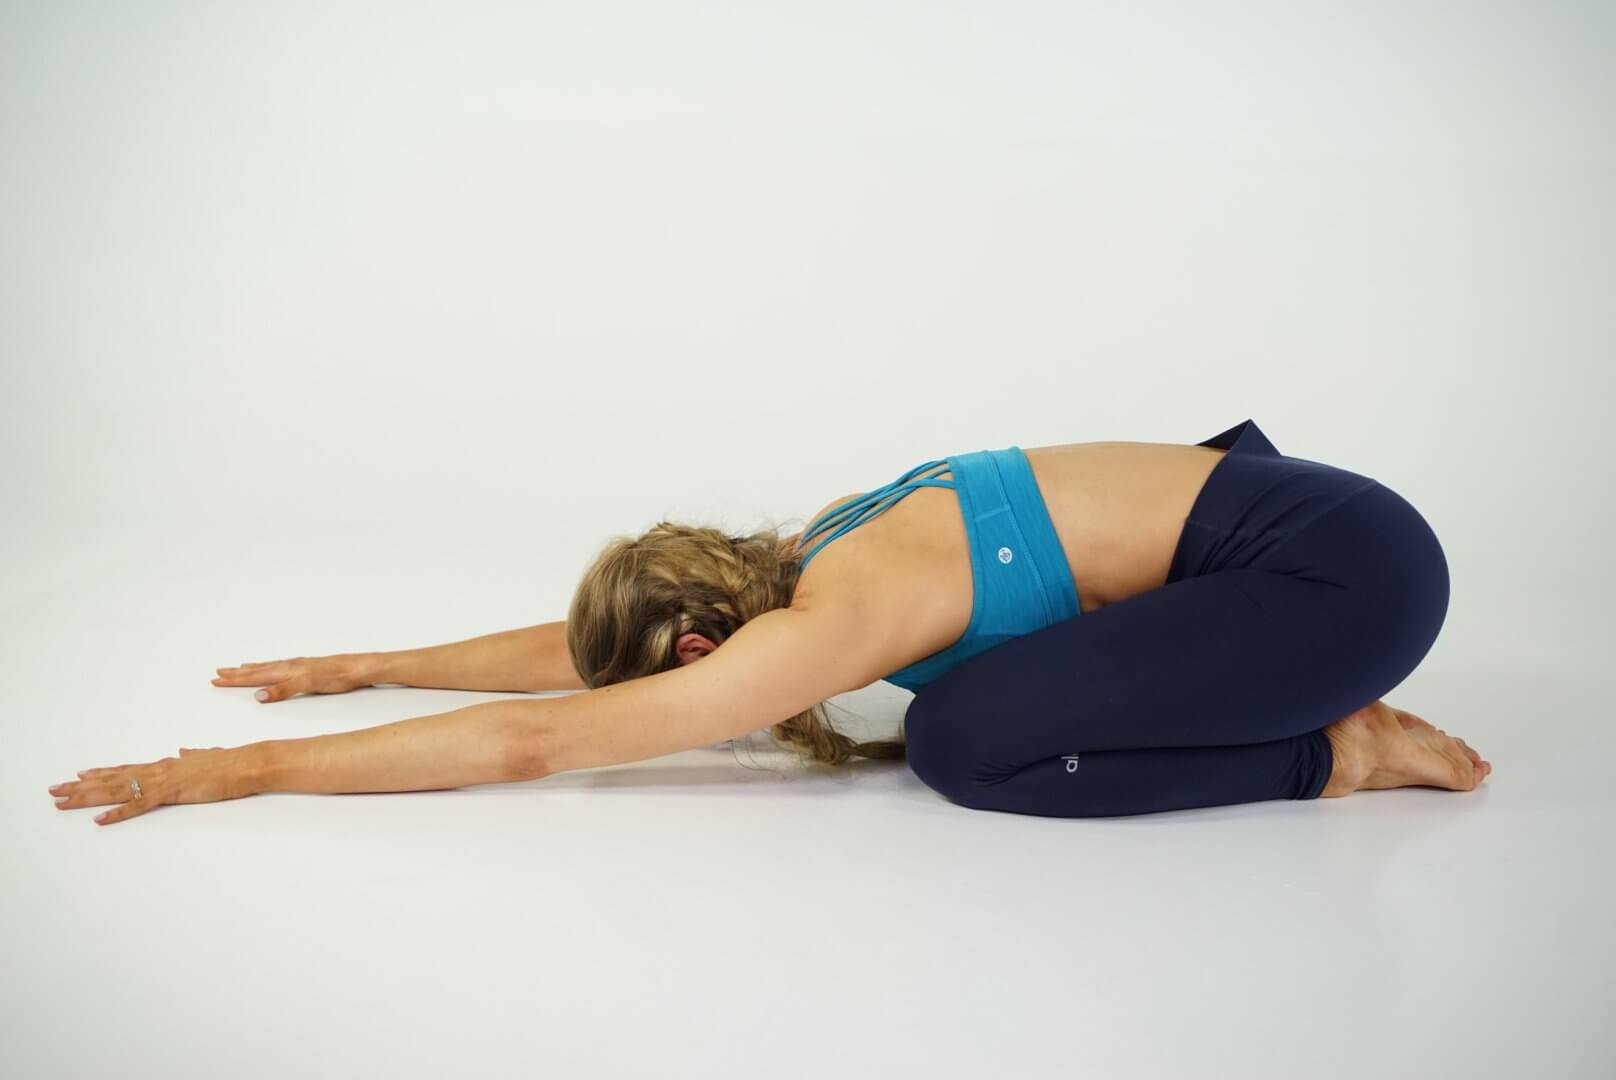
- Step 1 – Start on the Yoga mat on your hands and knees.
- Step 2 – Exhale and lower the hips towards the feet. Feel the tailbone extending deep into the mat.
- Step 3 – Walk the hands forward, away from the body towards the front of the mat, which stretches out the entire body and back.
- Step 4 – Lower the upper body onto the thighs, and surrender to the pose.
- Step 5 – Lengthen forward through the arms, to open the chest, and fully relax the neck and shoulders by placing the forehead on the Yoga mat.
- Step 5 – The breaths should be slow and steady. Take one long deep inhale, and one full complete exhale. Use the breath to surrender deeper into the pose with each exhale. Hold the pose for as long as is comfortable.
Variations: Open the knees if compression in the hips prevents you from relaxing the back. This will improve alignment by allowing the sides of the torso to rest in between the thighs. If the arms and hands do not feel comfortable. You can take the arms to the sides of the torso, with the palms facing upwards.
Benefits: The beautifully restorative pose allows lengthening of the back and the sides of the body, in a nourishing and relaxing way. It may help to relieve tension, and postural issues by creating space in the back and torso. Allows immediate relief for the shoulders and neck.
6. Cat / Cow Pose – Marjariasana / Bilasana
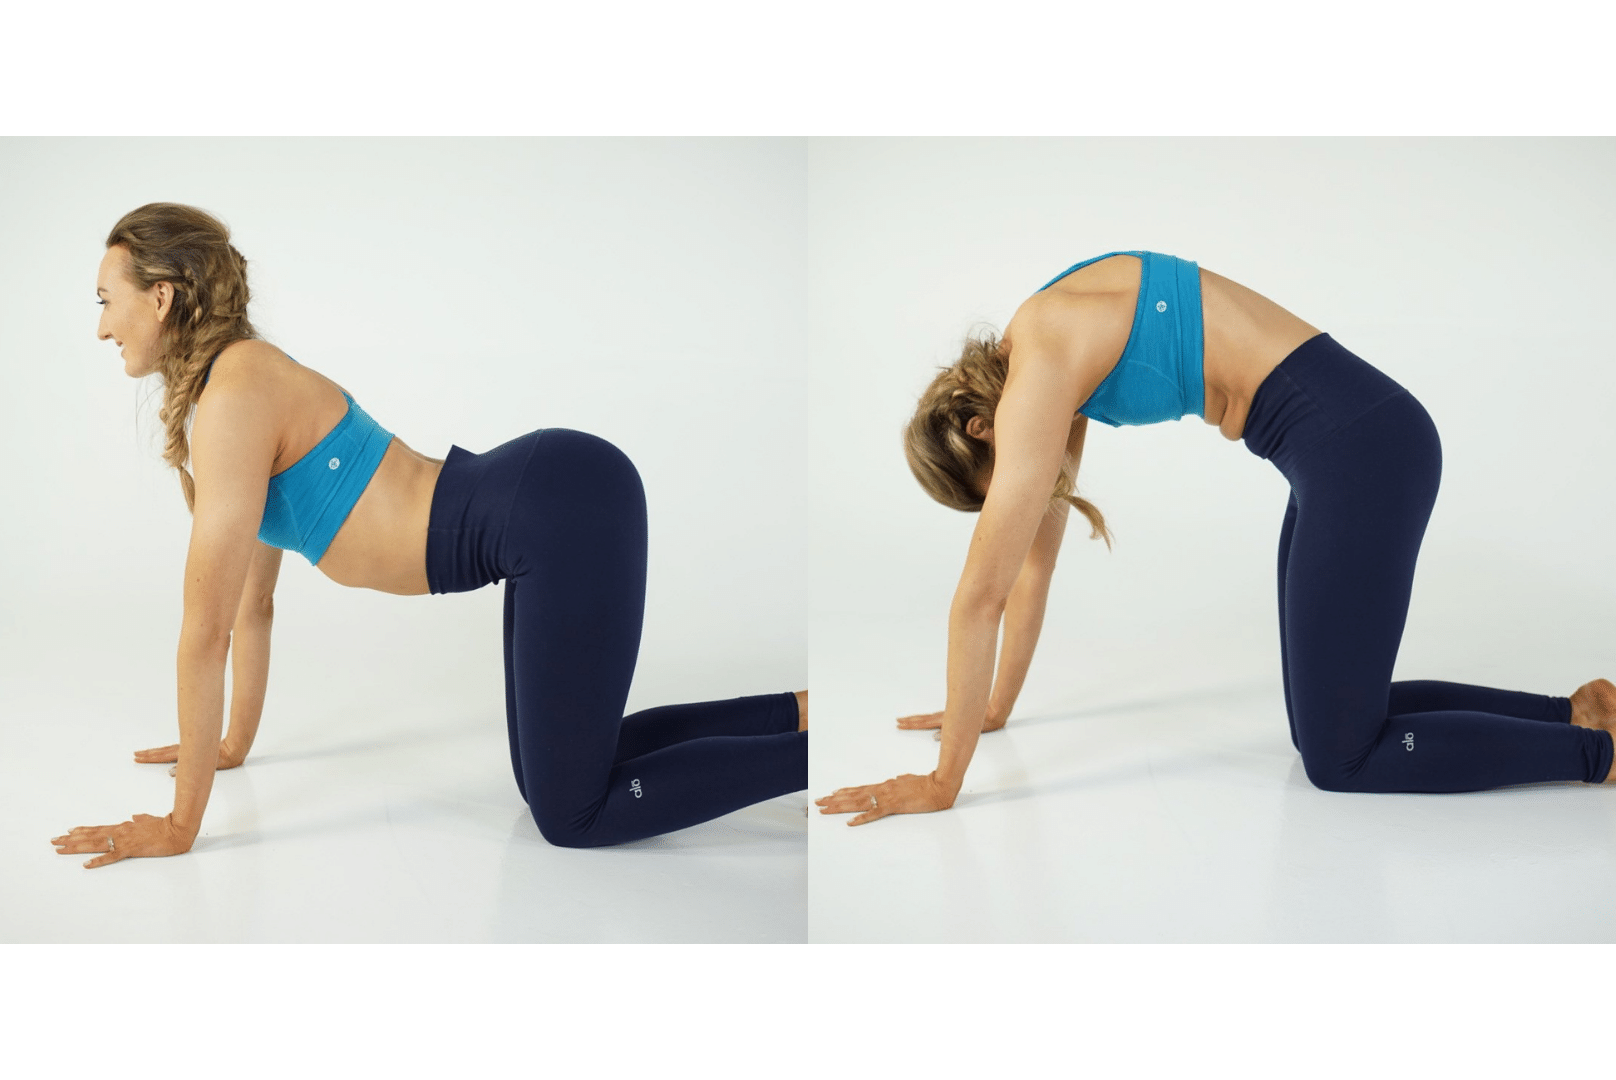
- Step 1 – Start on the Yoga mat on your hands and knees.
- Step 2 – Hands and wrists are under the shoulders with the fingers pointing forwards, knees are under the hips. Palms are fully grounded and the fingers are spread. Keep a small micro-bend in the elbows.
- Step 3 – Exhale and slowly lift the middle back and abdomen, tuck the tailbone and bend the chin in towards the chest.
- Step 4 – Inhale and slowly lower the middle back and abdomen, lift the chin and the tailbone towards the sky.
- Step 5 – Synchronize the breaths with the movement. Allow the breath to deepen the stretches within the chest and the back.
Variations – If the knees are uncomfortable, then fold the Yoga mat, to allow more comfort for the knees.
Benefits – This Yoga pose encourages gentle movement in the back, the neck, and the shoulder blades. Moving slowly with the breath encourages a moving meditation within your Yoga poses. Release tension in the neck and shoulder, and move gently to avoid increasing possible inflammation – this may help relieve the symptoms of pain that accompany shoulder injuries.
7. Thread the needle – Supta Kapotanasana
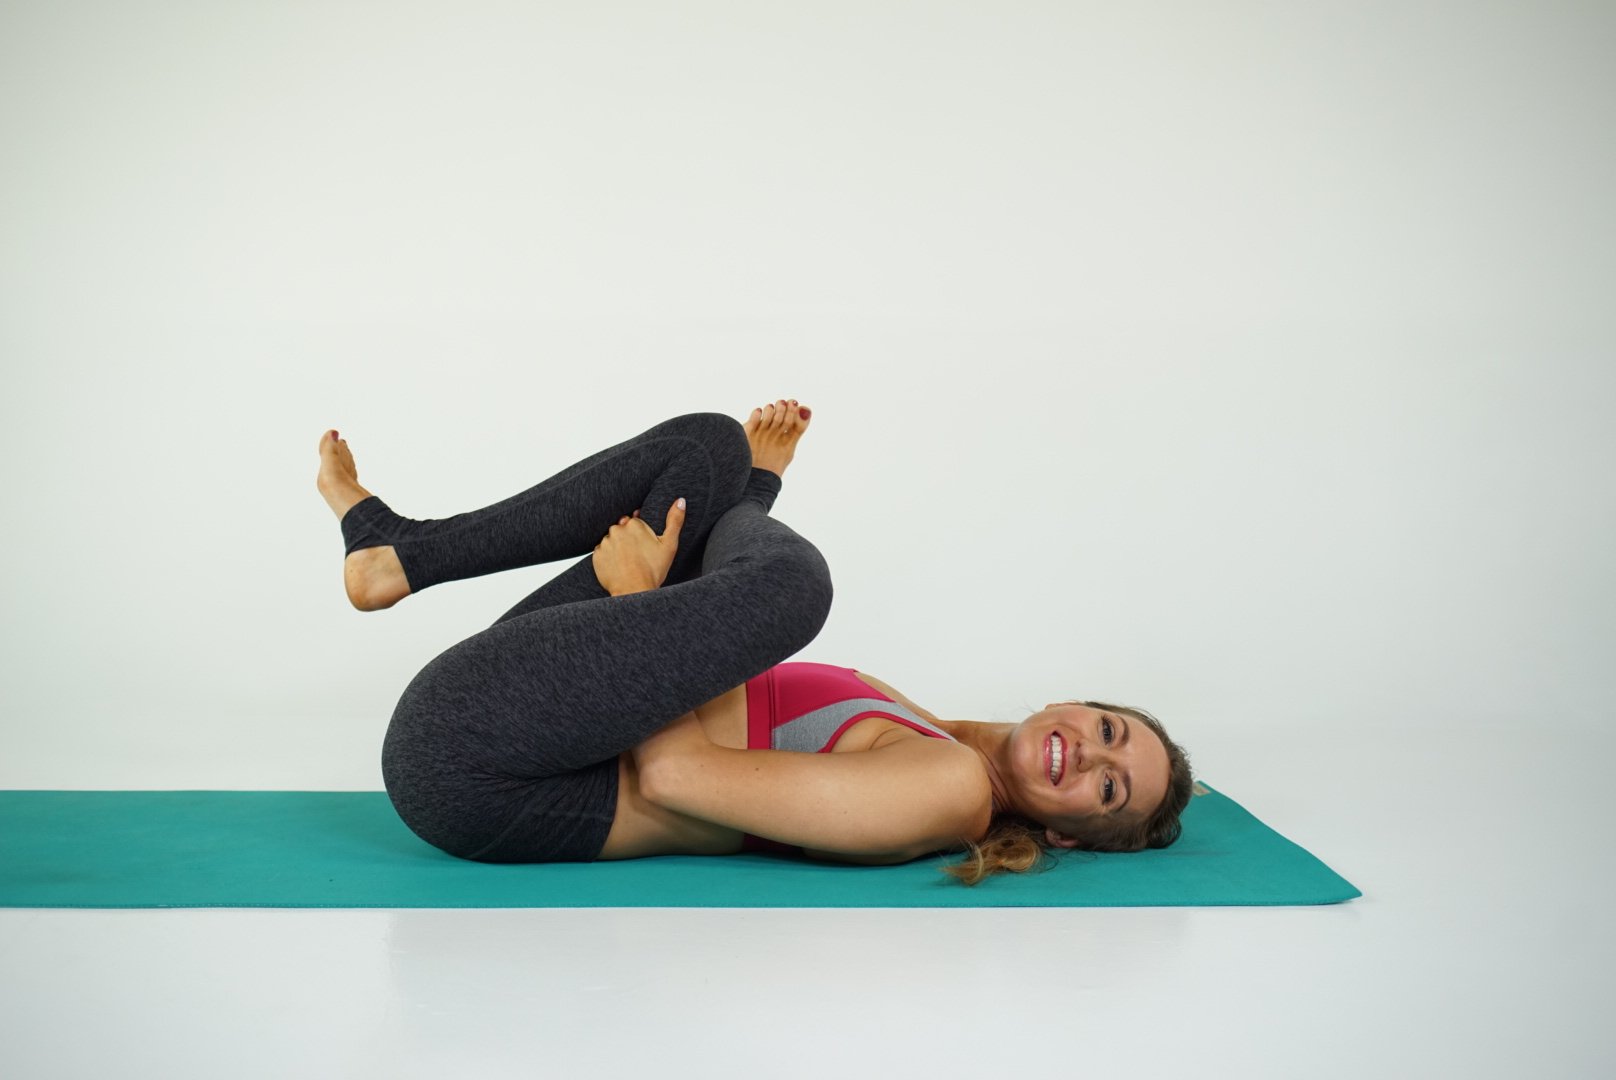
- Step 1 – Lay on the Yoga mat, and bend the right knee, placing the right foot over the left thigh just above the knee.
- Step 2 – Thread the needle by taking the right arm through the thighs, and the left arm on the outside of the left thigh, so you can interlace the hands behind the left thigh.
- Step 3 – Exhale and use the hands to draw the left leg towards the chest.
- Step 4 – Fully relax the shoulders, shoulder blades, back, and neck.
- Step 5 – Slow the breath, and hold the pose for as long as is comfortable, repeat on either side.
Variations: If you feel the shoulders or the hips lift from the Yoga mat, then release the grip on the left leg to allow the back and shoulders to be fully grounded.
Benefits: Restorative supine Yoga poses allow you to stretch and relax the muscles which may be contributing to shoulder pain, whilst also preventing extra strain on the body.
Sources
Find more yoga sequences by benefit.
YOU MIGHT ALSO LIKE
- How to Teach Somatic Yoga: A Practical Guide for Instructors
- The Best Somatic Exercises for Grief: Find Healing Through Movement
- The Best Somatic Exercises for Anger Management and Emotional Release
- Yoga to Reconnect with Yourself: 5 Essential Practices for Inner Peace
- Yoga for Connection: 10 Poses to Deepen Relationships and Bonding
- Yoga To Connect With Your Body For Mind-Body Harmony
- Yoga to Connect with Feminine Energy: 5 Transformative Practices
- Yoga to Connect with Your Heart: 3 Poses for Emotional Balance
- Myofascial Release Yoga: Unlock Tension and Improve Flexibility
- 6 Hip Openers For Emotional Release
- Office Yoga: 10 Poses You Can Do Right Now
- Ayurveda Food Combining: The Key to Balanced Digestion
- Yoga For Grief: 8 Yoga Poses For Support
- Yoga for Vata Dosha: Practice Poses and Tips
- Yoga for Pitta Dosha: Practice Poses and Tips
Learn how to do 11 of the most popular yoga poses correctly. Free video + PDF download.


