
Yoga practices are not limited by age. In fact, yoga practice is one of the few physical exercises you can continue as you age. With the right breathing exercises, yoga teacher, and exercise routine, seniors can reap the benefits of yoga classes.
Want to learn how?
Keep reading and I’ll go over the best types of yoga for seniors and the top 10 yoga poses good for seniors.
Best Types of Yoga for Seniors
Yoga can help with health issues and overall body strength of older adults with minimal equipment making it a great exercise form to get into later in life. The movements in yoga classes can help with all sorts of issues that go along with aging including:
- Managing blood pressure and chronic joint pain.
- Increasing lung capacity, bone density, and range of motion.
- Improving circulation and breathing techniques.
Yoga for seniors also helps with managing more long-term health challenges like heart disease, osteoporosis, and arthritis.
The benefits of yoga aren’t just limited to the physical body either. Many people also turn to yoga therapists to help with increased alertness, concentration, and memory.
Basically, practicing yoga and meditation can lead to improved quality of life and well-being no matter what age you are.
The best types of yoga for seniors are:
- Chair yoga: This type of gentle yoga involves using the chair as a prop. This is especially helpful for yoga programs for beginners and older adults.
- Iyengar yoga: Well known for its creative use of props in yoga class, Iyengar yoga is very different from regular yoga practice because it allows many modifications using props which can be great for seniors. This means beginners and older adults have more opportunities to explore varied yoga postures in yoga class.
- Yin yoga: This gentle yoga is characterized by its use of props and being in a yoga asana for longer durations. You can fully relax into a pose and take the time you need to figure out what works best for you.
Top Yoga Poses for Seniors
These 10 poses are a great starting point for getting a good yoga pose sequence for seniors that is comfortable and beneficial.
1. Butterfly Pose – Baddhakonasana
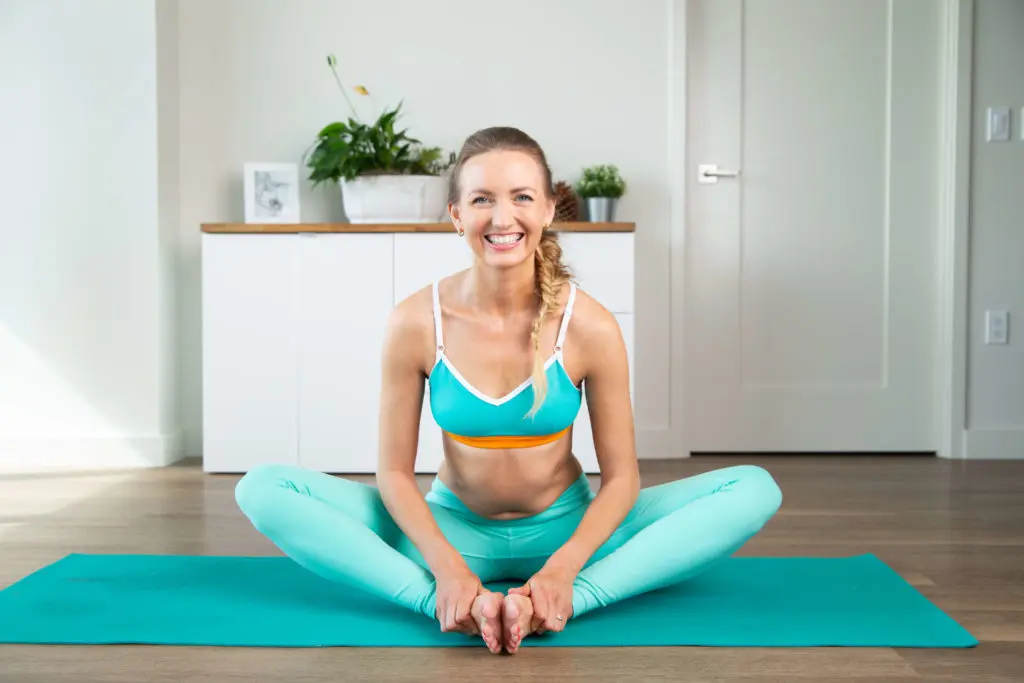
- Step 1: Start in Dandasana
- step 2: Fold the legs and join the soles of the feet together; knees out to the side and straight back.
- Step 3: Hold for 15 breaths.
- Step 4: To release gently extend the legs
Variations: In the reclining variation of this pose, you can lie down on the mat and join the soles of the feet together. Alternatively, you can also sit with the back against the wall.
Benefits: This is a great pose to improve range of motion around the hips and groin – stretching the inner thigh and back. It also helps with lower body pain and is a great addition in yoga for seniors.
2. Cat / Cow pose – Marjaryasana / Bitilasana
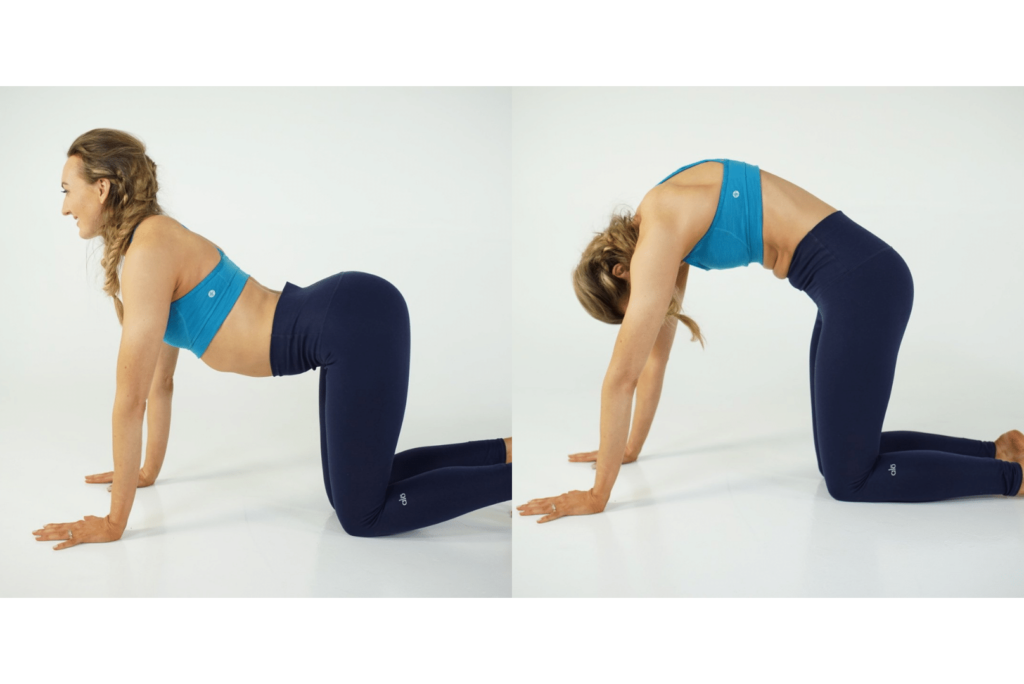
- Step 1: Start in tabletop position – palms under the shoulders and knees under hips, neutral spine
- Step 2: Breath in to drop the belly down and arch the back, lift the chin up.
- Step 3: Breath out to round the back and push into the earth with palms
- Step 4: Repeat 5-10 times and then return to tabletop position
Variations: If the knees hurt, use a blanket under the knees. You can also practice the seated chair yoga variation of this pose – keep the palms on the knees and move from the lower back – breath-in to arch the back and breathe-out to round the back.
Benefits: Great for mobility and flexibility of the spine. It’s also great to tackle stress and can be successfully used to help with hypertension and insomnia. For seniors with back pain, this is a great pose to get started.

3. Seated Spinal Twist Pose – Parivrtta Sukhasana
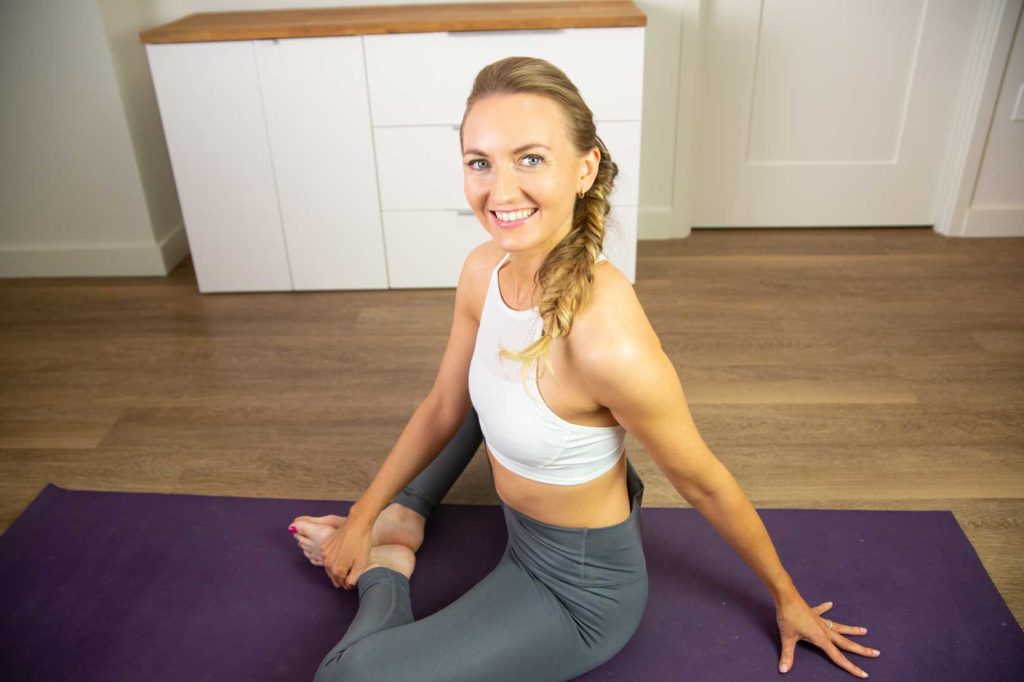
- Step 1: Start in easy seated pose with the arms and shoulders relaxed
- Step 2: Breathe-in to extend the arms up. Breathe-out to twist to the right, place the left hand on the right knee and right hand behind the back
- Step 3: Hold the pose for 5-10 breaths
- Step 4: Breathe-out to unwind. Repeat on the other side.
Variations: Place a folded thin blanket under you if there is any discomfort in the lower back. Or try the chair yoga version of this pose. Take the assistance of yoga instructor if needed.
Benefits: This is a great pose to improve flexibility of the spine, neck, shoulders and hips. It strengthens the lower back and is great for aiding digestion.
4. Tree Pose – Vrikshasana
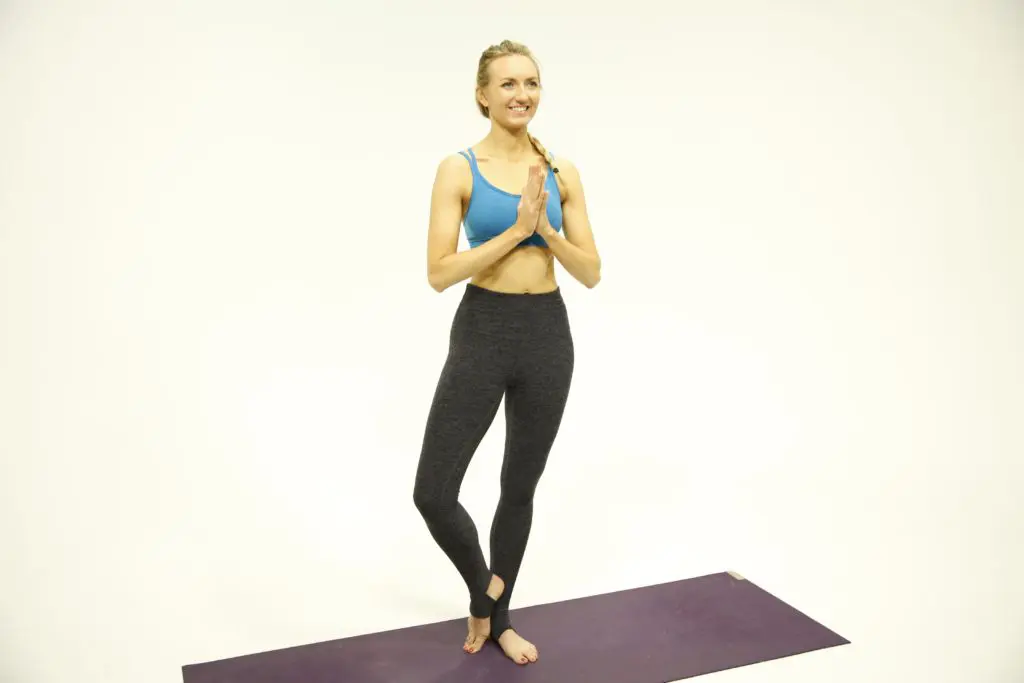
- Step 1: Start in mountain pose.
- Step 2: Breathe-in to bend the right knee. Place the sole of the right foot on the inside of the left thigh, above the knee.
- Step 3: Gaze at one point in front of you, on the same level as the eyes. Maintain balance by keeping the spine straight.
- Step 4: Slowly bring the palms in Namaskar mudra above the head. Take 5-10 breaths here.
- Step 5: Inhale to point the right knee to the front. Exhale to lower the right leg down. Repeat on the other leg
Variations: In case balancing is extremely challenging or the joints hurt, place the sole of the foot on the ankle or the inside of the shin. You can also practice keeping the joined palms in front of the chest – this will make balancing easier.
Benefits: It stretches the legs, back and arms. It’s one of the best standing poses recommended by yoga teachers and helps with concentration and focus. Practice the pose for longer to build strength in the legs and core.
5. Palm Tree Pose – Tadasana
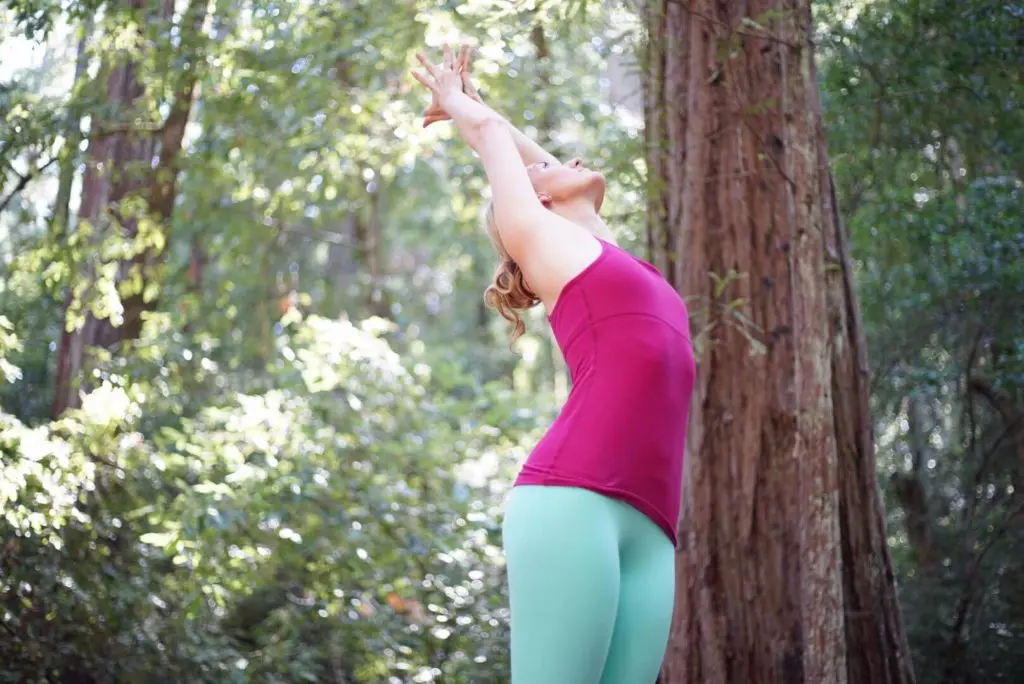
- Step 1: Start in mountain pose.
- Step 2: Gaze at a steady point. Lift the hands up and interlock the fingers overhead, flip the palms up
- Step 3: Inhale and lift both the heels off the mat. Stretch as much as possible without over arching the back.
- Step 4: Stay here for 5-10 breaths. Exhale to rest the heels back down and return to starting pose
Variations: To maintain balance, this yoga routine can be done by seniors next to a wall.
Benefits: Good for stretching the arms, chest, abdomen, spine and the legs. It helps with concentration, focus and improves posture, increases awareness and steadies the breath. Practice this pose for longer to help with digestion, blood circulation and building strength in the abdomen and legs.
6. Upward Salute Side Bend Pose – Parsva Urdhva Hastasana
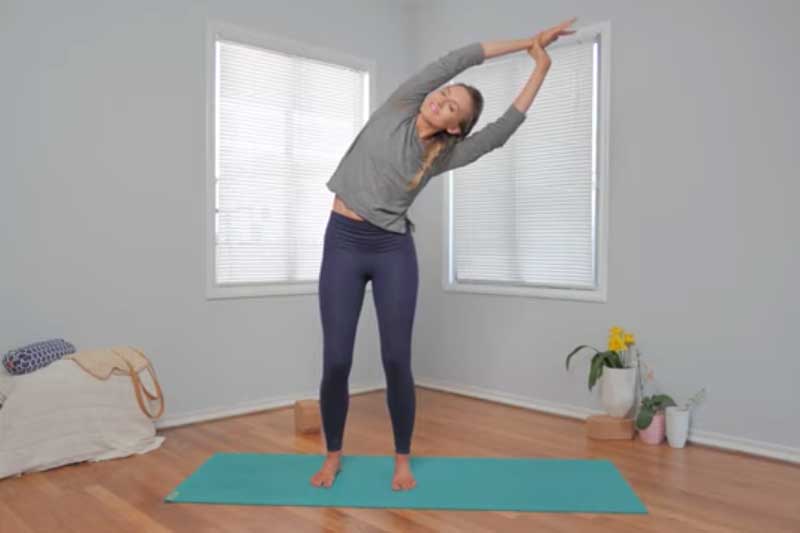
- Step 1: Start in mountain pose.
- Step 2: Inhale and sweep the arms out to the side and up overhead in Namaskar mudra
- Step 3: Exhale and lean to the right side, pull the left shoulder back and keep the chest open.
- Step 4: Hold for 5-10 breaths. To release, exhale and return to centre. Repeat on the other side.
Variations: If its difficult to balance, then stand with your feet hip distance apart. Beginners can also stand with the back against a wall to ensure the back doesn’t round.
Benefits: This standing pose is excellent for side body flexibility. It stimulates the internal organ and is great to aid the digestive process for all types of bodies.
7. Sphinx Pose – Salamba Bhujangasana
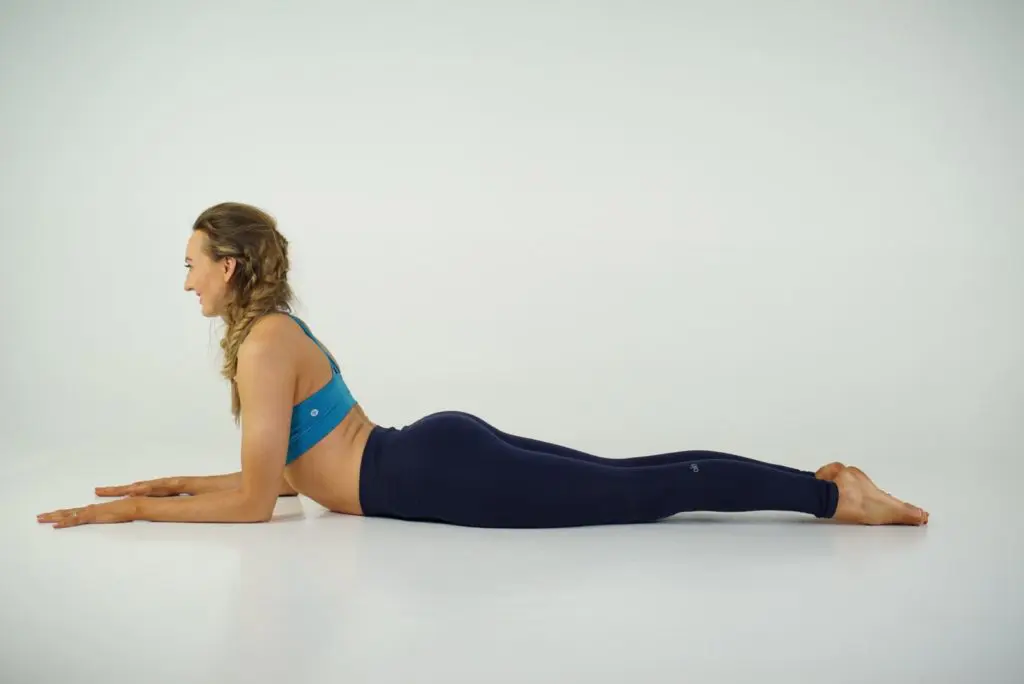
- Step 1: Start on your stomach with feet hip distance apart and forehead on the ground.
- Step 2: Lift the upper body. Place your forearms shoulder distance apart and parallel to each other. Move the shoulder away from the ears.
- Step 3: Inhale and lift the head up. Tuck your chin to ensure the back of the neck is long
- Step 4: Pull the centre of the chest forward. Take a few deep relaxing breaths here.
- Step 5: Exhale to gently bring down your abdomen, chest and head back to the floor.
Variations: In case your shoulders hurt, use a cushion under the chest for added support.
Benefits: This is one of the most relaxing poses for the back and neck. It also stimulates the abdominal organs and expands the chest and shoulders and builds strength in the back.
8. Twisting Cobra Pose – Parvrtta Bhujangasana
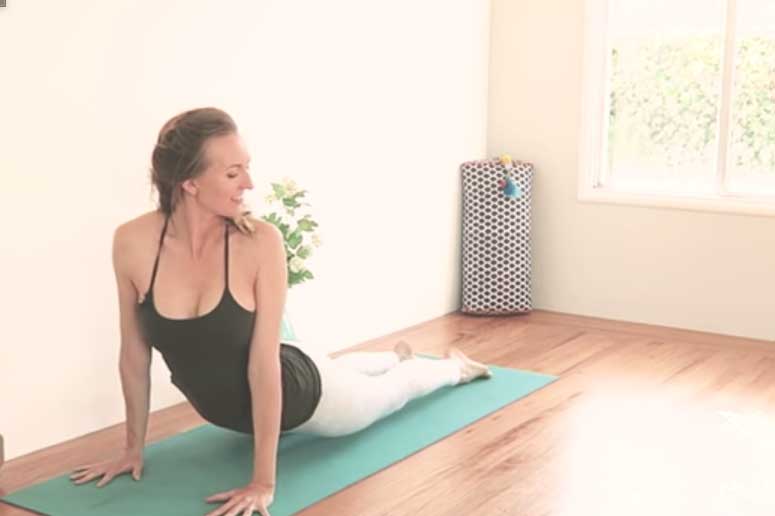
- Step 1: Start in prone position, with belly and forehead on the mat, feet as wide as the yoga mat and palms by the side of the ribcage.
- Step 2: Inhale to lift the chest and head up till arms are straight. Avoid shrugging shoulders
- Step 3: Exhale to twist to the right. Stay here for 3-5 breaths.
- Step 4: Inhale back to centre and exhale to come back down. Repeat on the other side.
Variations: Try to lift the chest a little lower if this pose is too difficult. You can also place a folded thin blanket under the hip bones for more support.
Benefits: This pose is great to increase flexibility of the back. Great to include as part of exercise program for people with constipation – it massages and stimulates liver and kidneys
9. Supine Spinal Twist – Supta Matsyendrasana
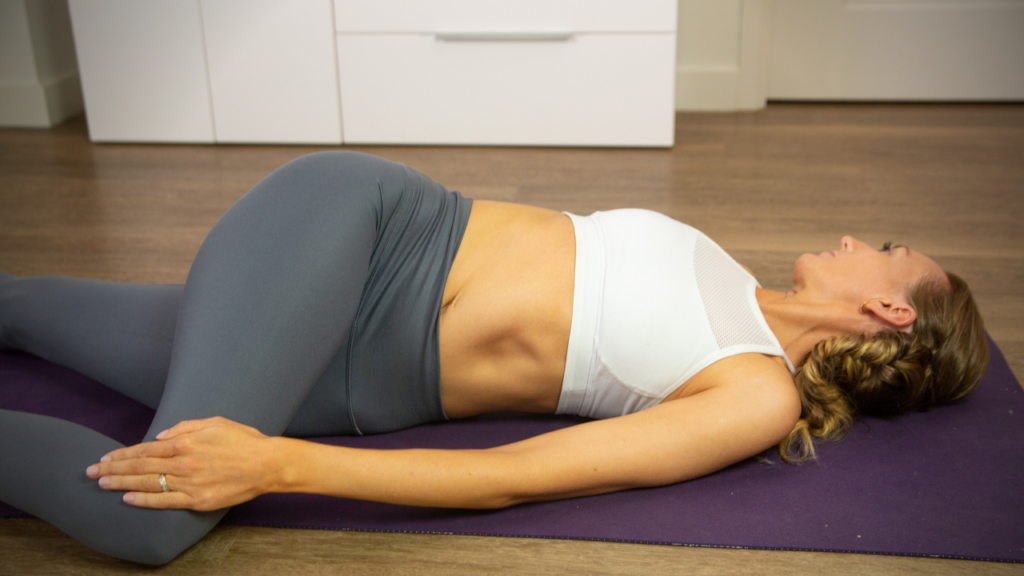
- Step 1: Start on your back. Bend both the knees with soles of the feet on the mat. Extend out the arms in line with shoulders.
- Step 2: Inhale to lift the knees to the chest, exhale to drop the knees to the right, while looking to the left.
- Step 3: Stay here for 5-10 breaths.
- Step 4: Inhale to come back to centre. Repeat on the other side.
Variations: If the stretch on the back is too intense, try gentle yoga with just one knee bent. If you want to further intensify the pose, cross one knee over the other
Benefits: This pose stretches the glutes, chest, and obliques. Its health benefits include improved spinal mobility and digestion. One of the best yoga poses to alleviate lower back pain.
10. Corpse pose – Savasana
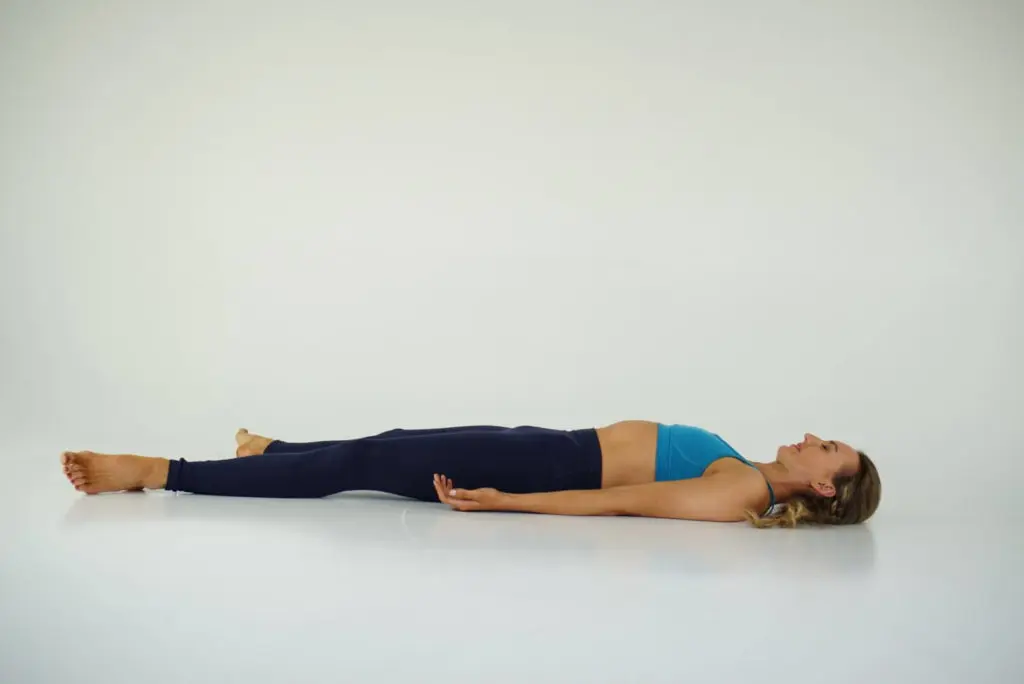
- Step 1: Start on your back. Take your feet as wide as the mat and turn the palms up. Close your eyes and observe 30-50 breaths
- Step 2: To release, start with small movements around the fingers and toes and then the rest of the body.
Variations: For people with back pain, place a pillow under the knees.
Benefits: Probably one of the most important yoga poses in a yoga journey, this yoga pose helps calm the mind and relax the body. For a Hatha yoga and restorative yoga teacher, this is one of the hardest yoga poses to teach yoga practitioners because a lot of work goes into stilling the mind.
Next Steps
- If you’re interested in practical kriya yoga as a way to improve your daily life and relationships, check out my Yoga for Self Mastery course.
- Order my Yoga Life book for a practical guide to creating balance in your life through yoga.
- Check out my YouTube channel and find some yoga classes that you can try out for yourself!
Learn how to do 11 of the most popular yoga poses correctly. Free video + PDF download.
Find more yoga sequences by benefit.
YOU MIGHT ALSO LIKE
- How to Teach Somatic Yoga: A Practical Guide for Instructors
- The Best Somatic Exercises for Grief: Find Healing Through Movement
- The Best Somatic Exercises for Anger Management and Emotional Release
- Authentic Pathways: Connecting With Higher Self for Inner Peace
- Yoga to Reconnect with Yourself: 5 Essential Practices for Inner Peace
- Yoga for Connection: 10 Poses to Deepen Relationships and Bonding
- Yoga To Connect With Your Body For Mind-Body Harmony
- Yoga to Connect with Feminine Energy: 5 Transformative Practices
- Yoga to Connect with Your Heart: 3 Poses for Emotional Balance
- Myofascial Release Yoga: Unlock Tension and Improve Flexibility
- 6 Hip Openers For Emotional Release
- Office Yoga: 10 Poses You Can Do Right Now
- Ayurveda Food Combining: The Key to Balanced Digestion
- Yoga For Grief: 8 Yoga Poses For Support
- Yoga for Vata Dosha: Practice Poses and Tips
Learn how to do 11 of the most popular yoga poses correctly. Free video + PDF download.

