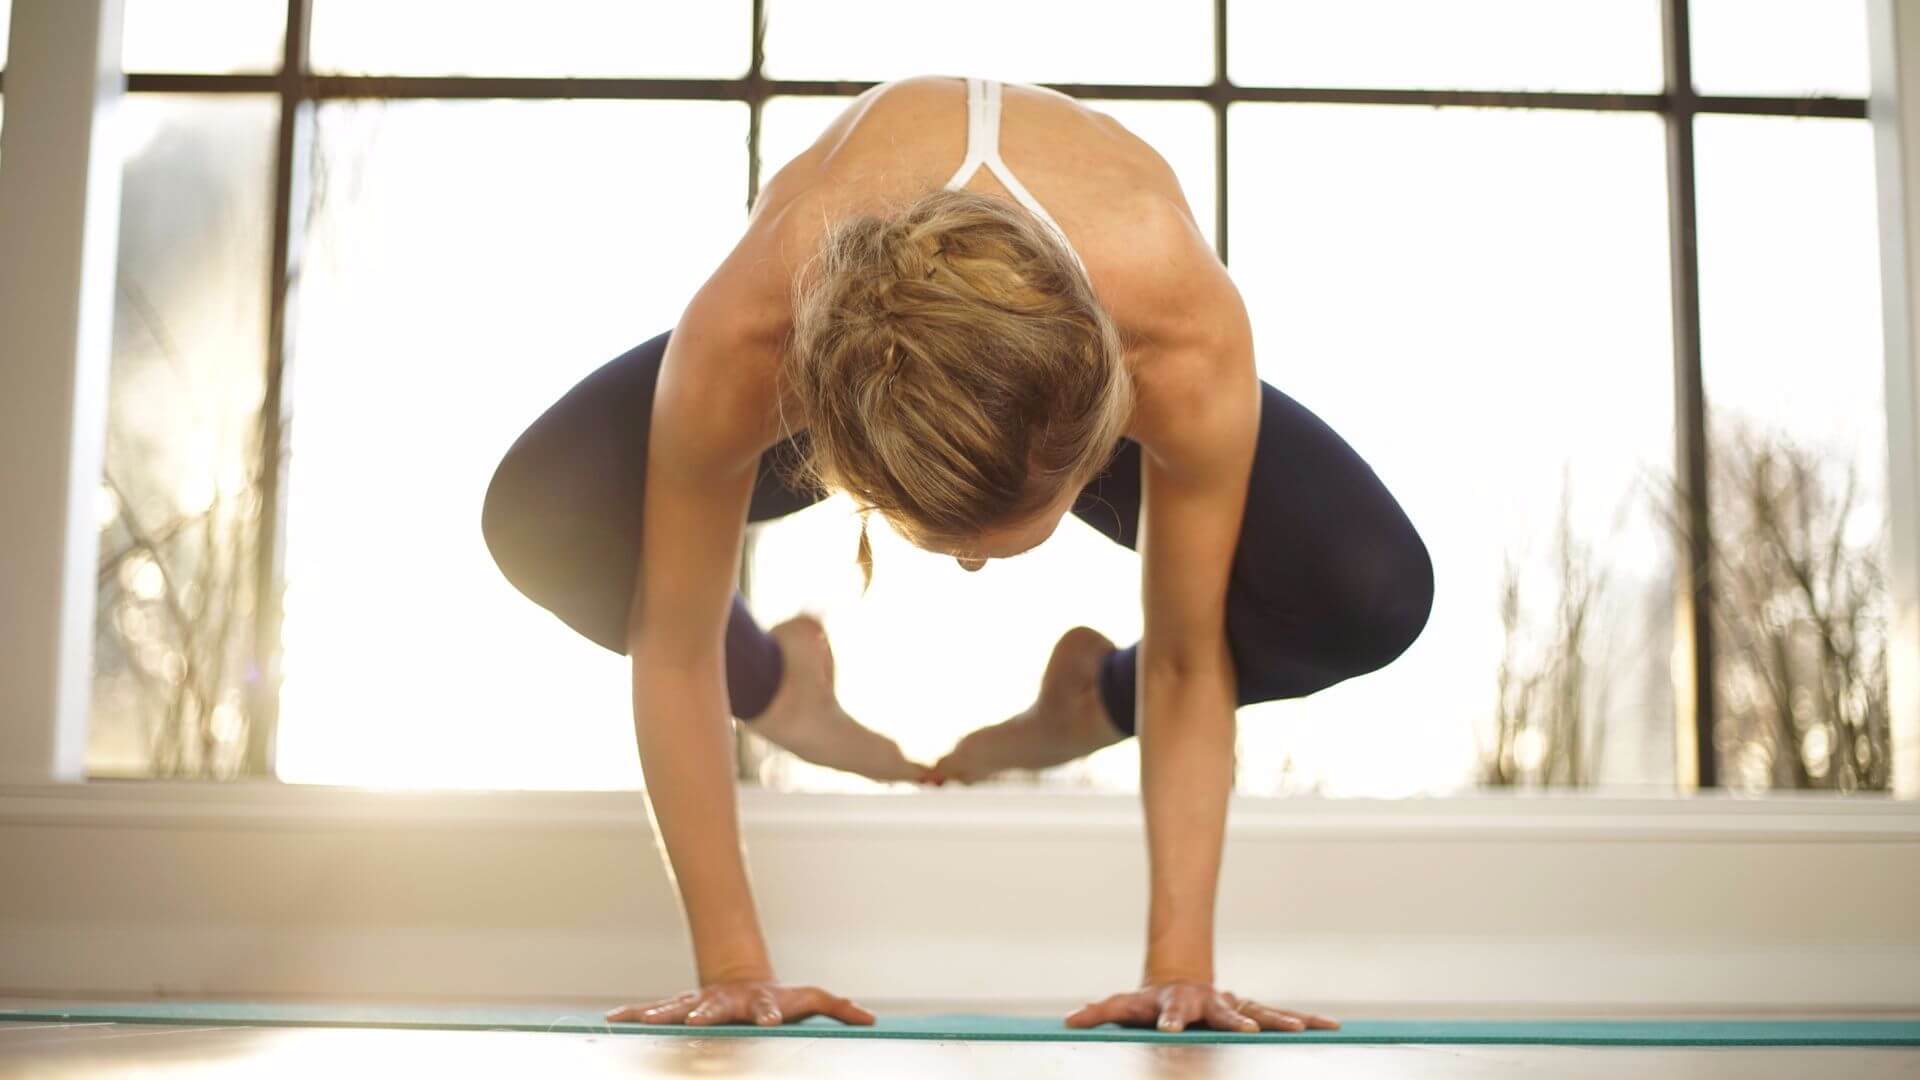
(Bakasana): Techniques, Benefits, Variations

Crow Pose Prep & Practice
1
Beginning in Squat (Malasana) at center of mat. Bring hands forward onto mat, heels lift, feet on tiptoes. Feet may be parallel or toes turned out slightly, knees wider than hips.
2
Spread fingers and press down through knuckles as you begin to bend the elbows enough to create a shelf for your knees. Elbows hug in toward midline, low abs firm in toward spine, back rounds and tailbone lengthens toward heels.
3
Begin to lean forward, coming up high onto tiptoes, knees come onto backs of upper arms, and toes lift off the ground, one foot at a time.
4
Thighs and arms hug toward midline, abdominals are deeply engaged. Head is neutral, gaze toward mat, jaw relaxed. Breath is steady.
5
To come out of the pose, come back to Squat (Malasana) and rest in Hero (Virasana) or Child’s Pose (Balasna).
Variations/Modifications
- Toes remain on mat
- Toes on block
- Forehead on block
Physical, Mental and Emotional Benefits
- Strengthens the core
- Develops arm and shoulder strength
- Promotes digestion
- Improves balance and concentration
- Strengthens the will and refines communication
Contraindications
- Carpal Tunnel or Wrist Injury
- Pregnancy
- High Blood Pressure
- Shoulder or Neck Injury
Thoughtful Sequencing
Mountain (Tadasana), Squat (Malasana), Crow (Bakasana), Squat (Malasana), Easy Seat (Sukhasana), Child’s Pose (Balasana).
A Few Notes
Crow pose has been confused with crane pose for most of modern yoga history. Bakasana is the Sanskrit term for crane pose, whereas kakasana is the term for crow pose. Because of the super common mistake that has yoga teachers and students alike thinking that bakasana is crow pose, I’ve chosen to use that term in this post for accessibility.
To safely get into crow pose, it’s important to have the arm and shoulder strength to hold and balance your body weight. Although it may seem like the posture requires a lot of upper body strength since it’s an arm balance, the truth is that it mostly requires core strength in the abdominal muscles. Your core muscles are what will hold your body tightly in place as you squeeze your inner thighs together.
Advanced practitioners will be able to be in this pose with straight arms, though that certainly isn’t required.
For the rest of us, it is recommended to keep bent elbows and to maintain the upper body over the wrists, elbows, and shoulders.
There are a few crow pose variations that can help make this yoga asana more accessible. For those worried about falling forward, you can place a pillow or blanket in from of you to soften the fall. If you can’t lift your feet off of the ground, then you can opt to place a yoga block beneath your feet to help you become more accustomed to the feeling of having your body weight over your arms and wrists. If you can’t quite balance in crow pose yet, then I suggest lifting one foot off of the ground at a time, heel first.
If you find yourself losing balance easily while in this posture, then pull your left inner thigh in toward your right inner thigh and rotate the inner knee upward. With bent elbows, pull your shoulder blades toward one another, while making space for your upper body between your outer arms. Ensure that your triceps are facing backward and upward, as if being pulled by your shoulder blades. Engage your core muscles and see if you can lift your hips upward.
To prepare for this posture, focus on strengthening your abdominal muscles and inner thighs. Plank pose and boat pose will be helpful in building the upper body strength and core strength required for this pose.
Crow pose is a great arm balance that can help prepare you for other advanced yoga postures, like tripod headstand and, ultimately, handstand.
Some poses to help you prepare for this advanced asana are:
- Cat Pose (Marjaryasana)
- Yogi Squat – Garland Pose (Malasana)
- Warrior III (Virabhadrasana III)
- Chair Pose (Utkatasana)
- Four-Limbed Staff Pose (Chaturanga Dandasana)
- Low Crescent Lunge (Anjaneyasana)
- Wide-Legged Forward Fold (Prasaritha Padottanasana)
Want more yoga pose tutorials? See more in my Yoga Pose Directory.
Learn how to do 11 of the most popular yoga poses correctly. Free video + PDF download.


